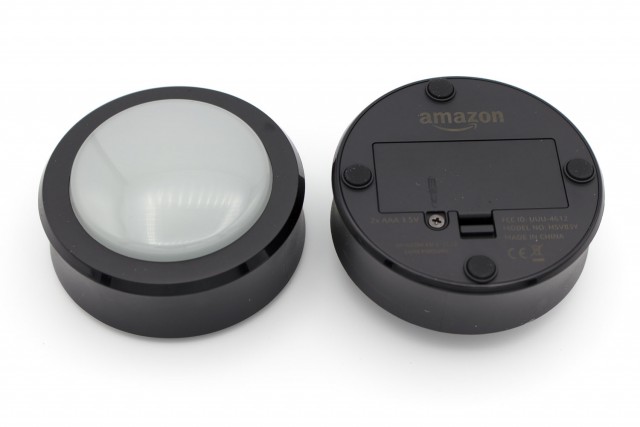
Amazon recently released the Echo Button, a Bluetooth Low Energy device designed for use with Echo devices (which I don’t own). Although it uses Bluetooth instead of Wi-Fi, I thought it might be a better device to repurpose than the Dash Button, due to its larger size and easily replaceable battery. Thus, I bought one to take apart.
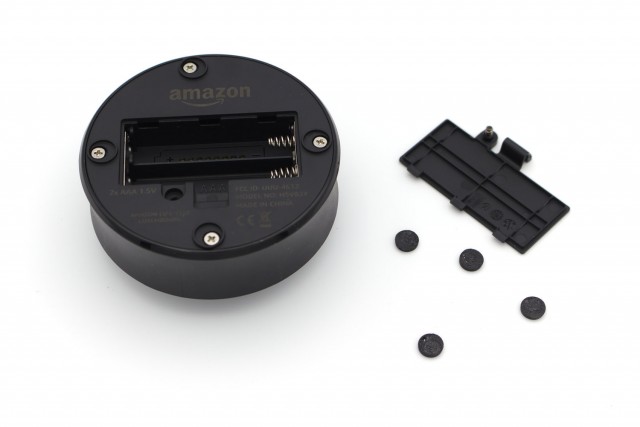
Amazon seemed really worried about the batteries falling out, since the battery door is held shut with both a plastic tab and one Phillips #1 screw. Underneath one of the two AAA batteries is a row of exposed test points. Four other Phillips #1 screws are hidden beneath the device’s rubber feet; removing these allows the device to be opened.1
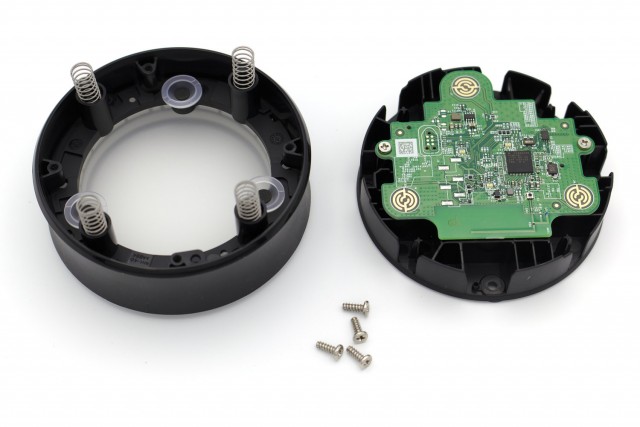
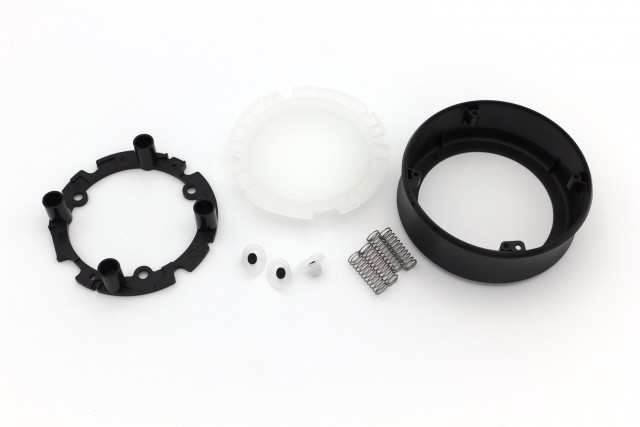
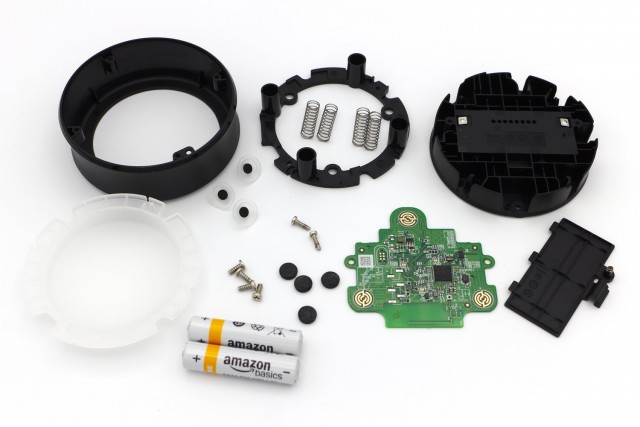
Once opened, there are two parts—a top half with the large button, and a bottom half with the PCB and batteries.
The top half consists of three plastic parts, three button contacts, and four springs.
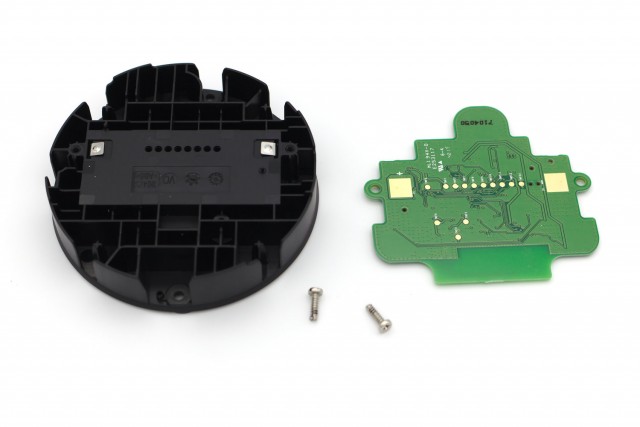
The bottom half consists of one plastic piece, with the battery compartment, and the PCB, secured with two more Phillips screws.
The device can be easily disassembled and reassembled with standard tools and without damaging it.
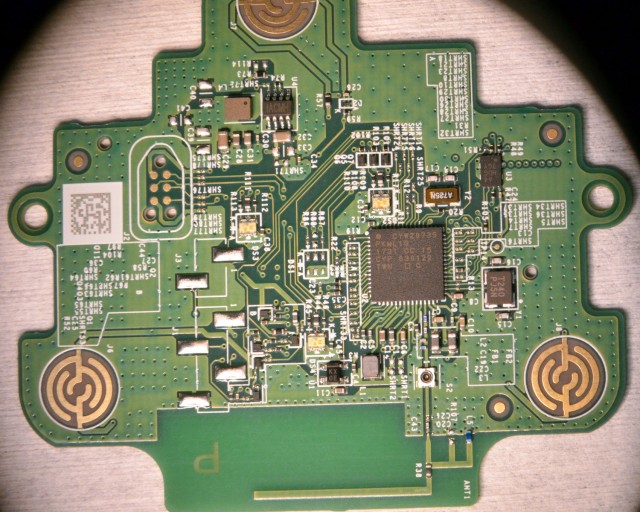
The PCB is fairly spartan, consisting of a combined microcontroller / Bluetooth Low Energy SoC, three RGB LEDs,2 a trace antenna, and supporting components. For easy hackability, there’s a Tag-Connect SWD footprint, as well as a U.FL antenna connector and numerous cuttable traces / solder jumpers. The SoC is a Cypress CYW20735 “single-chip Bluetooth transceiver for wireless input devices.” There appear to be freely available development tools for it.
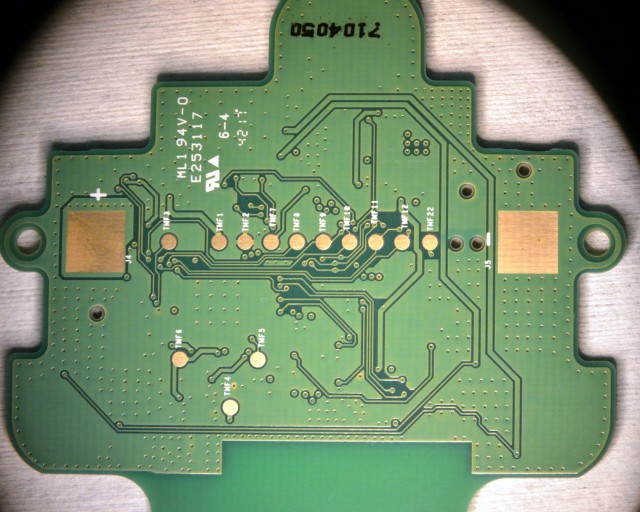
The bottom of the PCB includes a set of test points, some of which are accessible from within the battery compartment. In particular, the SWD header is accessible via these test points with the following mapping:
 TMF2: SWDIO
 TMF9: SWCLK
TMF10: GND
TMF11: RESET
TMF12: VCC
TMF22: SWO
As far as software goes, the device broadcasts as a Bluetooth Low Energy gamepad with ID EchoBtn2V8.3 I was able to successfully pair it to a computer, but I have not yet tried to use it as an input device. I have also not yet tried to connect a debugger to the SoC.
Hi,
How did you interface with the buttons using your PC?
I have tried scanning for them with iOS’s LightBlue, but I can’t seem to detect them…
Sam
I connected using Linux (BlueZ 4.101), after placing the button in pairing mode by pressing it until it starts glowing orange. Here’s what
hcitoolknows about the button:$ sudo hcitool info xx:xx:xx:xx:xx:xx Requesting information ... BD Address: xx:xx:xx:xx:xx:xx Device Name: EchoBtn2V8 LMP Version: (0x8) LMP Subversion: 0x4118 Manufacturer: not assigned (305) Features page 0: 0xbf 0x06 0x46 0x78 0x58 0x1e 0x5b 0x87 <3-slot packets> <5-slot packets> <encryption> <slot offset> <timing accuracy> <role switch> <sniff mode> <RSSI> <channel quality> <paging scheme> <power control> <enhanced iscan> <interlaced iscan> <interlaced pscan> <inquiry with RSSI> <AFH cap. slave> <AFH class. slave> <LE support> <sniff subrating> <pause encryption> <AFH cap. master> <AFH class. master> <extended inquiry> <LE and BR/EDR> <simple pairing> <encapsulated PDU> <non-flush flag> <LSTO> <inquiry TX power> <EPC> <extended features> Features page 1: 0x0f 0x00 0x00 0x00 0x00 0x00 0x00 0x00 Features page 2: 0x40 0x18 0x09 0x00 0x14 0x12 0x09 0x00Sorry about posting on such an old post; hopefully you’ll see it.
Did you ever make any progress in repurposing these?
I haven’t really tried.
I know this is a very old post, but I just wanted to check and see where the button itself is making contact? I wanted to remove the button and repurpose this with a reed-switch by my front door to trigger the lights on arrival.
The three large roundish exposed copper structures toward the edge of the top of the PCB are the contact areas; pressing the button shorts the traces in these structures together. I suspect shorting one of these structures is enough to trigger the button, but I’m not sure on this point.