Automatic Camera Clock Synchronization under Linux

The one feature I really wish my DSLR had was geotagging. Since my camera lacks this feature, I need to record a GPS track with an external device from which positions can be extracted based on timestamps for geotagging. This requires the camera’s clock to be set accurately, which I want anyway, but doing so manually in the camera’s menu is a bit of a pain. In the past I’ve only recorded GPS tracks for geotagging sporadically, as it required carrying around a dedicated GPS receiver. However, I finally bought a smartphone a few months ago, so I now always carry a device that’s capable of recording GPS tracks.1 This caused me to revisit the clock synchronization problem.

Under Linux, gPhoto2 supports synchronizing the camera’s internal clock with the computer’s clock for many cameras, including mine, a Canon EOS Rebel T2i. As long as one’s computer is configured to use NTP, this results in quite accurate timestamps on photos. In my case, under Linux Mint 17, running this synchronization manually involves plugging in the camera, unmounting the camera after it gets automounted so gPhoto2 can access it, and then running the appropriate gPhoto2 command to synchronize the camera’s clock. To automate this process, one just needs to add a udev rule to run the clock synchronization command automatically, before the camera is mounted. I wrote such a rule. Since the rule responsible for mounting the camera is in 40-libgphoto2-6.rules, the new rule that synchronizes the camera’s clock should be saved as /etc/udev/rules.d/39-sync-camera-times.rules so that it runs right before the camera is automounted. The contents of this file are as follows:

ACTION!="add", GOTO="sync_camera_time_rules_end"
SUBSYSTEM!="usb", GOTO="sync_camera_time_rules_end"
ENV{ID_USB_INTERFACES}=="", IMPORT{builtin}="usb_id"
ENV{ID_USB_INTERFACES}=="*:060101:*", RUN+="/usr/bin/gphoto2 --set-config syncdatetime=1"

LABEL="sync_camera_time_rules_end"

Now the camera’s internal clock will be synchronized with the computer’s clock any time the camera is plugged in. Note that this sets the camera’s clock to UTC, which makes the most sense anyway as the EXIF time data doesn’t include a time zone.2 I’ve tested the rule with a Canon EOS Rebel T2i under Linux Mint 17, but it should also work for any other camera for which gPhoto2 supports clock synchronization and under Ubuntu 14.04 and similar Linux distros. Obviously, gPhoto2 needs to be installed.

Edit (2017-03-11): The above no longer works on Linux Mint 18 / Ubuntu 16.04. The following contents of /etc/udev/rules.d/39-sync-camera-times.rules should be used instead:

ACTION!="add", GOTO="sync_camera_time_rules_end"
SUBSYSTEM!="usb", GOTO="sync_camera_time_rules_end"
ENV{ID_USB_INTERFACES}=="", IMPORT{builtin}="usb_id"
ENV{ID_USB_INTERFACES}=="*:060101:*", ENV{TZ}="Etc/UTC", RUN+="/usr/bin/gphoto2 --set-config datetime=now"

LABEL="sync_camera_time_rules_end"

For some reason, gPhoto now insists on doing a time zone conversion, which is why the time zone has to be explicitly set to UTC.


  1. Transferring the recorded tracks to a computer is easier too. 

  2. In my opinion, this is a significant improvement over the automatic clock synchronization in Canon’s EOS Utility for Windows, which insists on syncing the camera’s clock to local time. 

Posted in | Tagged , , , , , , , , | Leave a comment

Decoding a Midea Air Conditioner Remote

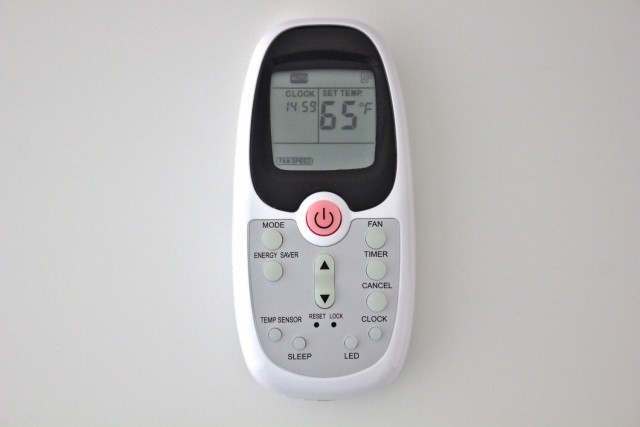
Last month, I purchased a 6000 BTU Midea window air conditioner (branded Arctic King WWK+06CR5) and thought it would be convenient if I could control it remotely. Doing so would involve decoding the remote’s IR signals; for this, I used a USB Infrared Toy and the PyIrToy Python library. Control signals for other Midea air conditioners have previously been decoded, providing a starting point. Although the signals transmitted by my air conditioner’s R09B/BGCE remote are similar to these previous remotes, they are also sufficiently different such that the actual data transmitted shares little in common. The signal is transmitted on a 38 kHz carrier, with a time base, T, of 21 carrier cycles, approximately 1.1 ms. Each bit consists of the IR transmitter off for 1T followed by it turned on for either 1T for 0 or 3T for 1. Each frame consists of a start pulse, six bytes of data, a middle pulse, and then the inverse of the six data bytes. The start pulse consists of the transmitter off for 8T and then on for 8T; the middle pulse consists of the transmitter off for 1T, on for 9.5T, off for 8T, and then on for 8T.

R09B/BGCE Remote Continue reading

Posted in | Tagged , , , , , | 11 Comments

Automated Document Creation and Typesetting with LaTeX

Creating a new document class file and then using this class is usually considered the “correct” way to typeset a form or other document generated with data in \LaTeX. However, there’s also the quick-and-dirty method of creating a regular \LaTeX document every time in a script using some sort of string concatenation and then typesetting this, which also has its merits. When a class file is used, the class describes the document look and structure; a new \LaTeX document still needs to be created each time to define the data. Not writing a class file and placing the document look and structure typesetting code directly in the generation script isn’t as clean as the class method as it mixes styling with data, but it does make some things easier. The quick-and-dirty approach doesn’t require knowing the additional \LaTeX language features needed for creating a class, using only what would use in a normal document. In particular, it is useful for automatically generating documents that change in structure based on the input data or other more complicated logic. This can obviously all be implemented as a \LaTeX class since \TeX is a Turing-complete language, but general purpose scripting languages such as Python are easier to use for this, particularly since most programmers use them much more often than they create complicated \LaTeX classes. The quick-and-dirty approach trades the class method’s cleaner design for ease of script creation. However, if the form will ever be created by hand, the class method is definitely superior.

Posted in | Tagged , , | Leave a comment

Amazon Dash Button Teardown

The Amazon Dash Button it an Internet connected button that allows ordering a single product from Amazon. Although it is not something I would ever use, I thought its guts might be interesting and bought two for a grand total of $2.10 with tax and free shipping. Others have already posted about disassembling it, so I’ll focus mostly on the electronics, since the aforementioned blog posts are missing high-resolution images of the circuit board and don’t quite get some details correct.

The first victim is the Cottonelle Dash Button. The outside of the Dash Button consists of a button, a microphone hole, a loop for tying to, and adhesive on the back. The different brands of Dash Buttons have the same model number, JK76PL, differing only in the label.

Box Continue reading

Posted in | Tagged , , , | 53 Comments

OpenStreetMap Baltimore City Buildings and Addresses Import

Two years ago, I started trying to import building footprints and addresses provided by the City of Baltimore into OpenStreetMap but was held up by red tape and eventually gave up.1 The City provides building footprints and parcel data on their open data portal; the download pages for these two datasets list the data as public domain, but the site’s terms of service is the same as the rest of City’s websites, saying the data is copyrighted. I had worked through the technical aspects of preparing and simplifying the building footprints for import and had started working on how to associate addresses from the parcel data but eventually gave up after I was unable to secure the needed licensing clarifications from the Mayor’s Office of Information Technology (MOIT).

This past fall, Elliot Plack, who then worked for Baltimore County GIS and was appointed to the Maryland Open Data Council by Governor O’Malley, got in touch with me about restarting the import, after finishing an import of similar data for the County. After meeting with Jim Garcia from MOIT, he was able to secure the permissions that we needed to proceed with the import. Additionally, he was able to get address point data, which is much superior to and easier to use than the parcel data I was originally going to extract addresses from.
Continue reading


  1. http://wiki.openstreetmap.org/wiki/Baltimore_Buildings_Import 

Posted in | Tagged , , , , , | Leave a comment