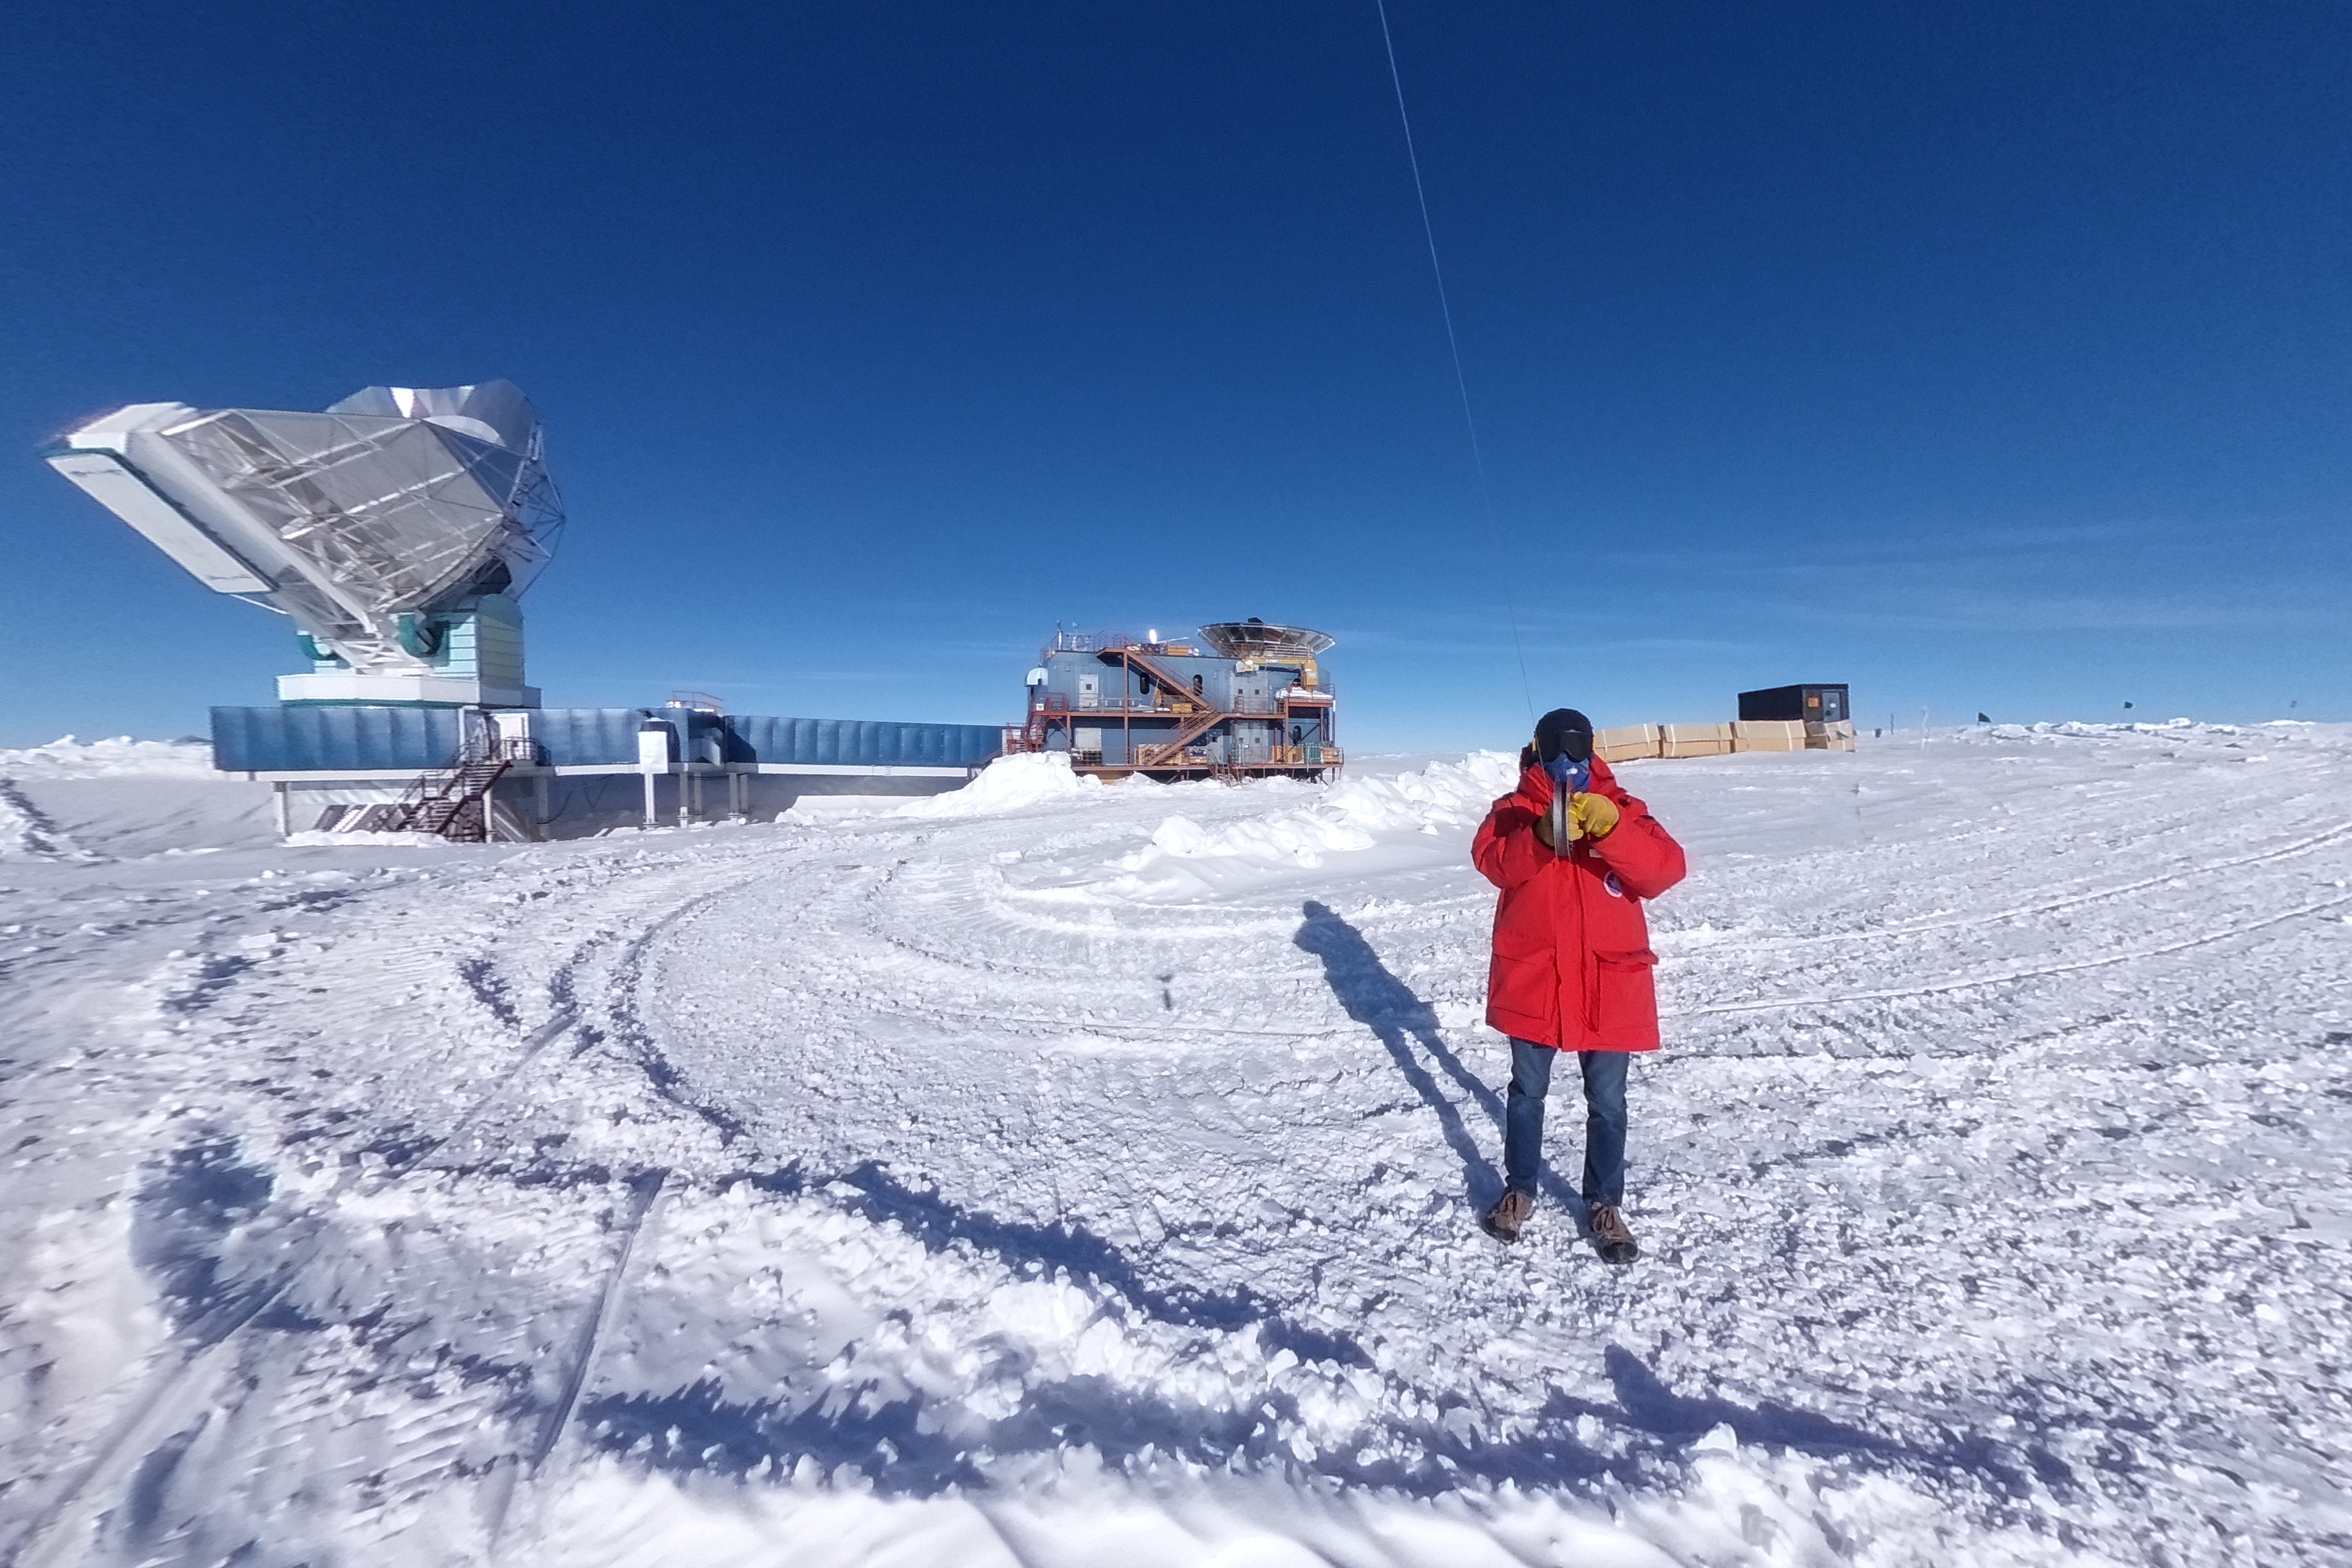
Since the U.S. Antarctic Program prohibits the use of remote-controlled aircraft, i.e., drones, how might one go about taking aerial photographs at the South Pole? The answer is kite aerial photography, which of course requires a kite. While my original plan was to buy an off-the-shelf parafoil kite, since they’re soft kites that can easily be packed in luggage. After attempting to buy an Into the Wind Parafoil 10, which I had determined would probably be a reasonable size for the camera rig I wanted to loft and was recommended in old forum posts for use in kite aerial photography, it turned out to be discontinued,1 and the proprietor of the small business that I had attempted to buy it from suggested that a rigid-frame kite such as a Rokkaku kite might be a better fit for the relatively-low winds at the Pole, since parafoil kites can collapse if there’s a lull in the wind. I had not previously considered such a kite, since the commercially-available options have spars that do not collapse to a sufficiently-short length to fit in a carry-on suitcase and because I was worried that their carbon- and fiberglass-composite spars may become too brittle in the extreme cold. Although there were other potential parafoil options, I was convinced that a rigid-frame kite could be the better option, since during days with higher wind speeds at the South Pole there’s often blowing snow and poor visibility. Thus, I set out to build such a kite with components that could survive the cold and that could collapse to <17″ to fit in my luggage.
Much of the discussions regarding and plans for building kites on the internet are contained within decades-old discussion forums and Geocities-era webpages, many of which are disappearing, although the Internet Archive has fortunately preserved many such resources, as has the Kite Plan Base. Rokkaku kites were frequently recommended for kite aerial photography,2 and I was able to find several plans on which to base my kite design, using two designs, in particular.3
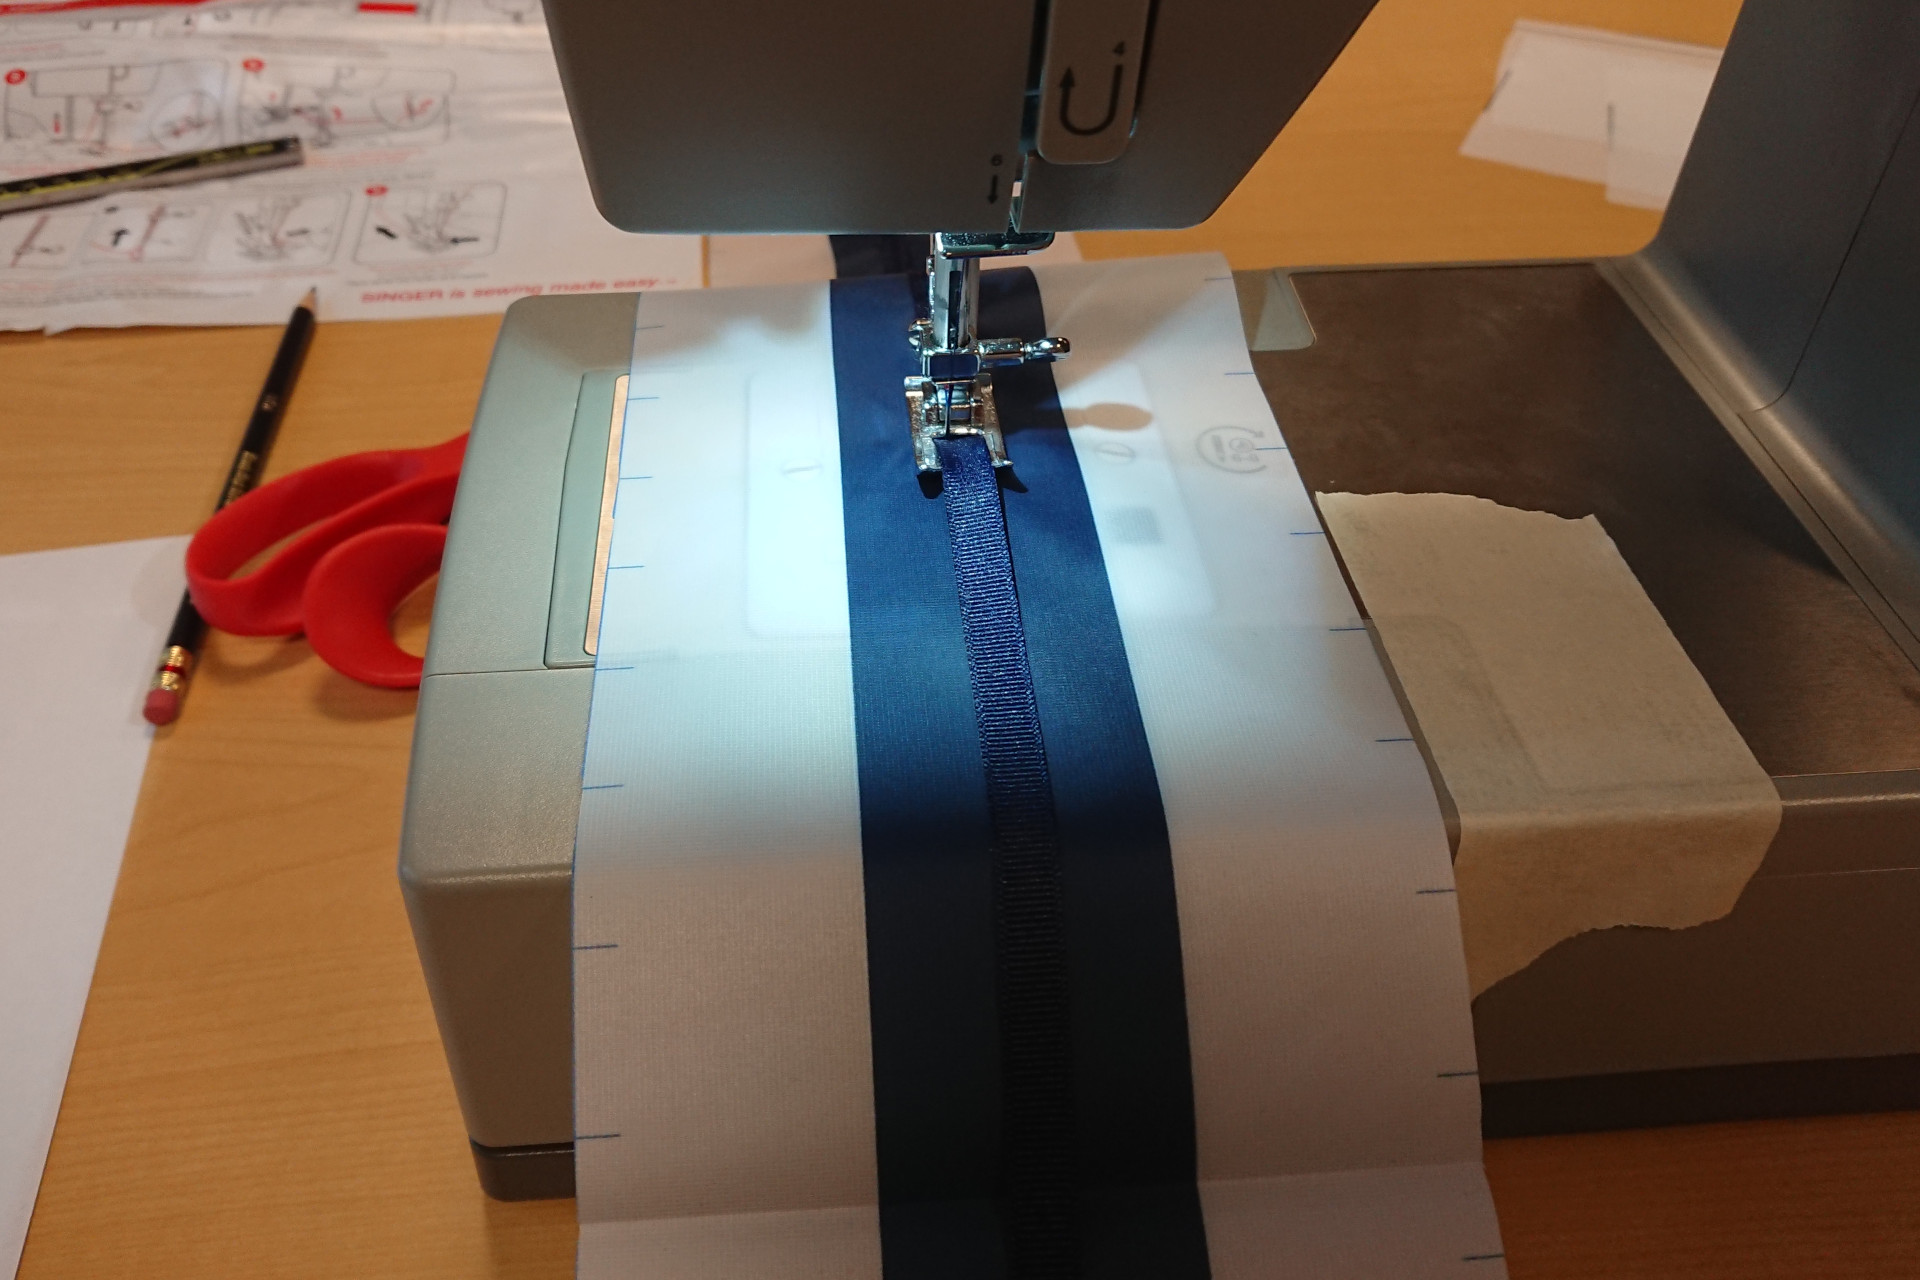
While the designs call for 3/4 oz ripstop nylon spinnaker cloth, which is sealed to make it low porosity, other fabrics with similar strength and low porosity can also be used. I ended up using a 1.1 oz silicone-coated ripstop polyester as I could get it custom printed, avoiding the need to measure and allowing for a custom design on the kite without the manual effort required for appliqué. Due to the archaic units frequently used with fabric, these two fabrics are actually of similar weight. Sail cloth is measured in “sailmaker’s ounces,” which is the weight of one “sailmaker’s yard” of fabric, which is 36″ by 28.5″; the polyester is measured in more-typical fabric ounces, so the weight of a square yard of fabric. Both quote the weight of the fabric itself prior to sealing the fabric to reduce the porosity. After coating and conversion to standard metric units, one typical variant of 3/4 oz spinnaker cloth, Fibermax 44, is 44 g/m2, while the polyester I used is 42 g/m2, or more or less the same.
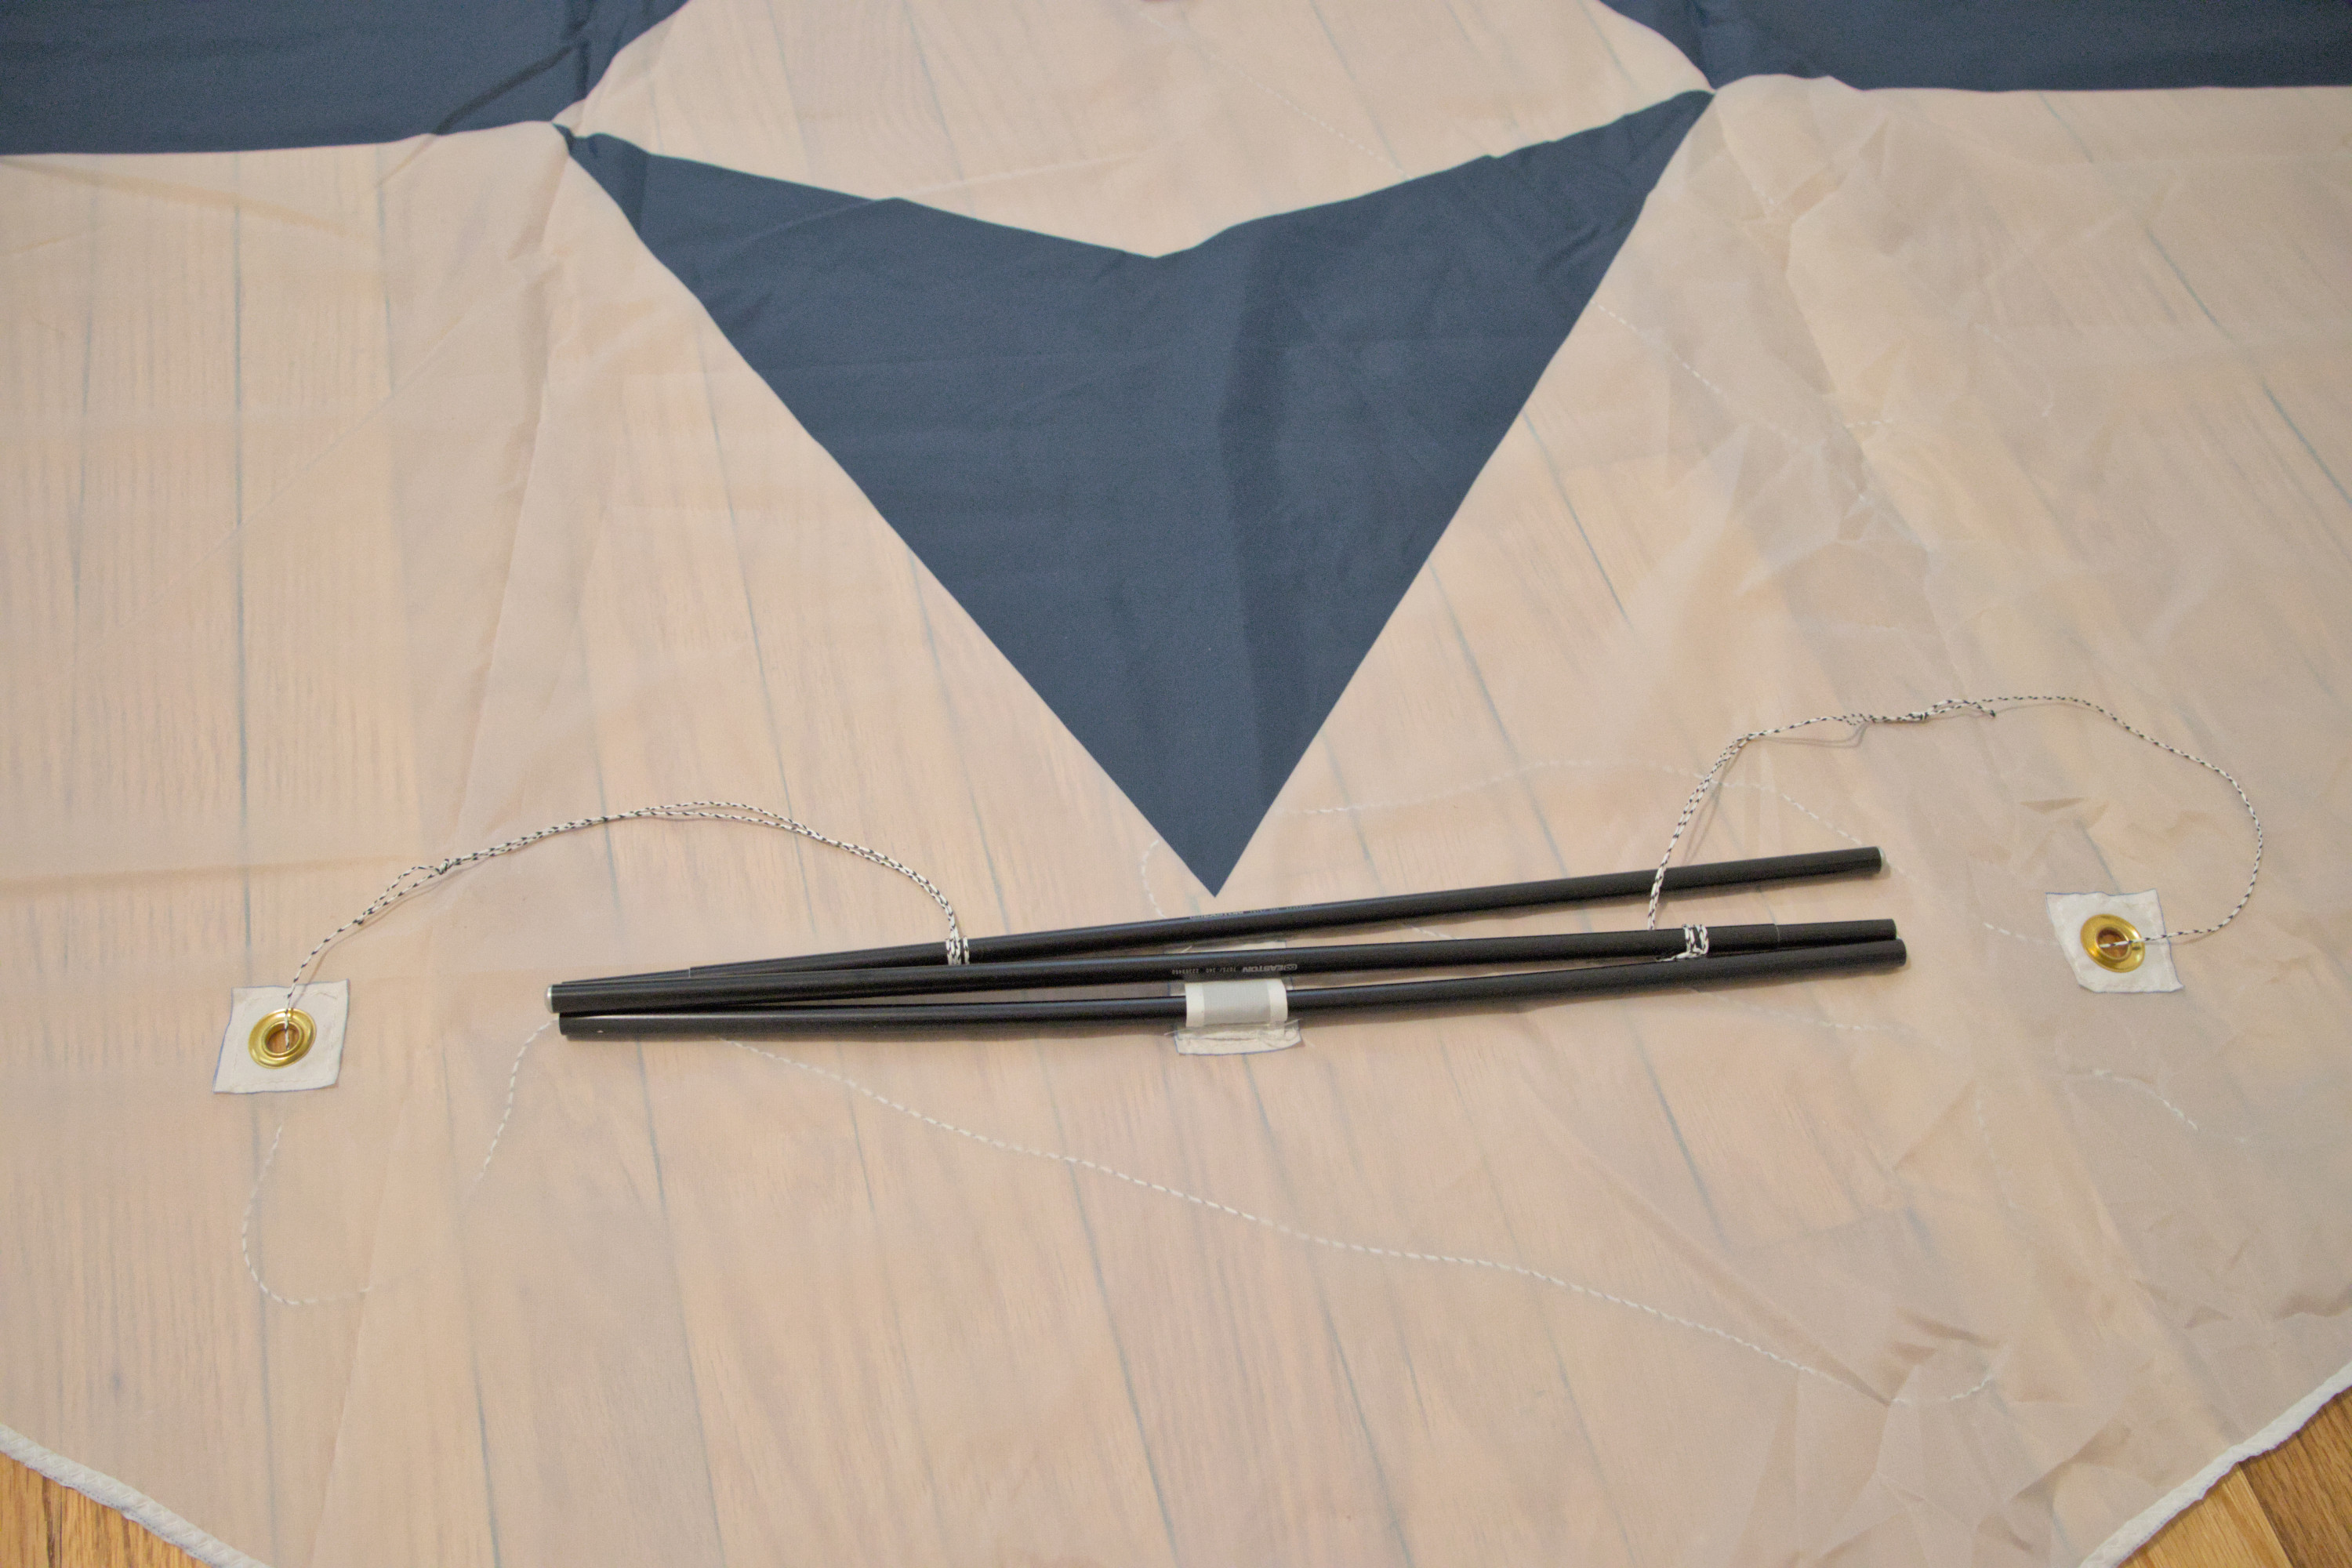
For the spars, I used Easton Expedition-series aluminum 7075 backpacking-tent poles, using stiffer 0.355″ OD (0.025″ wall thickness) tubing for the spine and lighter 0.344″ OD (0.019″ wall thickness) tubing for the spreaders. The spine consists of four 14.5″ sections of tubing, three of which contain an insert tube on one end for connecting the sections together, yielding a 58″ spar. Each of the two spreads consists of two 14.5″ sections, each with an insert tube on one end, and a 16″ section without insert tubes in the center,4 yielding two 45″ spars. As the tube sections do not come in these lengths, they were cut down to size with a pipe cutter, and sections with insert tubes were ordered with the tubes preinstalled. The spars are assembled with aluminum dome tip tie offs on the ends and connected with 3/32″ elastic shock cord, which is rated down to −40°C (equal to −40°F).
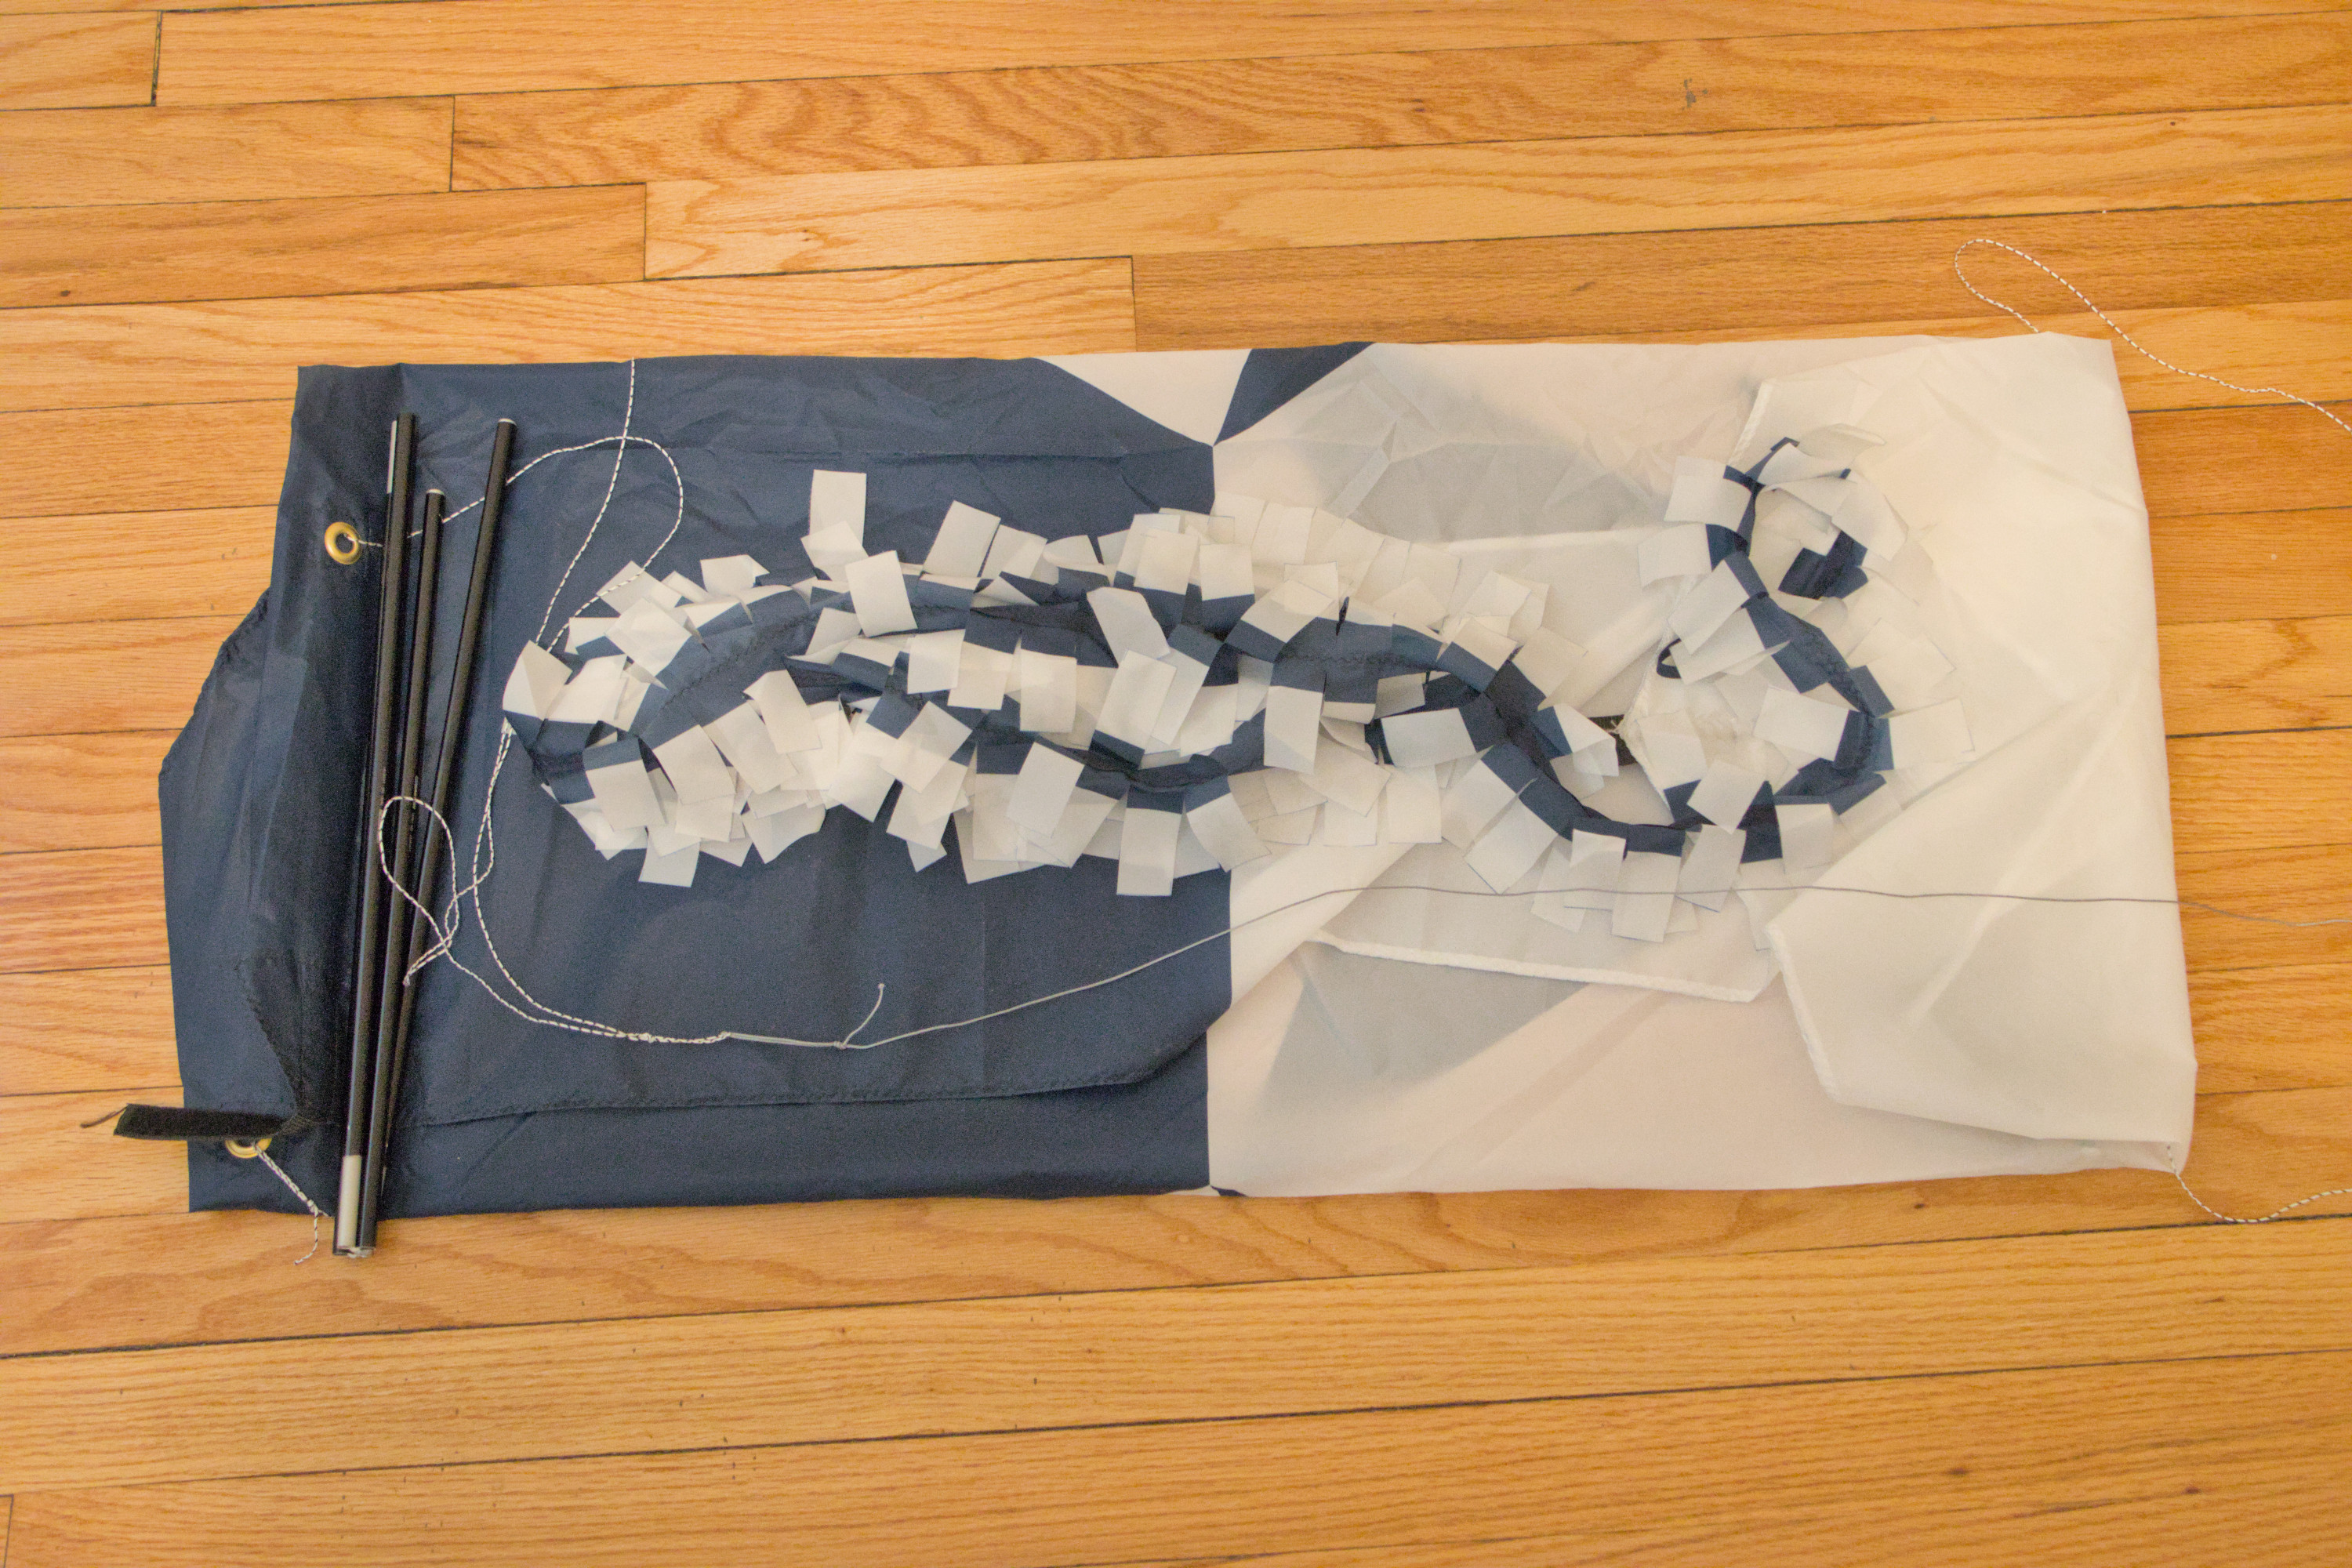
Using Inkscape, I scaled the design to fit the kite and fabric for a four-yard-long fuzzy tail onto a two-yard section of 60″-wide custom-printed ripstop polyester, including a design based on the True South flag; extra fabric was used to sew an 18″ by 4″ drawstring bag for the kite. The corners where the spars attach, the locations where the bridle passes through the kite to the spreaders, and the locations where the spreaders cross the spine were reinforced with an additional piece of the ripstop polyester sewn on, after which the kite edges were folded over twice and sewn with a zig-zag stitch.

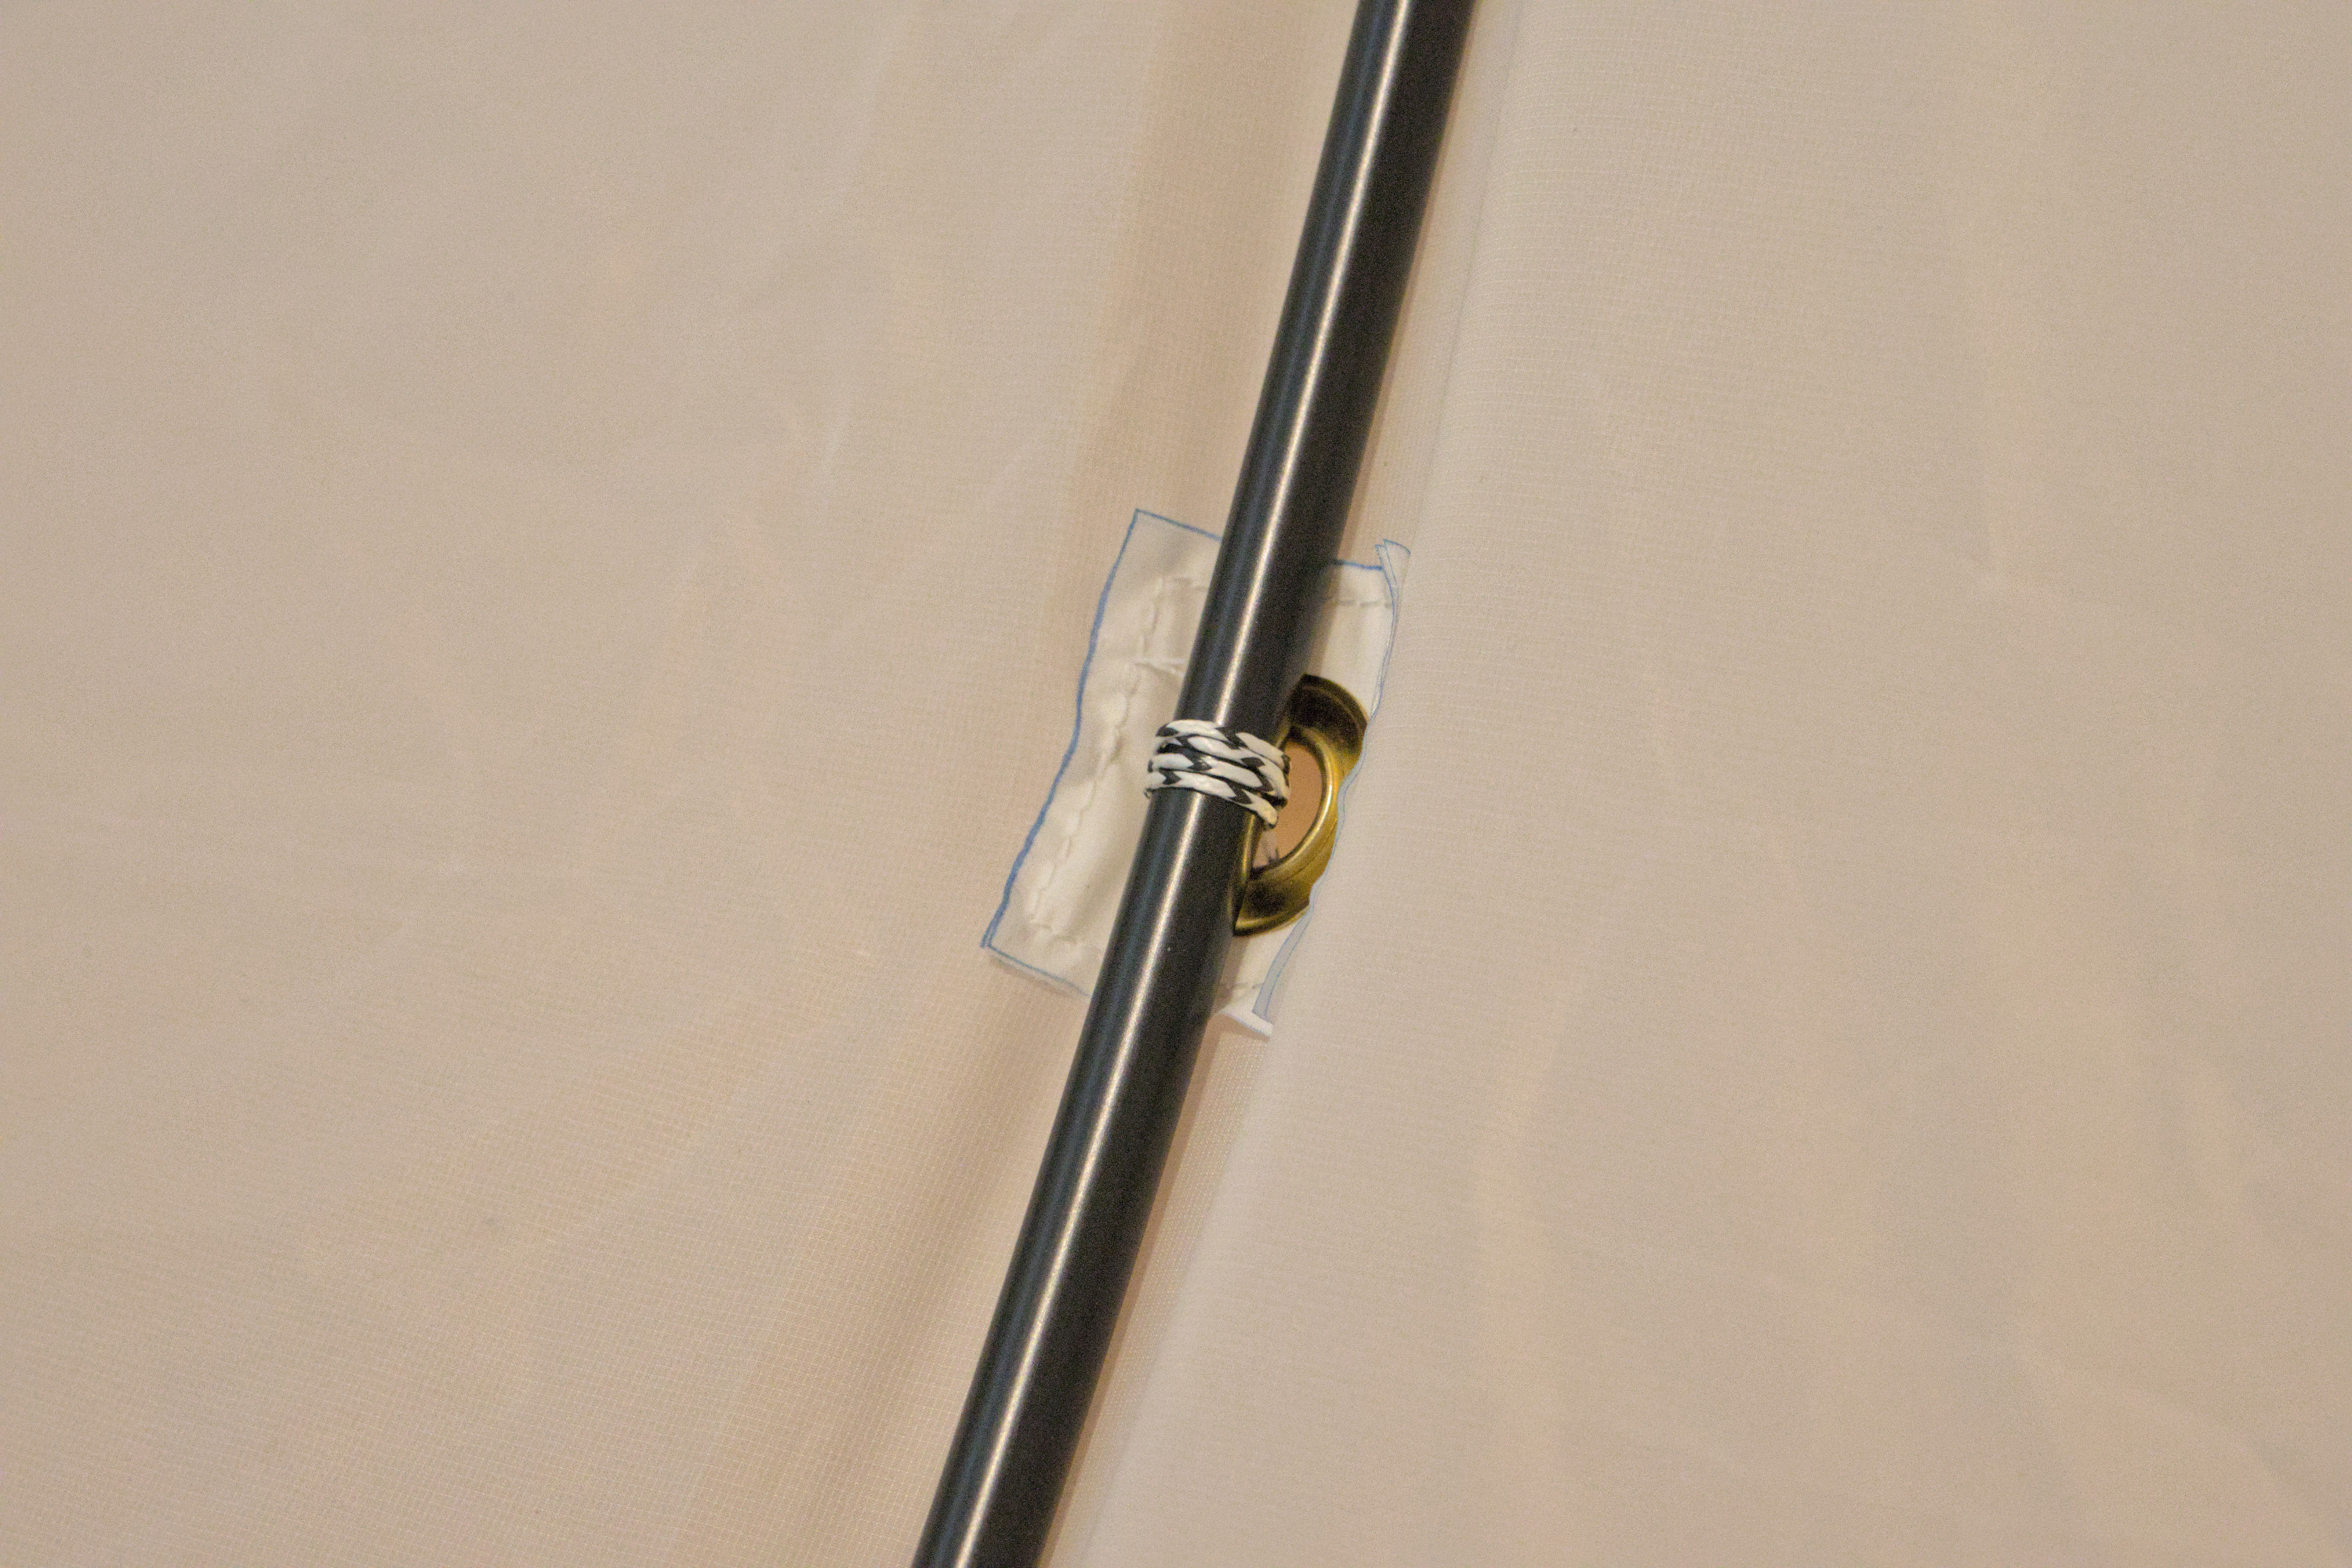
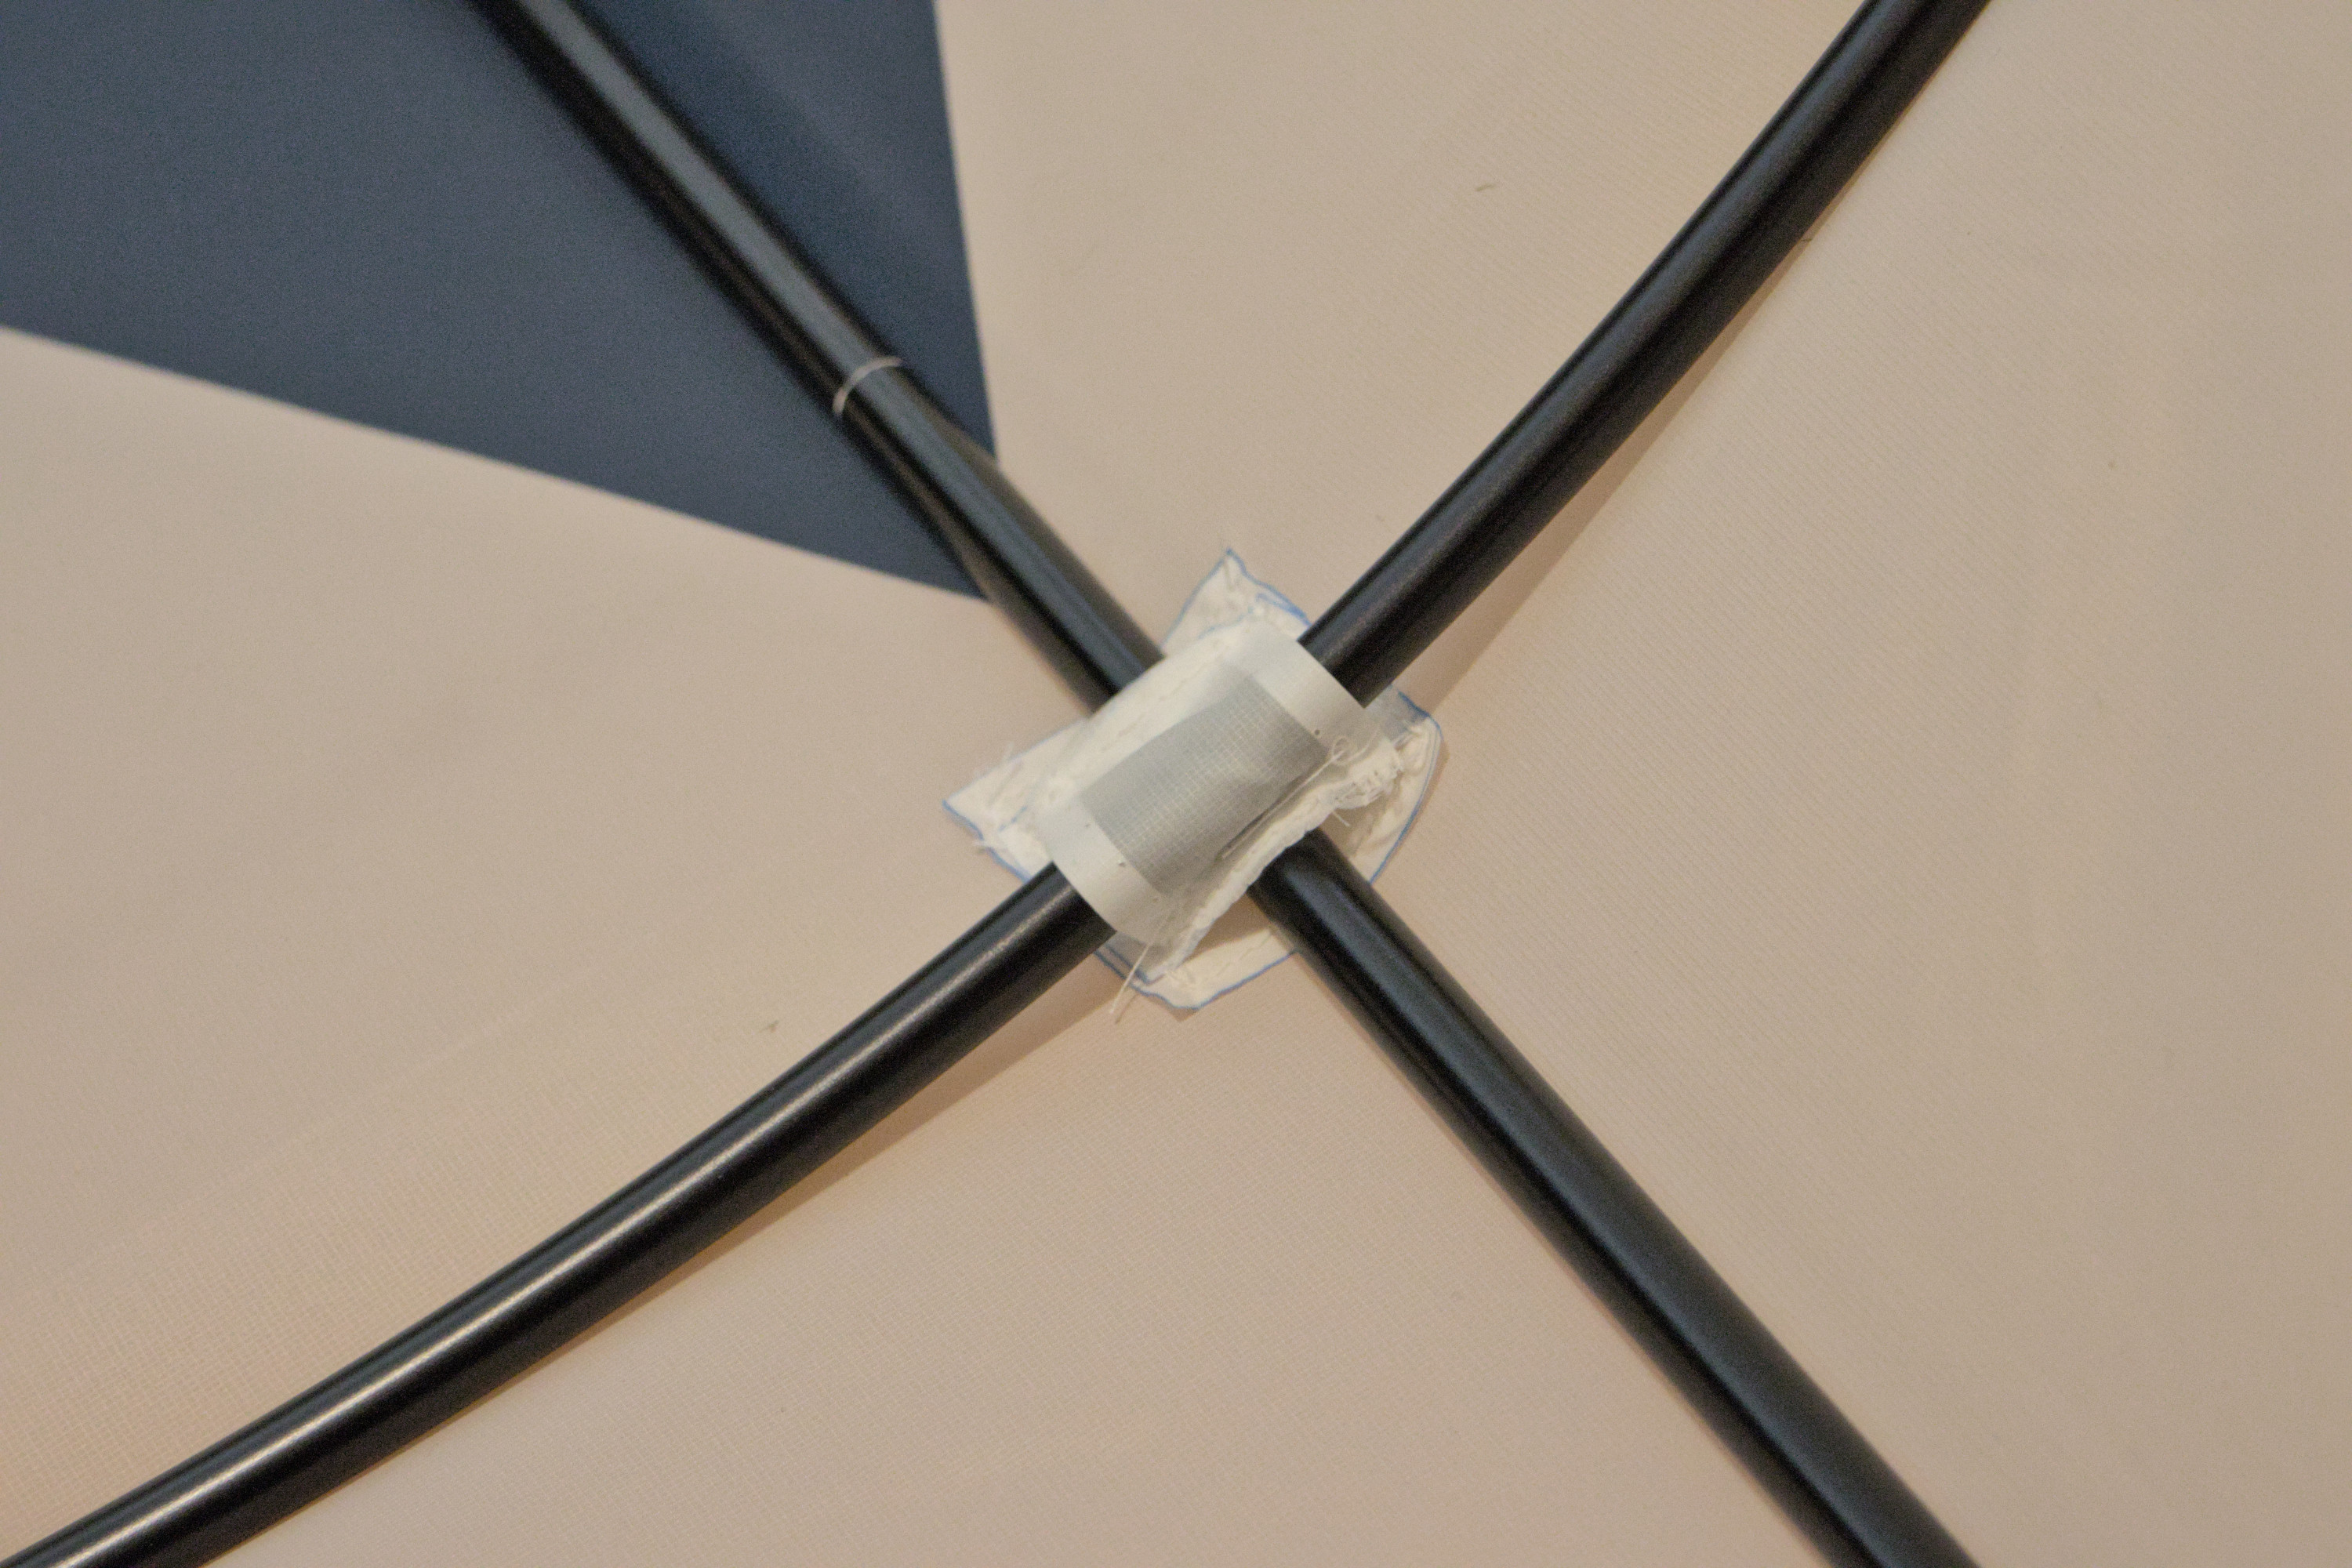
Brass grommets were installed for the bridle pass-throughs, and polyester rectangles were used to create sleeves where the spreaders cross the spine to secure the spine to the kite and the spreaders over it.5
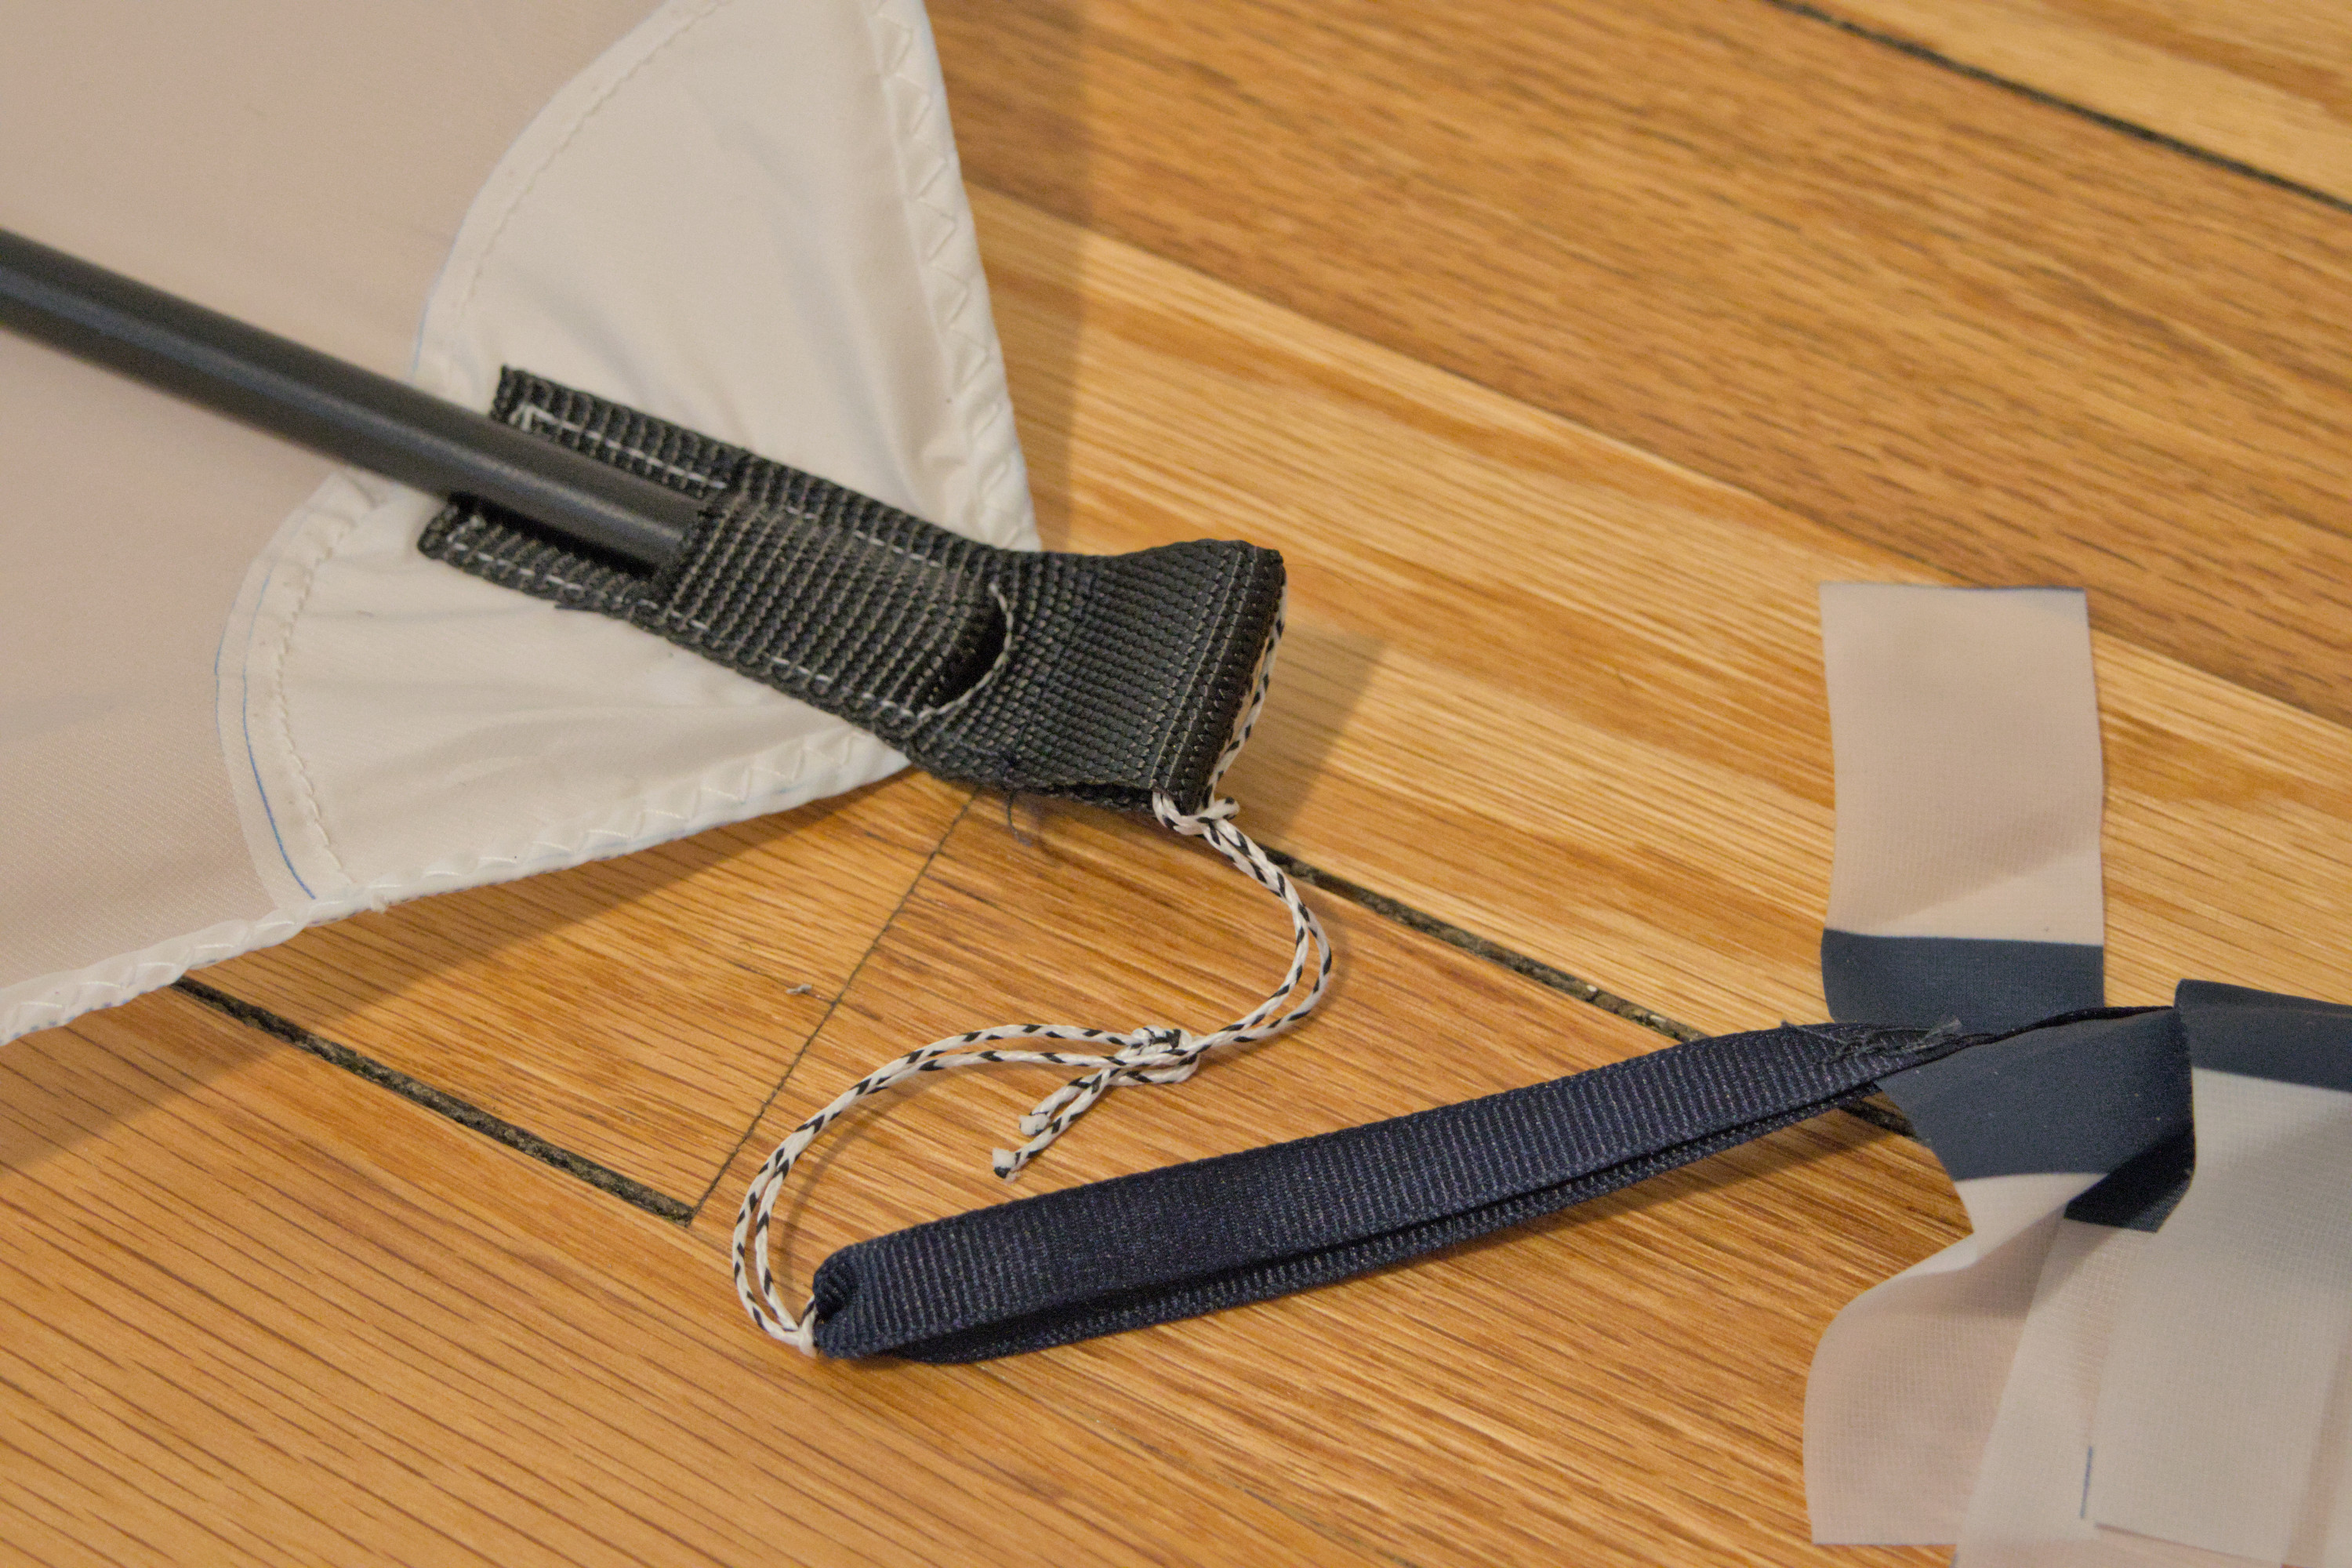
To secure the bottom of the spine, a pocket was created using a folded-over section of 1″ polyester webbing and sewn to the kite, with a loop hanging off the end of the kite for attaching a tail.
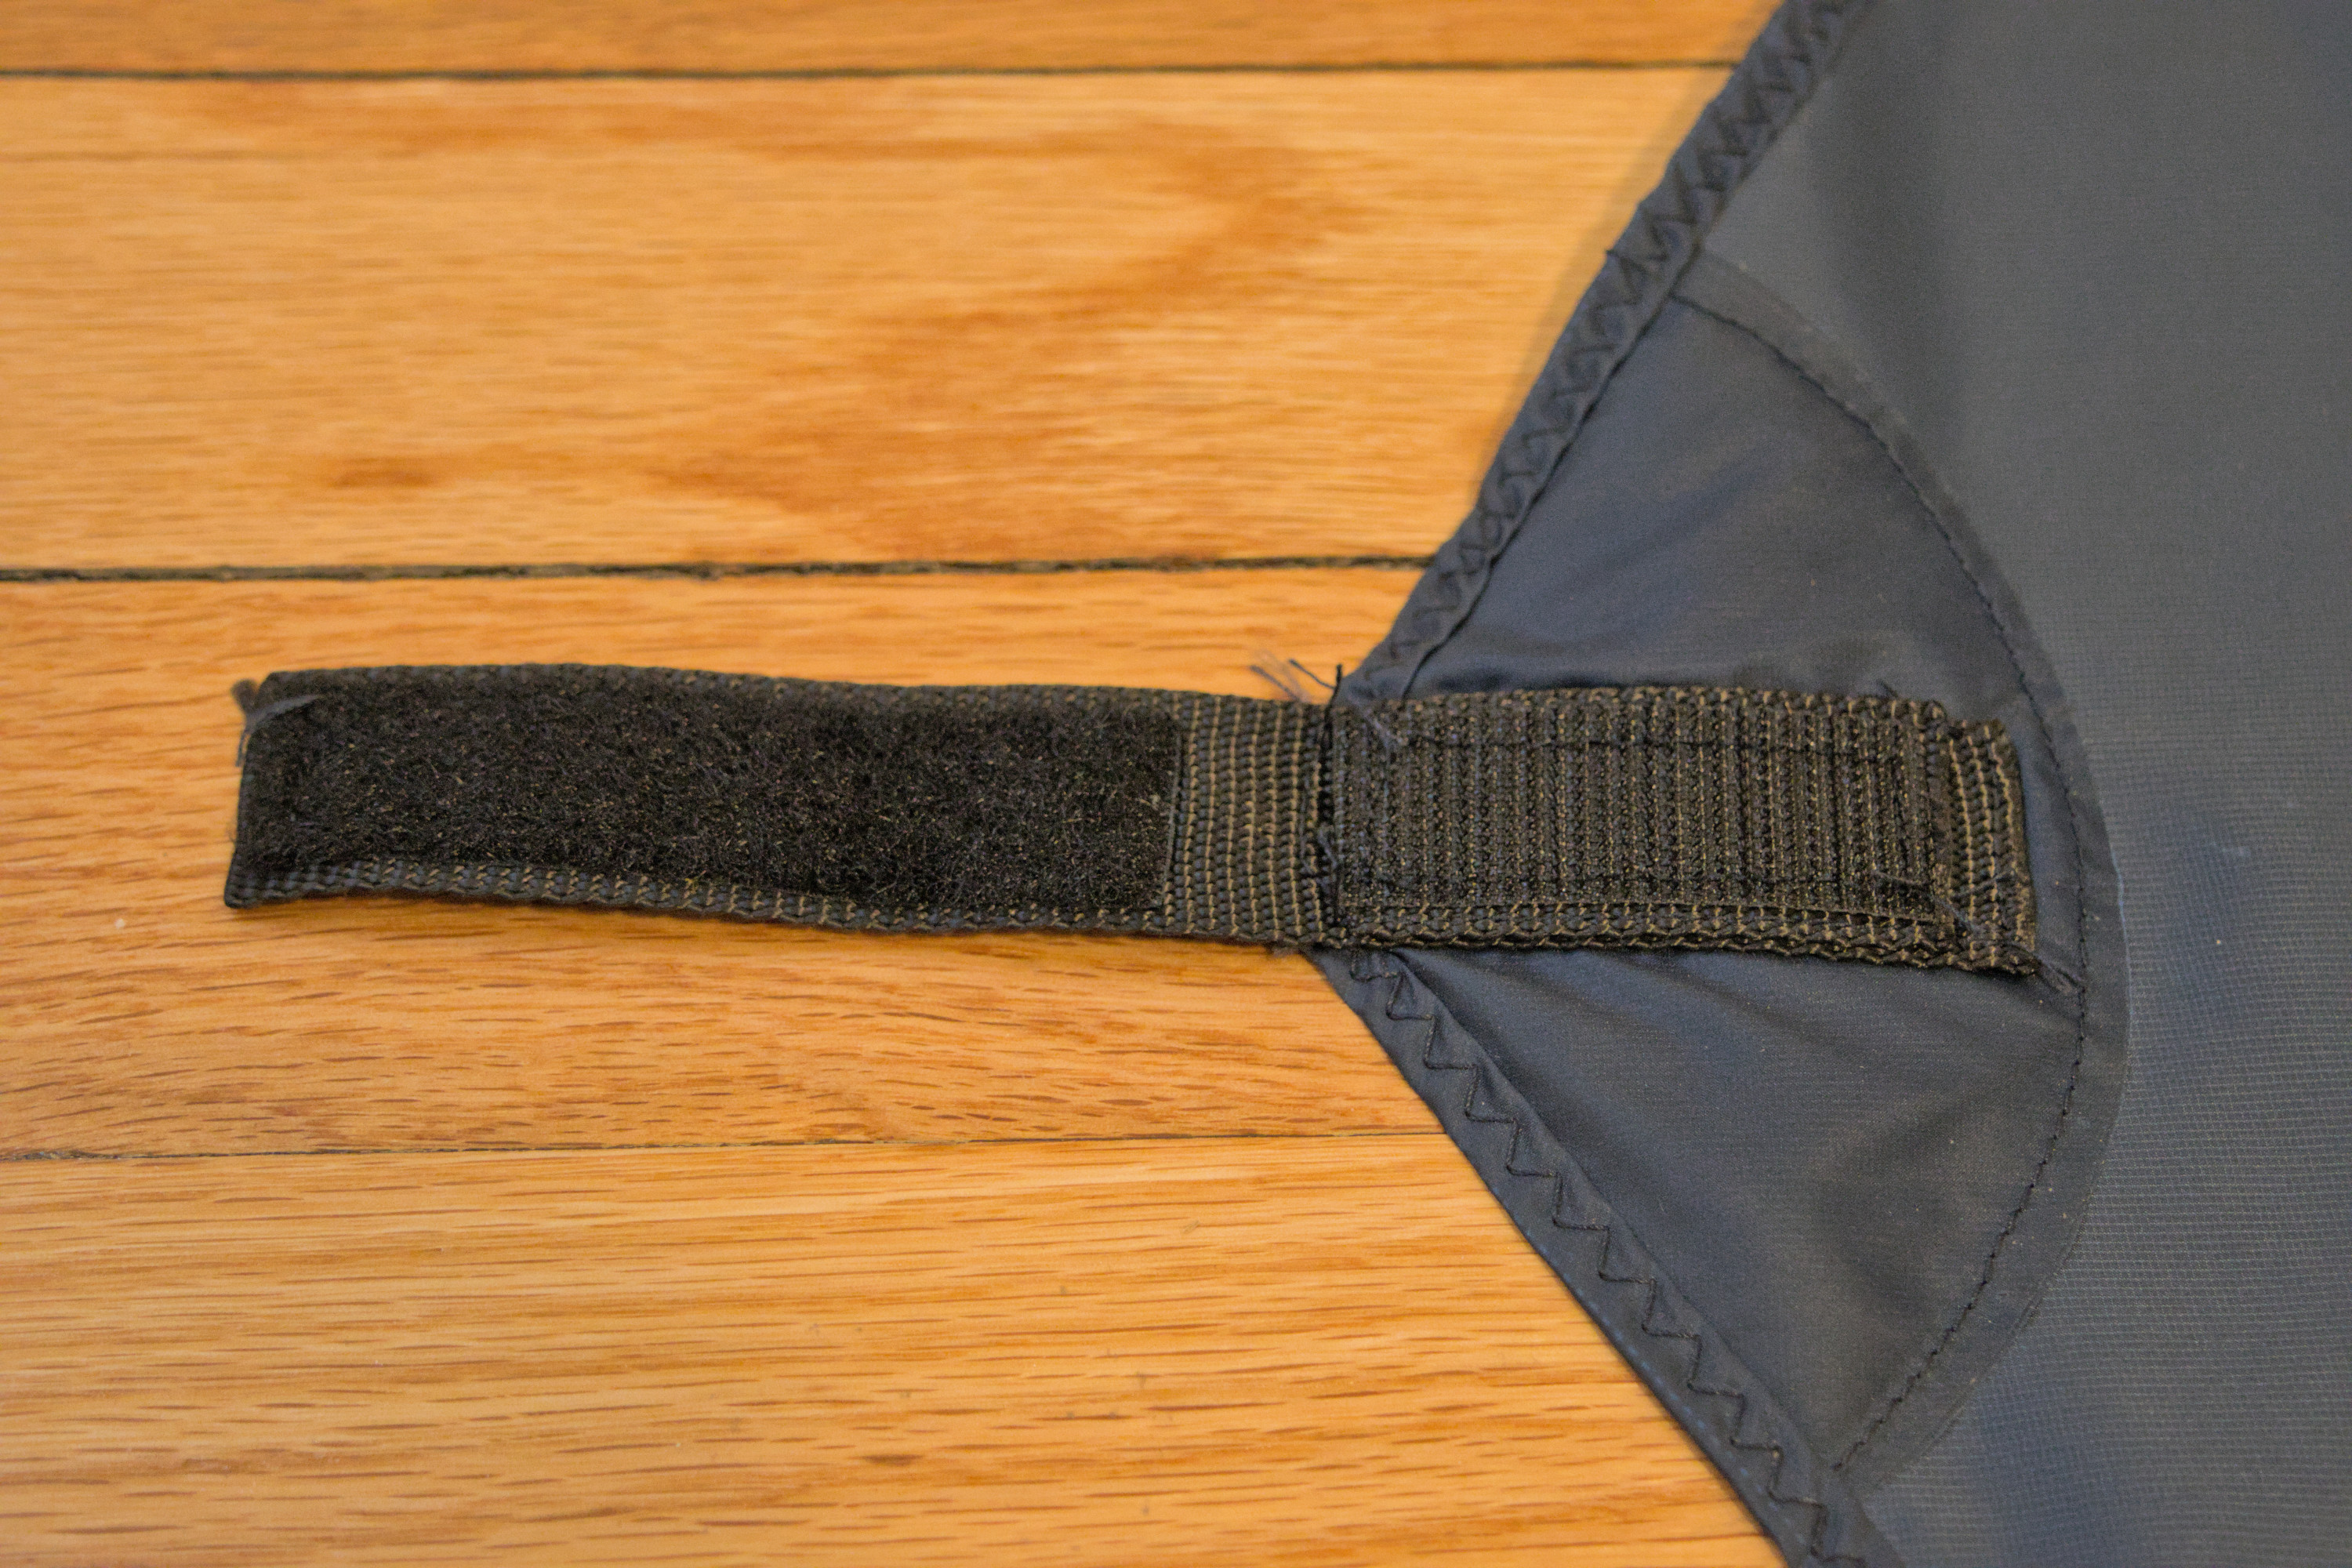
For the top of the spine, a sleeve was created by sewing the edges of two sections of webbing on top of each other, with one side of hook-and-loop fastener on top, and sewn to the kite; the bottom section extends past the top of the kite and has the other side of the hook-and-loop fastener sewn to it, allowing it to be folded over the end of the spine and pulled tight, allowing the hook-and-loop fastener to be used to tension the kite fabric along the spine, which is installed in the pocket on the bottom end of the kite and slipped through the sleeves where spreaders cross and the sleeve on the top.
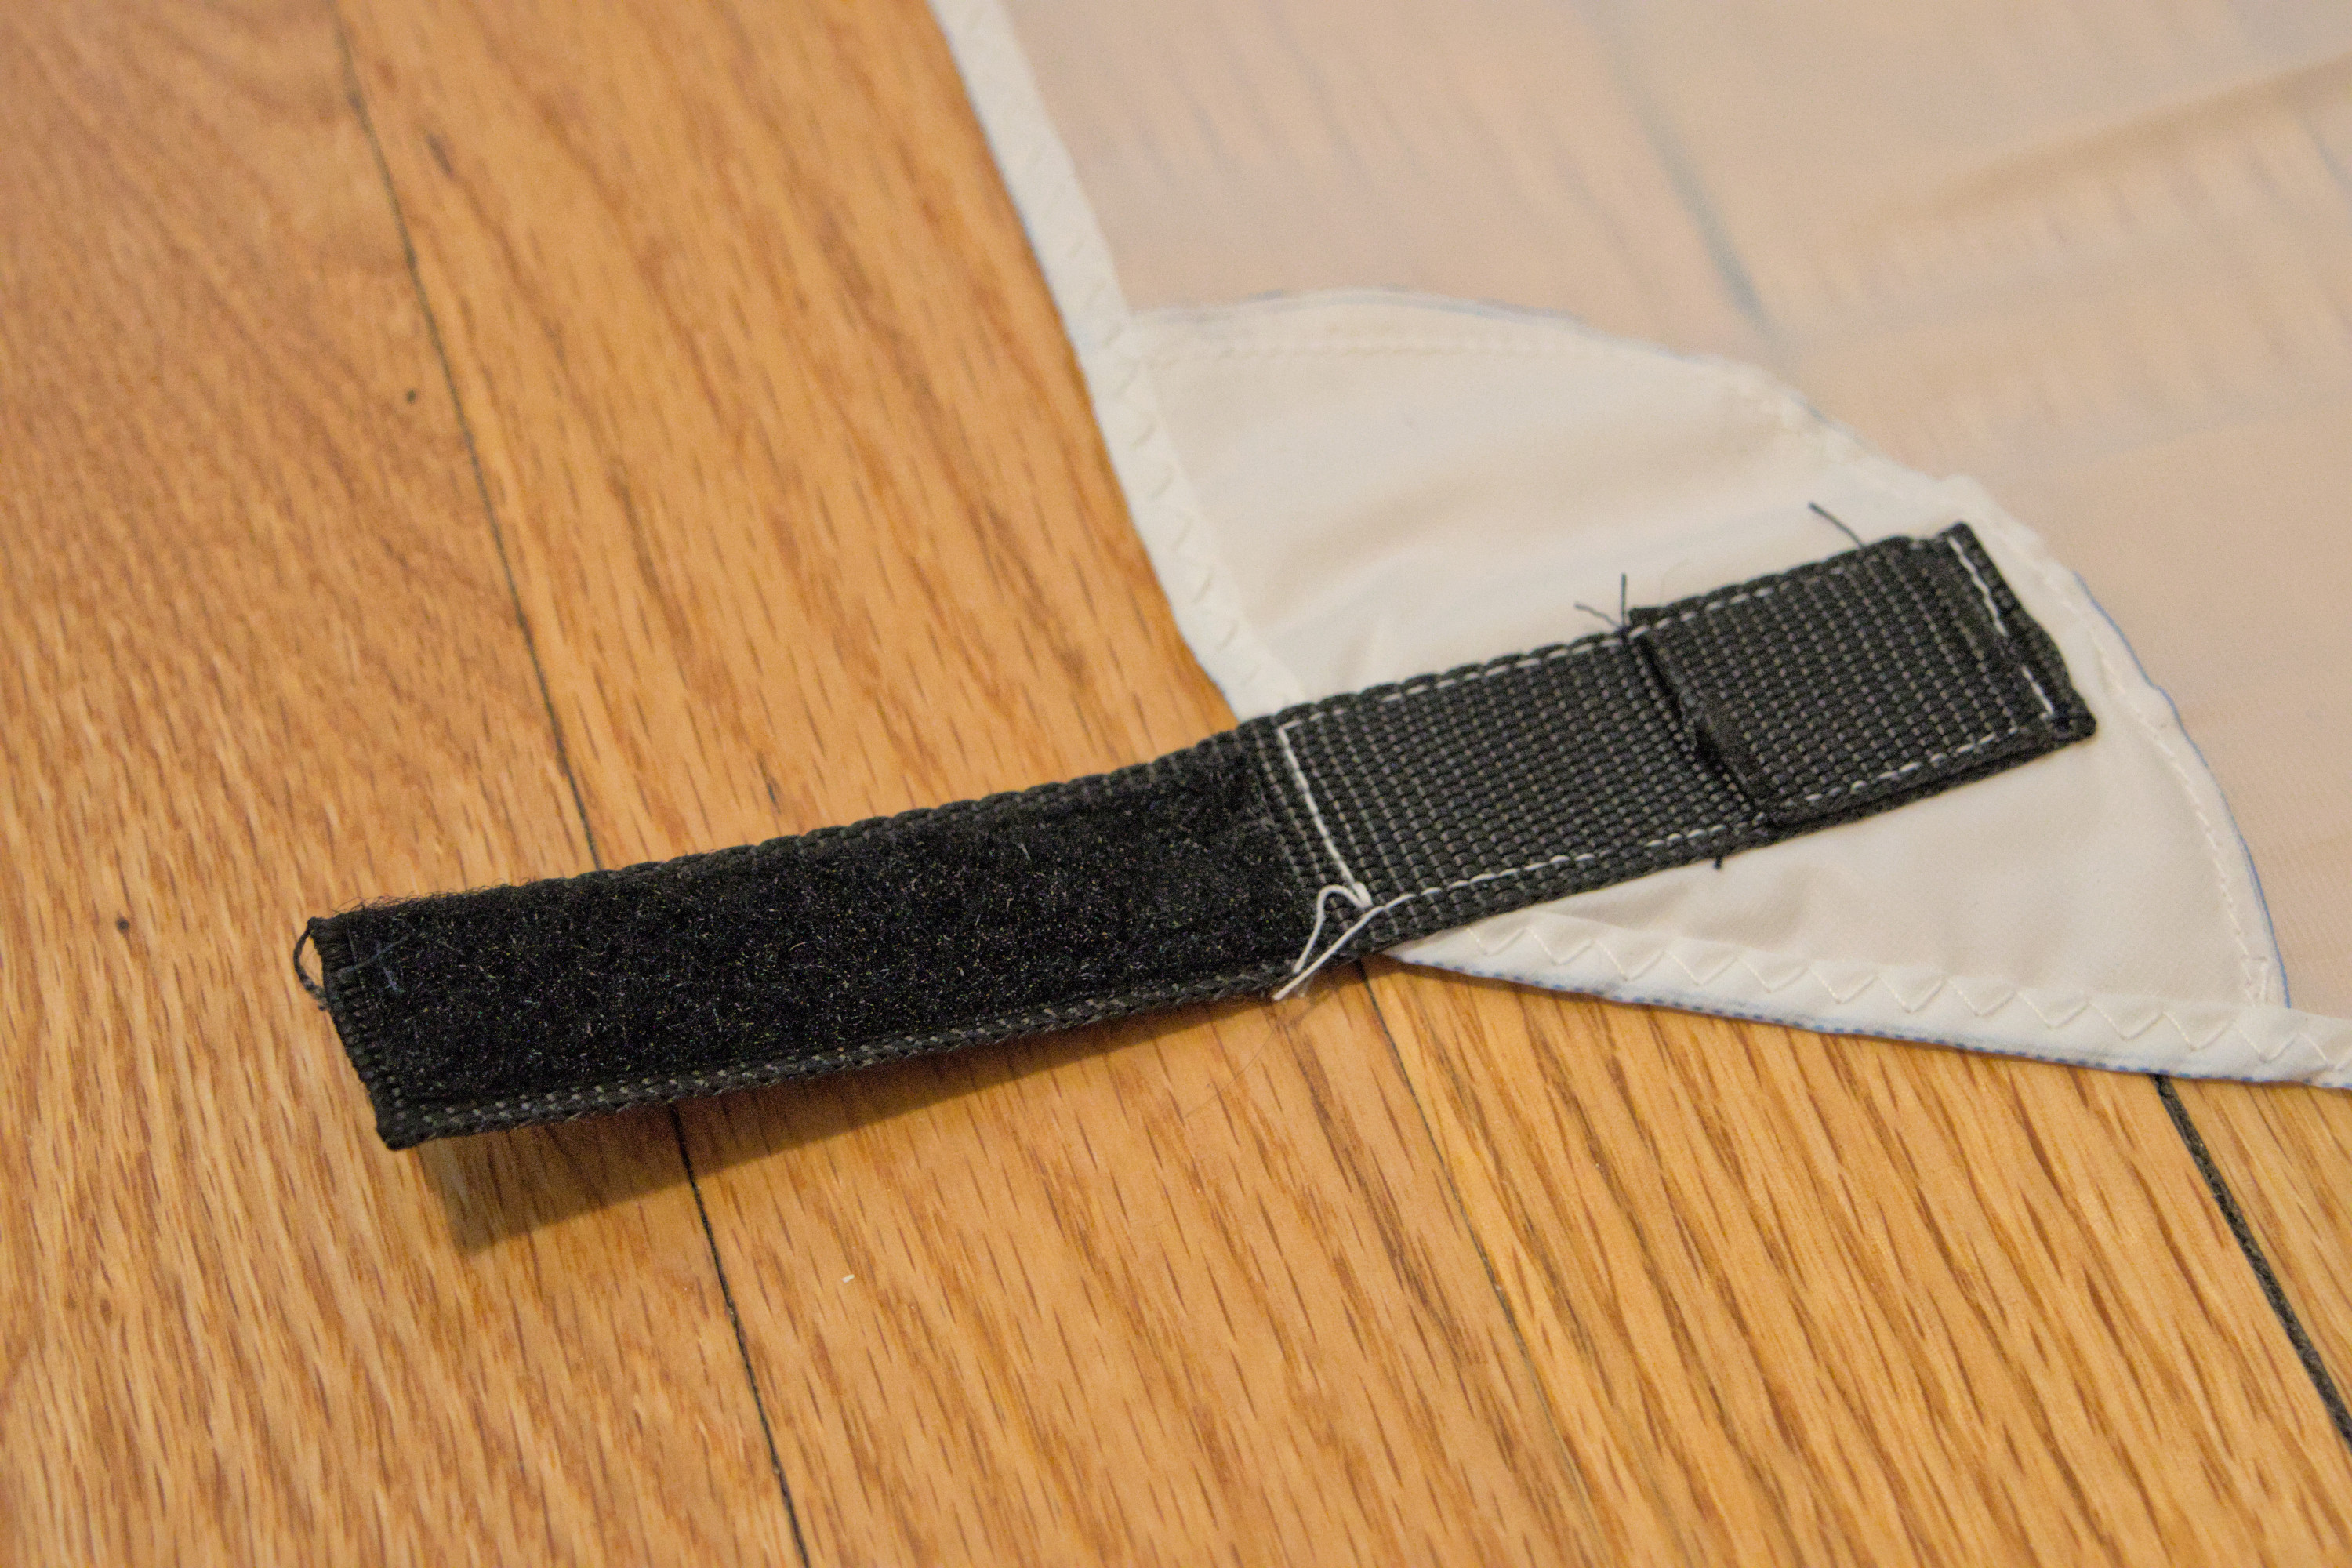
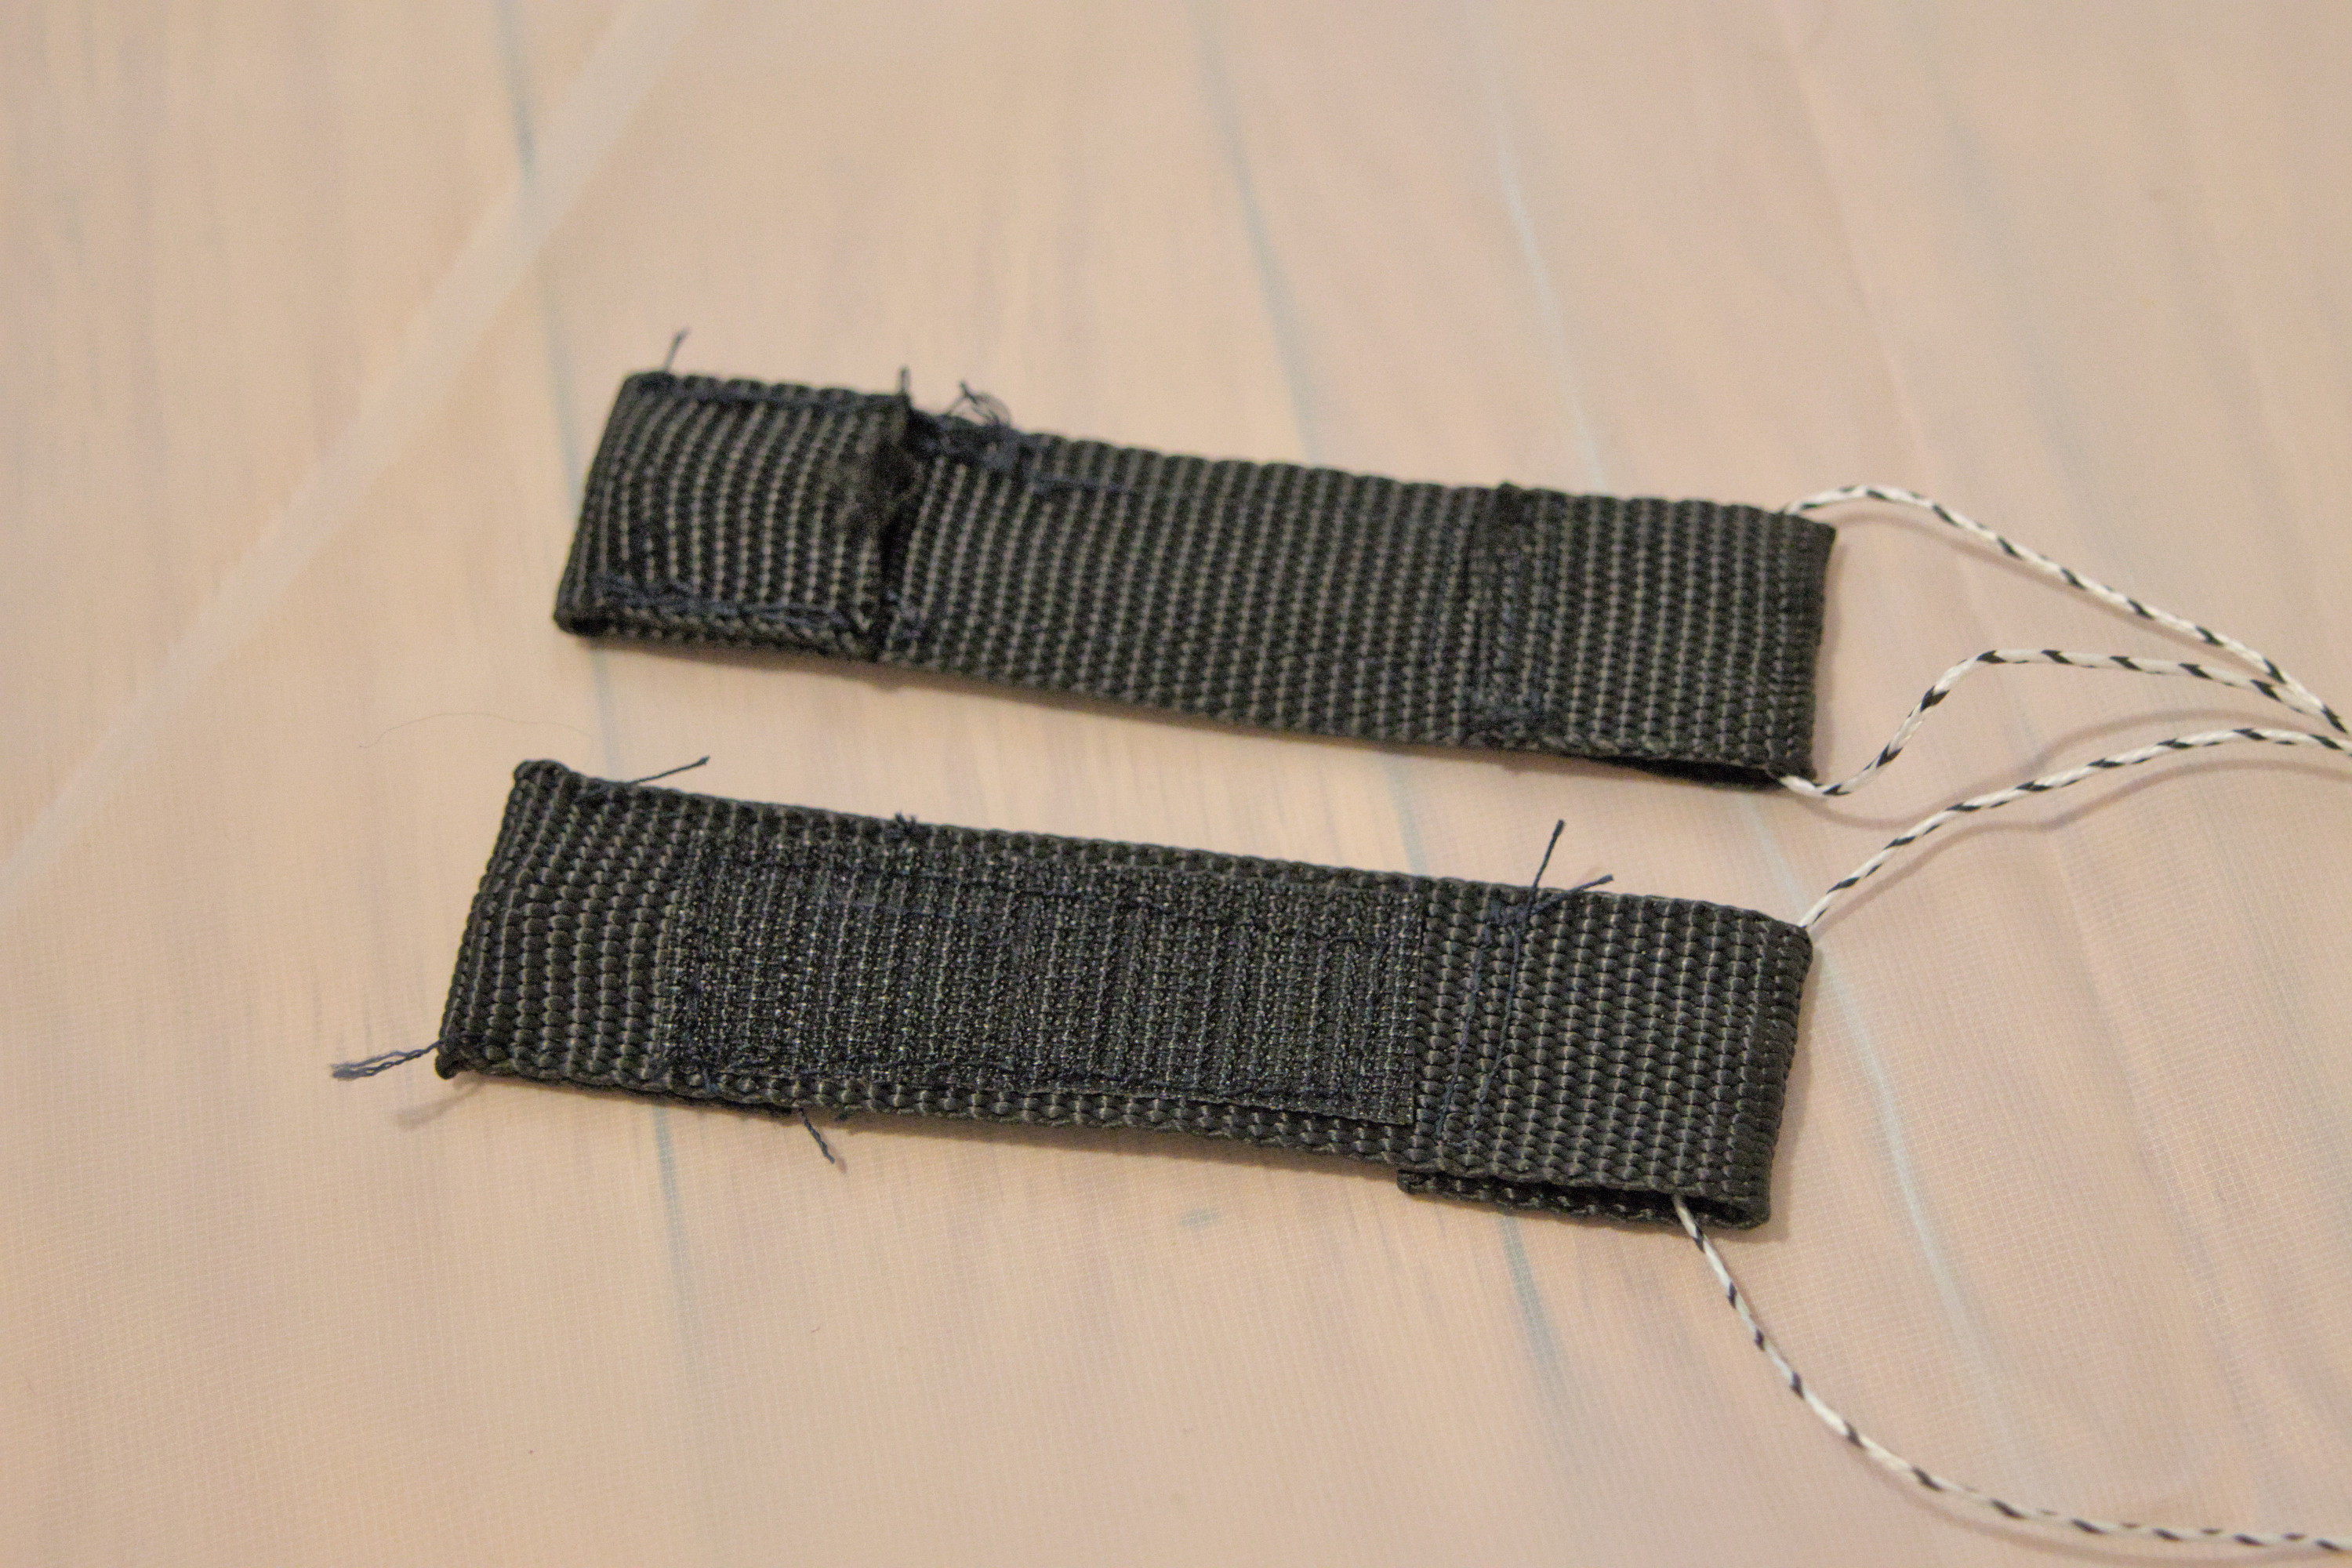
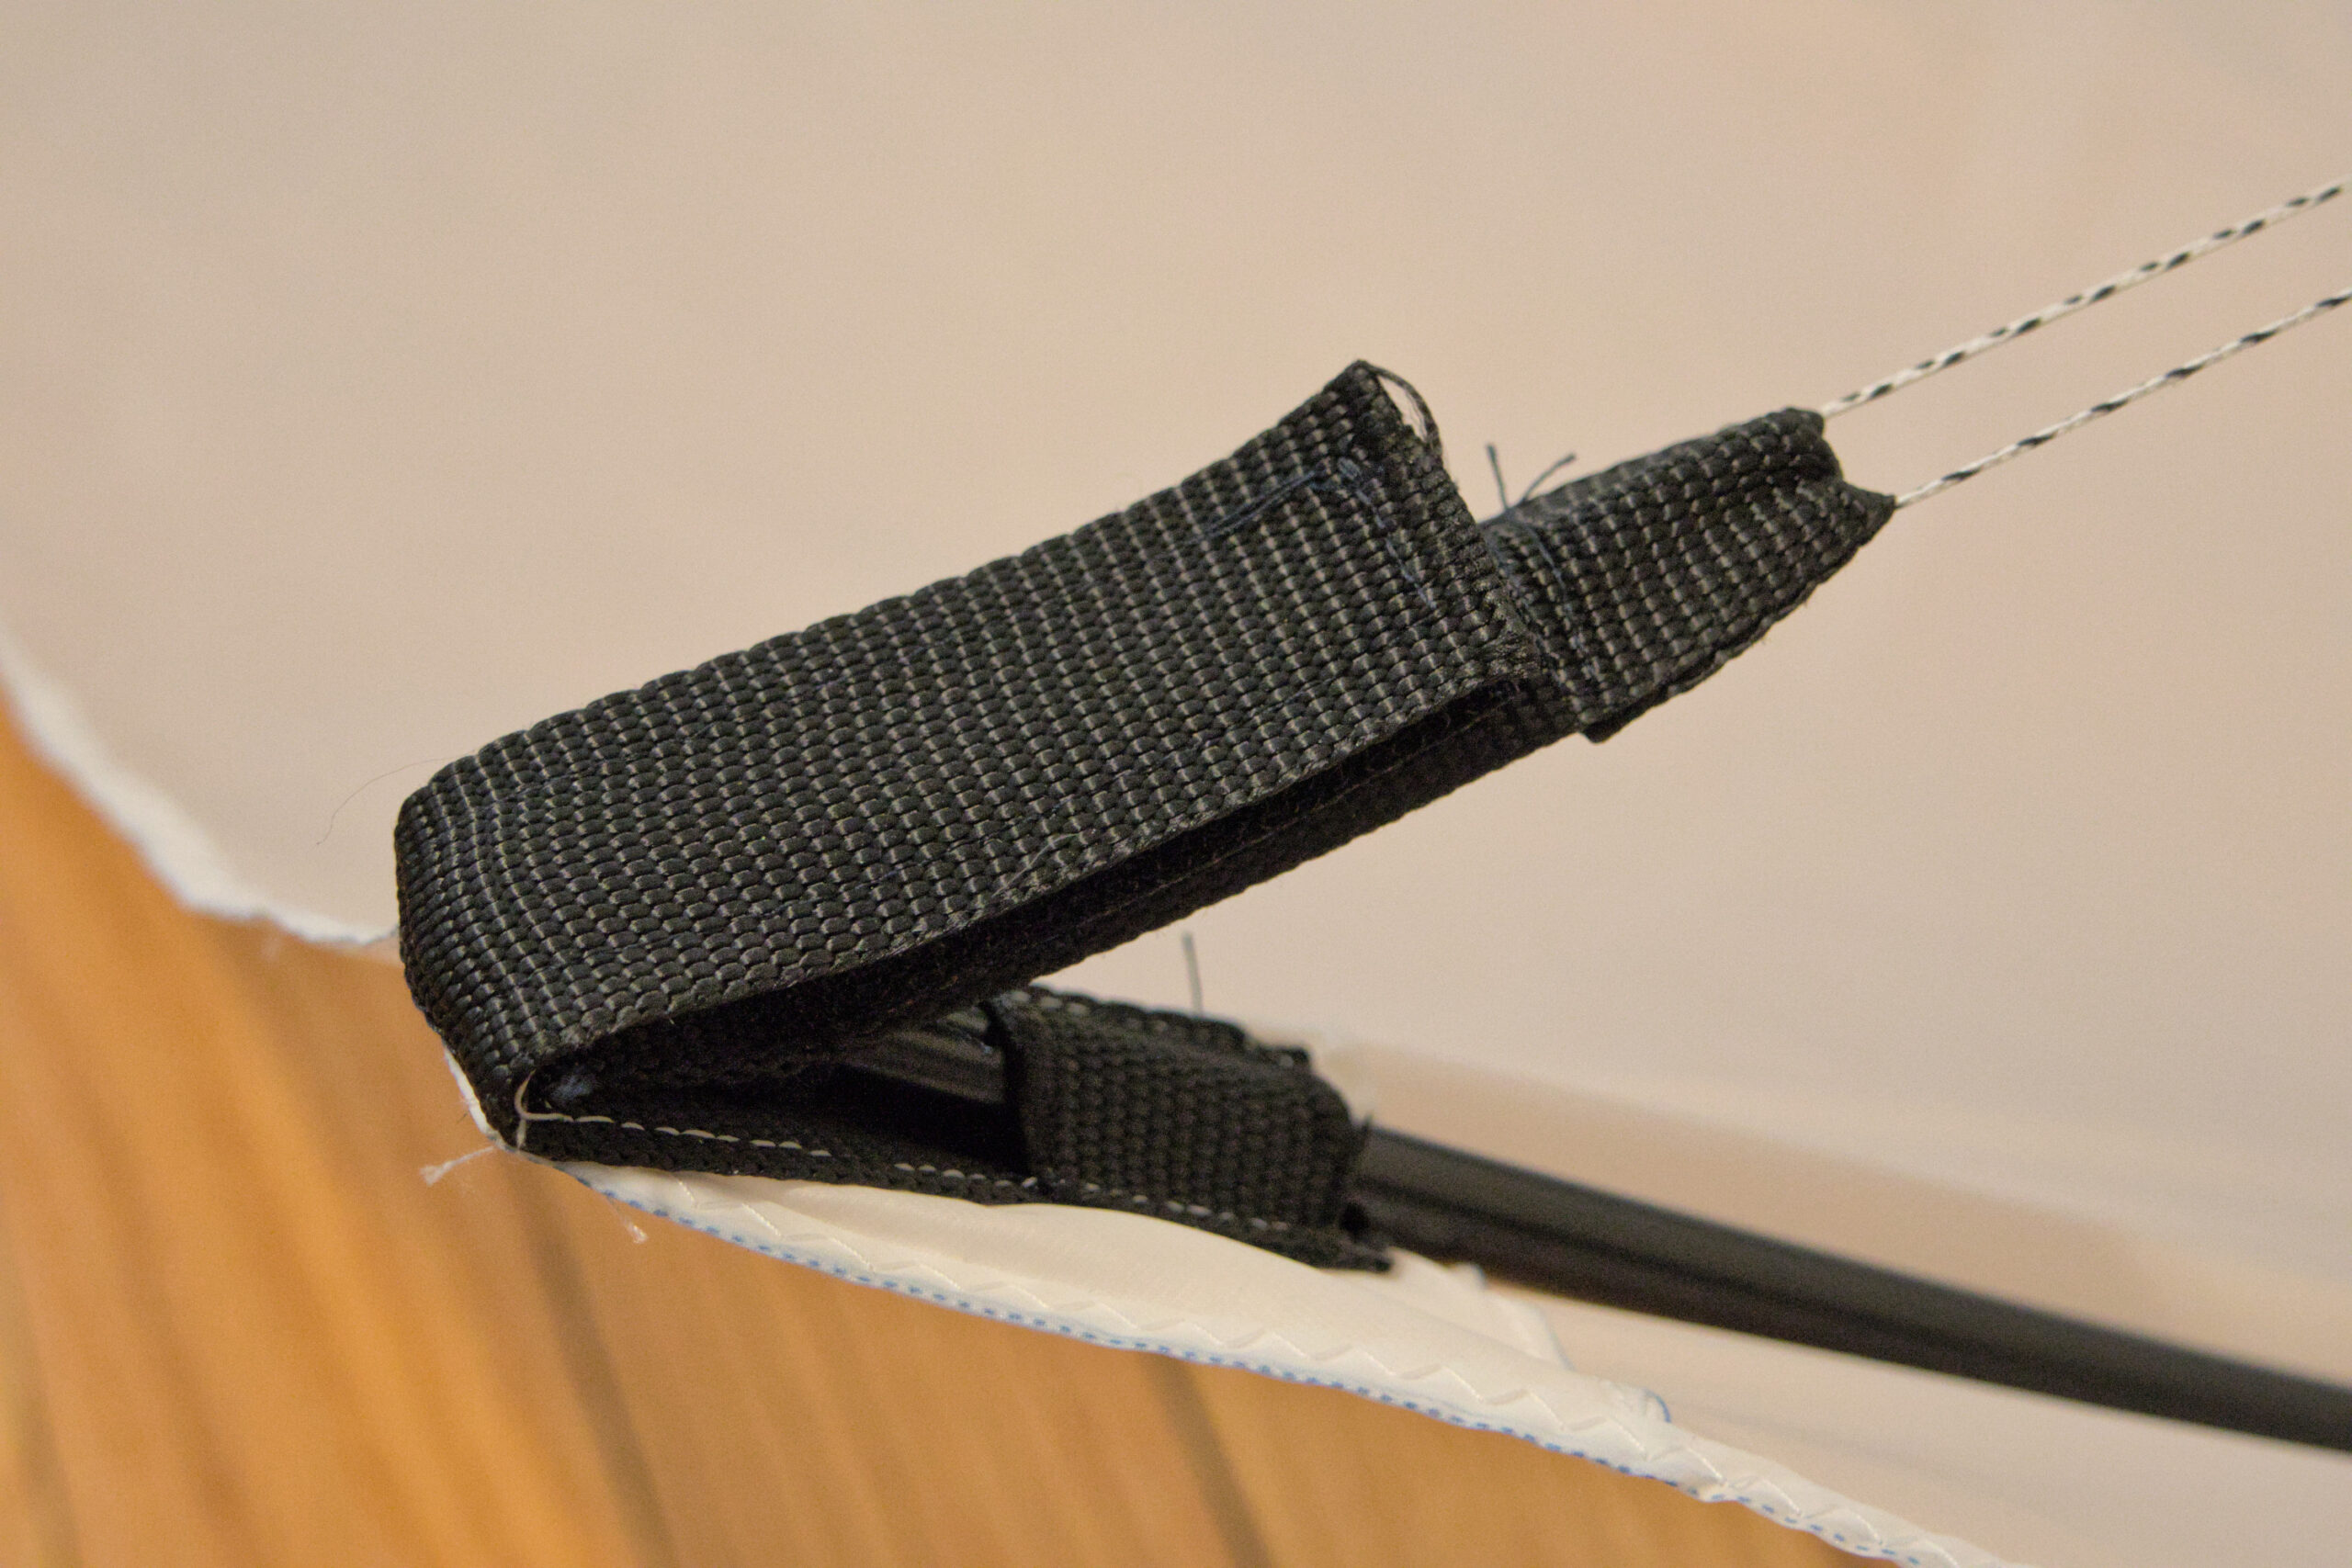
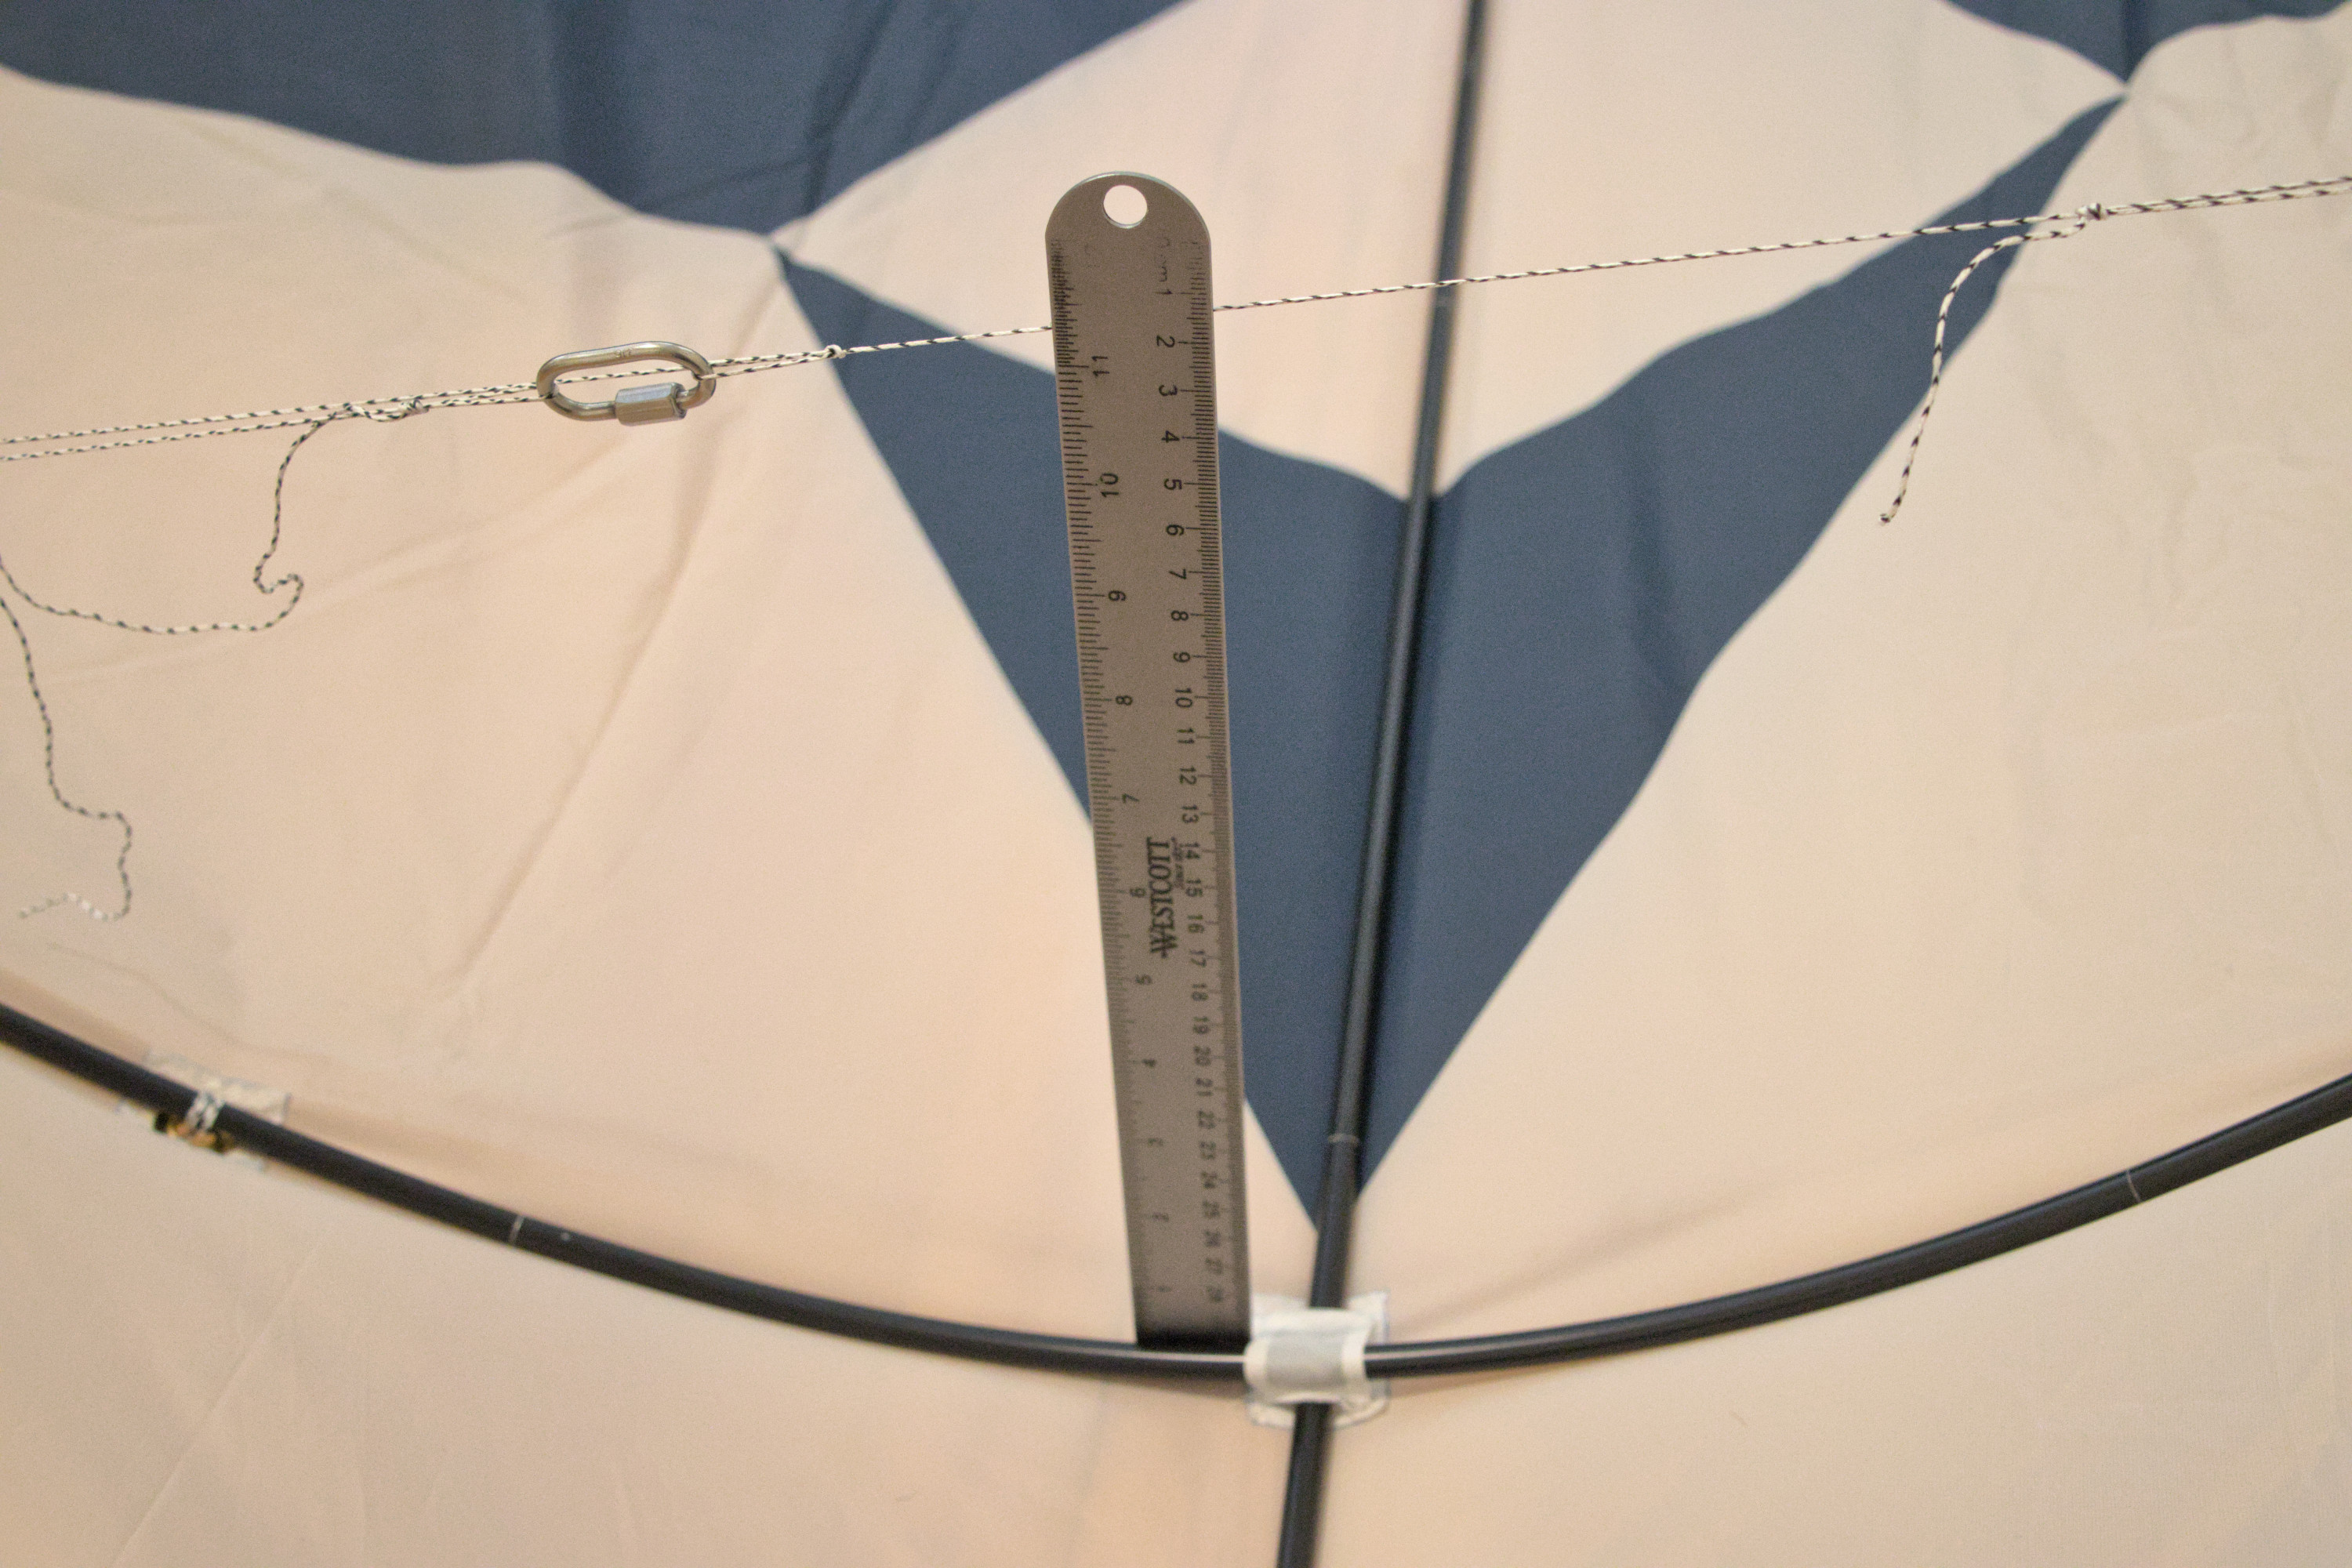
Similar sleeves are used for the ends of the spars, except that the hook-and-loop fastener is not installed on the top of the sleeve. Instead, additional sleeves, not sewn to the kite, were created by folding over sections of webbing, and the hook-and-loop fastener was sewn to these sleeves, which also had the end opposite the sleeve folded over and sewn to form a loop. The spreaders are slipped through the webbing sleeves on the ends, as well as the sleeves where they cross the spine, and the standalone sleeves are then slipped onto the ends. Braided line is used to attach the loops on the pairs of standalone sleeves to tension the spreaders, and the hook-and-loop fastener is used to attach the sleeves on the kite to the sleeves on the spreaders, allowing the kite fabric to be tensioned independently of the spreaders. The braided line is attached to one of the standalone sleeves with a figure-eight follow-through knot, with a figure-eight on-a-bight knot on the other end of the line; an alpine butterfly knot is placed along the line—which can be moved to adjust the spreader bow—and the end of the line is looped through the second standalone sleeve and attached to the alpine butterfly with a small quick link.6
The bridle is constructed from three sections of braided line. Each spreader has a line with a figure-eight on-a-bight knot on both ends of the line and one in the middle, with Prusik hitches used to attach the end loops to the spreader. The small loops in the middle of each spreader line are attached together with the third, main bridle line using a figure-eight follow-through knot on each end. An additional knot is placed along this section of line for attaching the main kite line using a quick link. The 5″-wide, four-yard-long fuzzy tail was constructed by sewing 3/8″ grosgrain ribbon down the center of the tail fabric using a zig-zag stitch and folding the end of the ribbon over on each end to make a loop. I then cut slits at 1″ intervals to make it fuzzy and attached it to the loop on the bottom of the kite using a small loop of braided line and lark’s head knots. It is approximately 1.0 m from the spreader attachment point to the center of the spreader line, and the line that connects the two spreader lines is approximately 2.5 m long. The completed kite weights approximately 370 g.
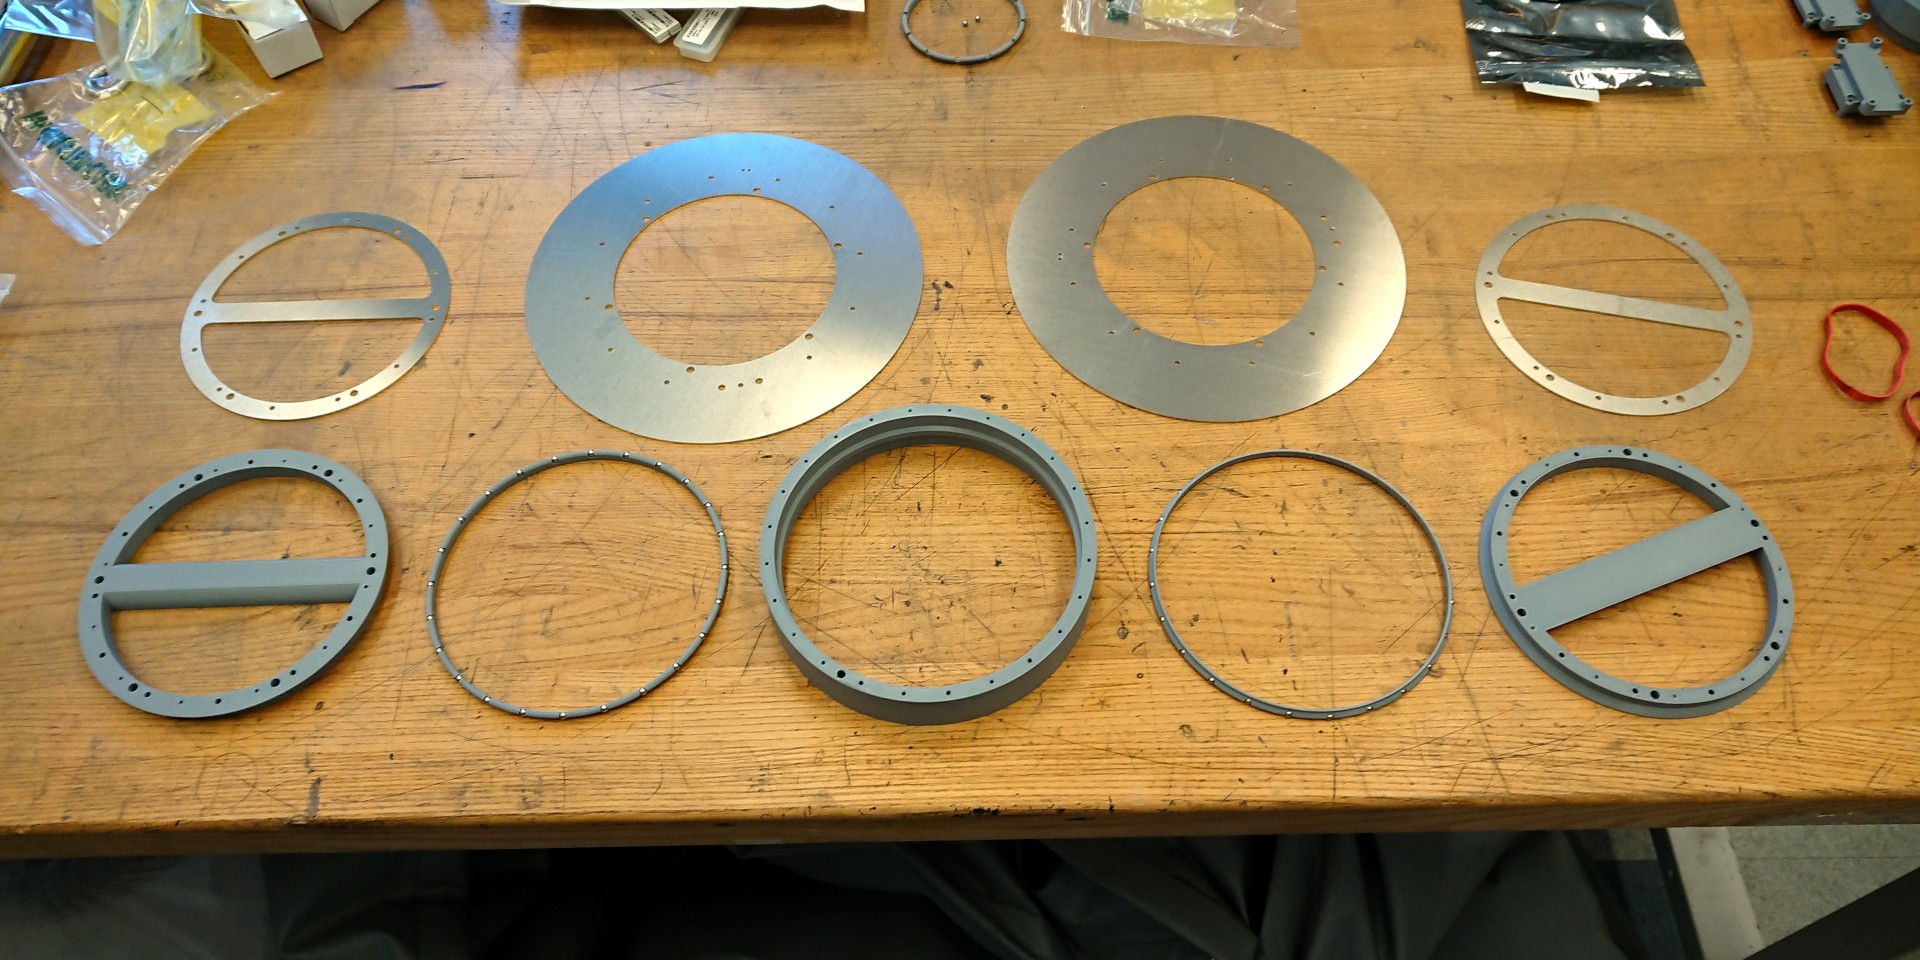
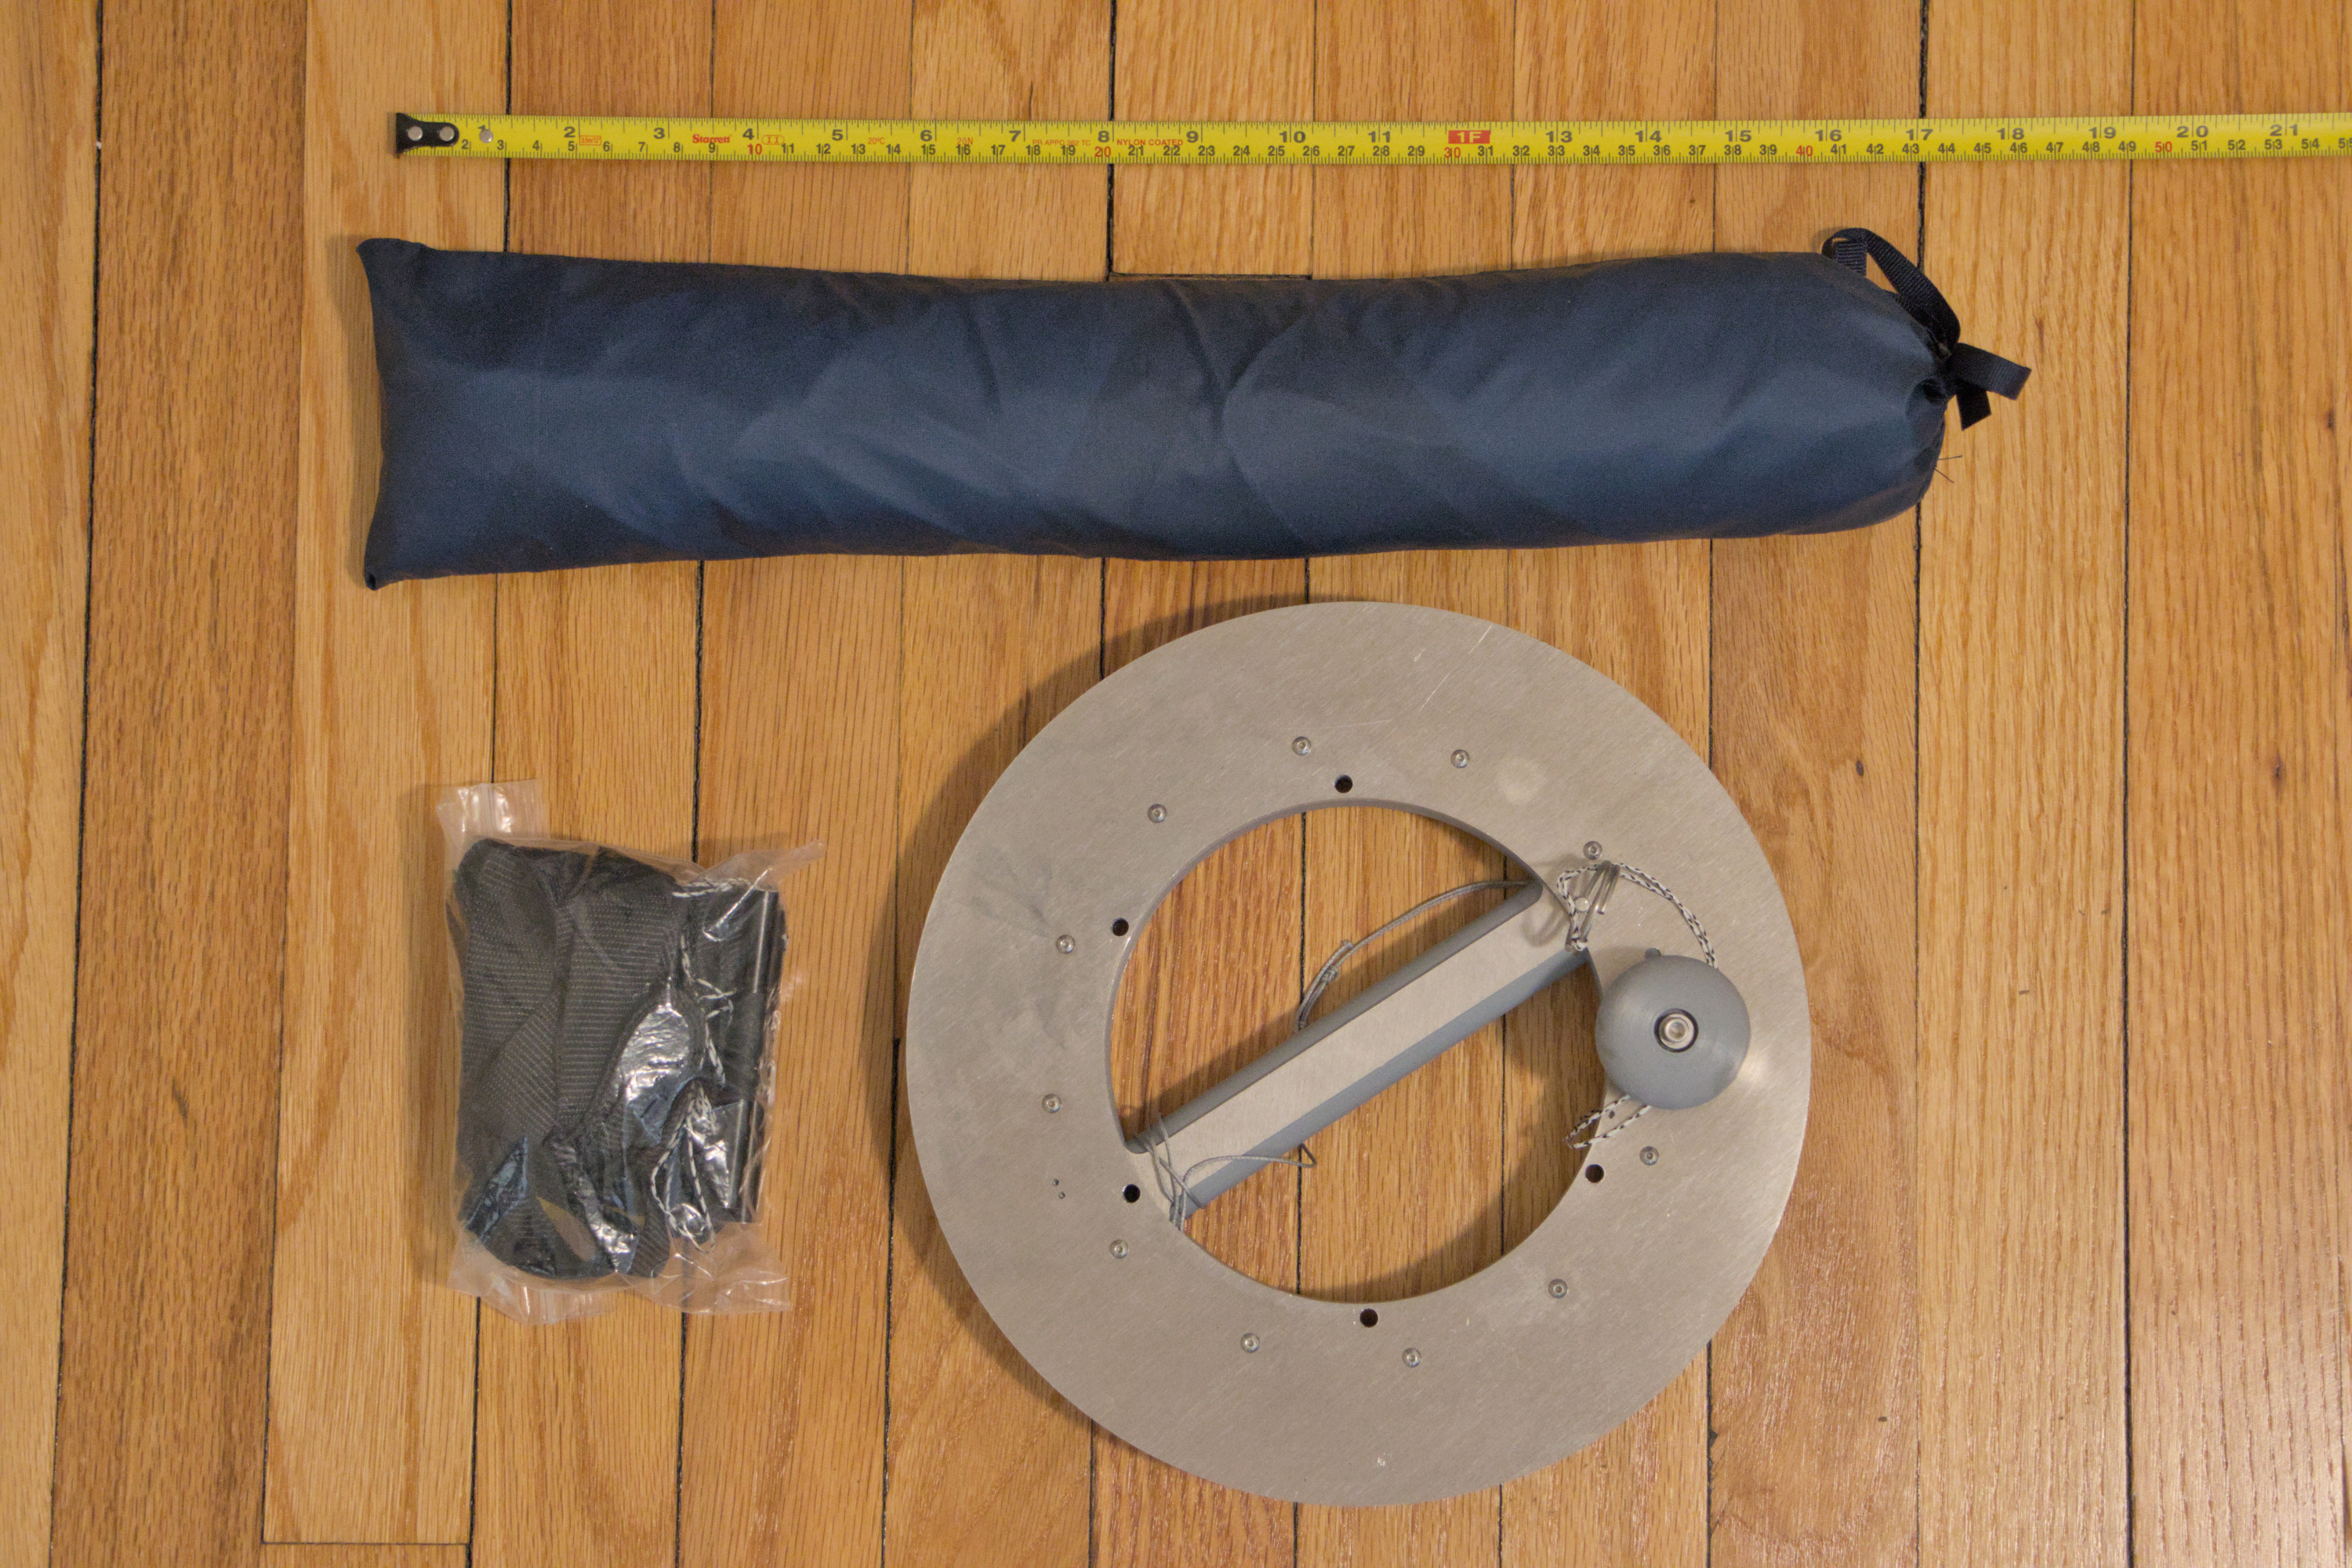
For the kite reel, I was again concerned about the performance of the typical mostly-plastic construction in the extreme cold. Thus, I opted to design a reel using a combination of a large 3D-printed ball bearing7 and laser-cut aluminum sheet parts. The 3D-printed parts were printed using PLA with a very high infill percentage and were designed to avoid bending moments. They were then tapped with 4-40 thread, and the reel was assembled using 4 mm stainless steel balls and button-head hex-drive screws. A round aluminum standoff and 8-32 socket-head cap screws were used to add a handle, and a ring-grip quick-release pin can be used to lock the reel. I sewed a couple of lengths of webbing into loops such that the lock-off reel can be attached to myself or fixed objects.
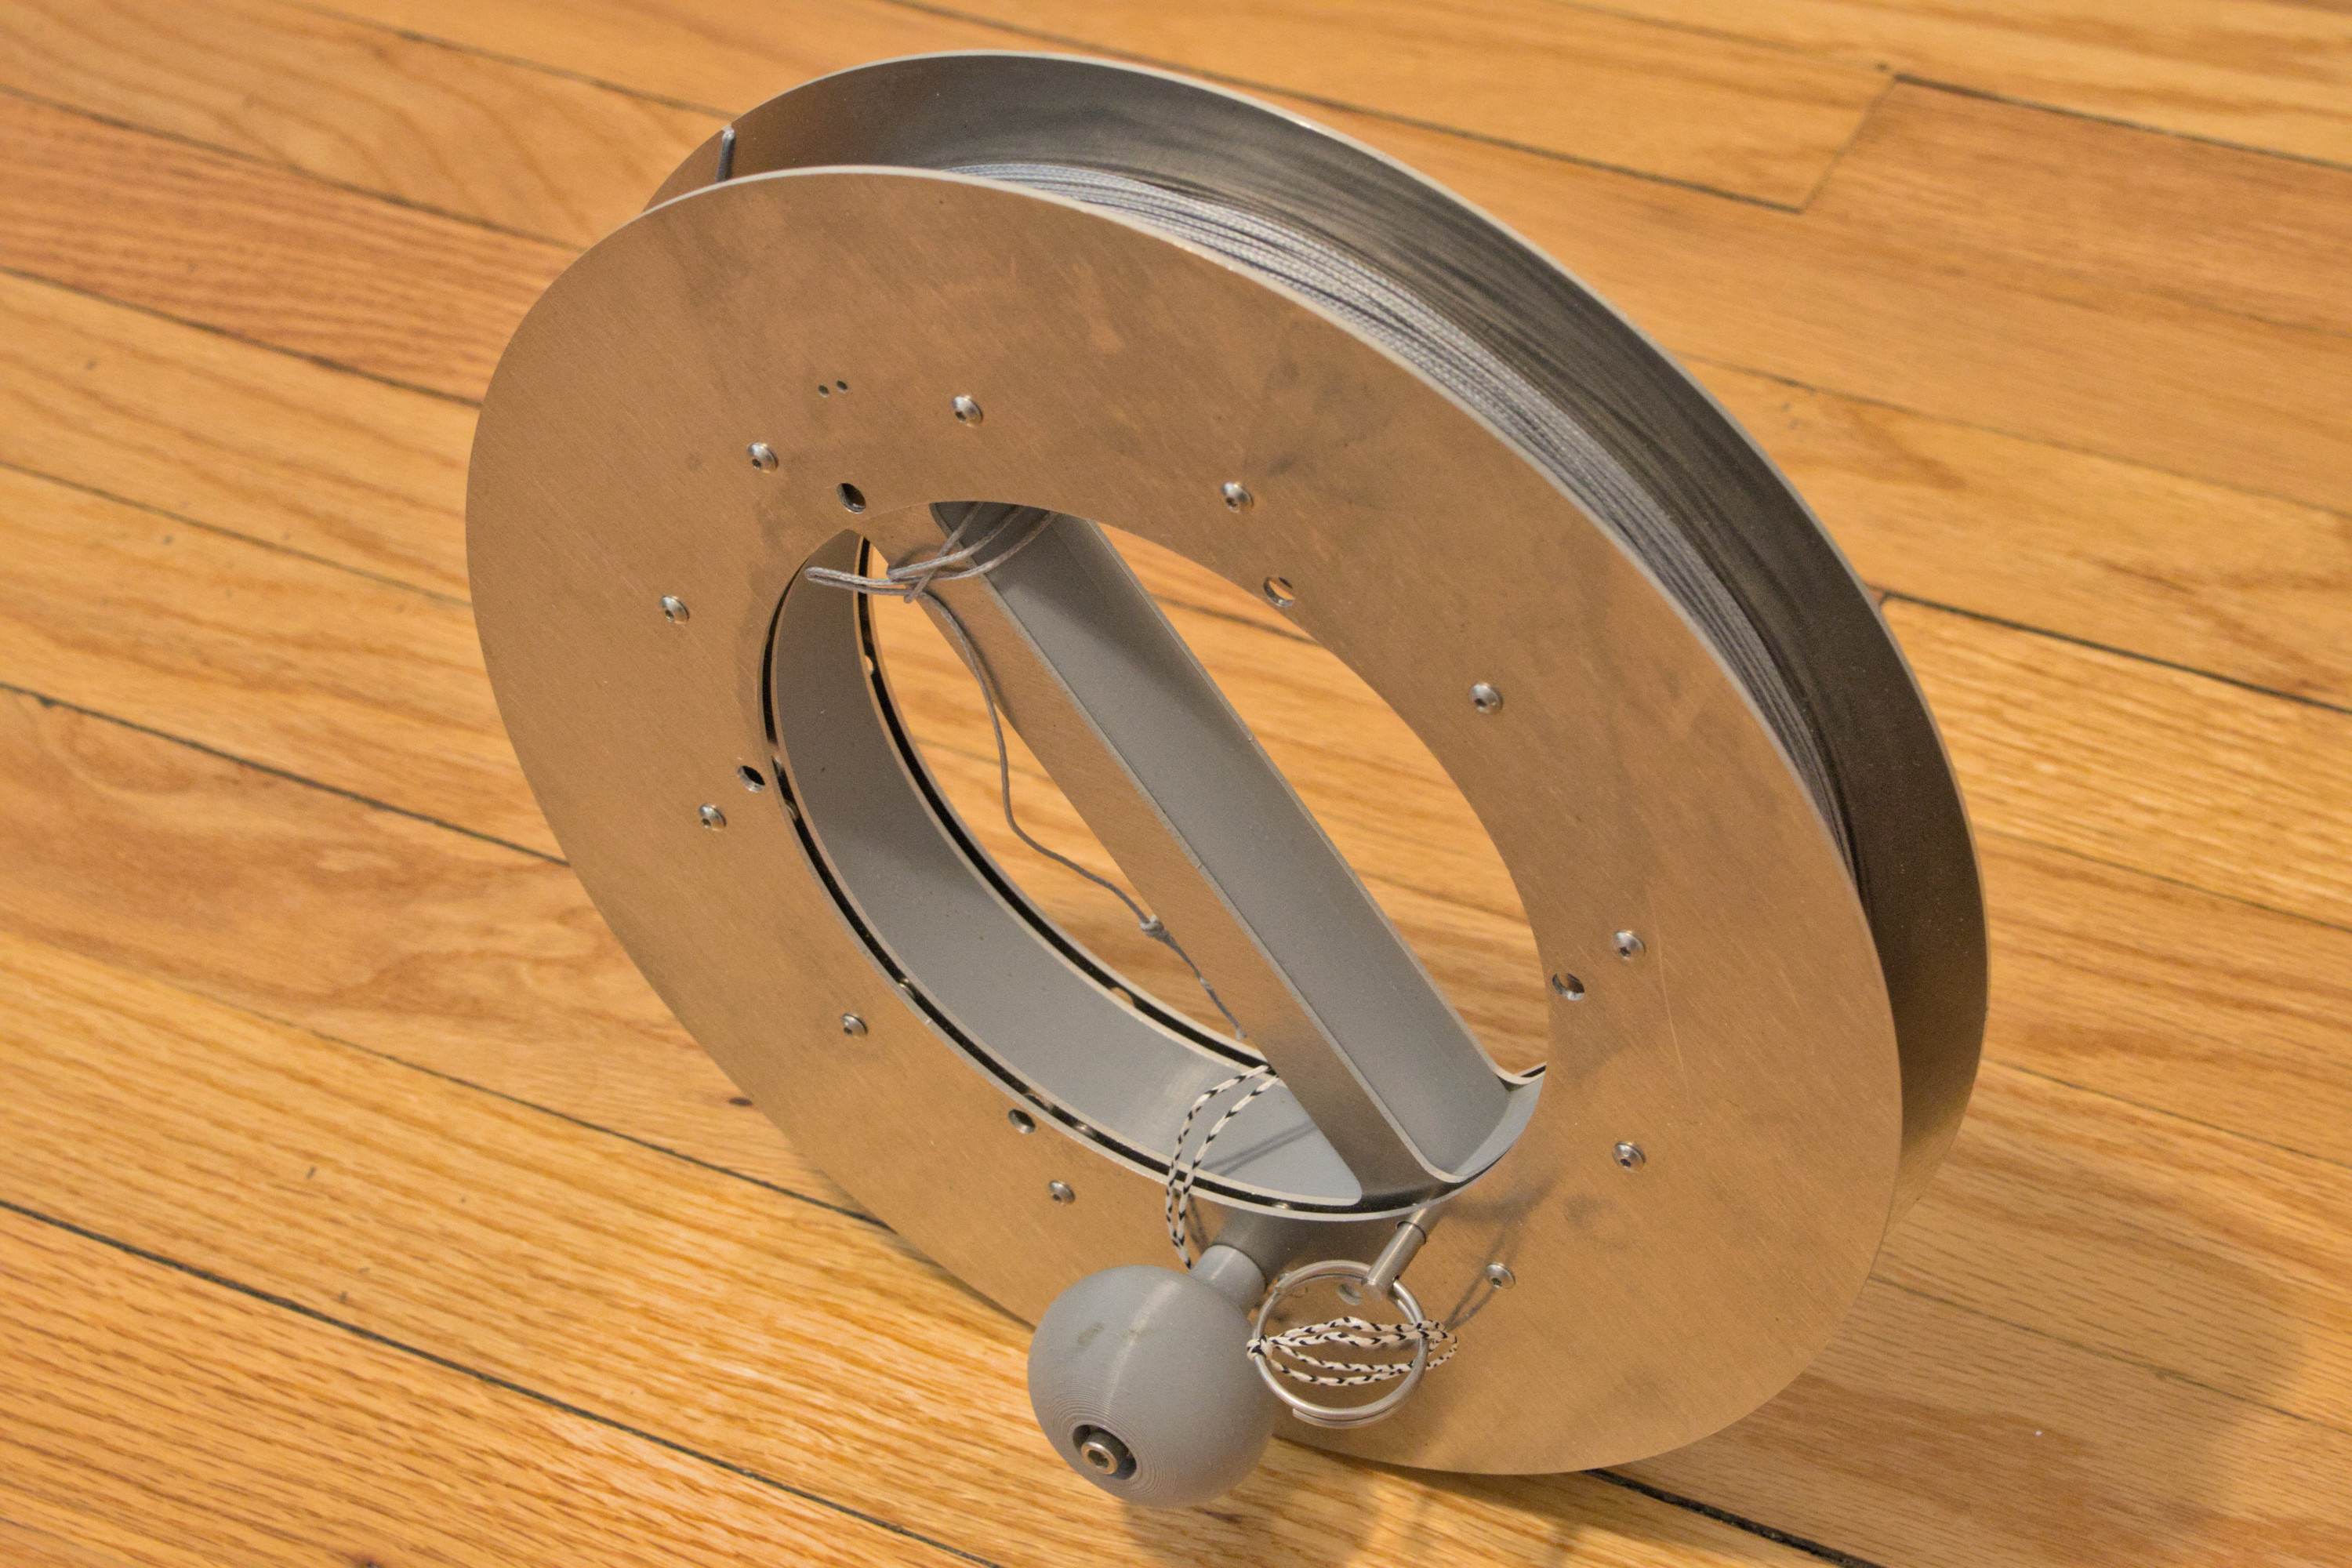
For kite line, I opted for braided high-modulus polyethylene line,8 sold as fishing line, as this type of line is lighter and thinner than the alternatives. Given the high cost of brand-name line, I opted for the cheaper alternatives available from Chinese vendors on eBay and Amazon, originally purchasing “200 lb” line on eBay. As I did not trust the sellers’ strength ratings, I load tested it using a heavy counterweight, a scale, and a chain hoist, and it failed at approximately half the rated capacity. After getting a refund,9 I then ordered “300 lb” line on Amazon, which is the strongest available. This did marginally better and failed at around 120 lb, although that was sufficient and was the strongest line available at a reasonable price. Except for what I used for the main bridle line, I installed the remainder of the 300 m of line on the reel (I used the “200 lb” line for the spreaders and the bridle spreader lines).10
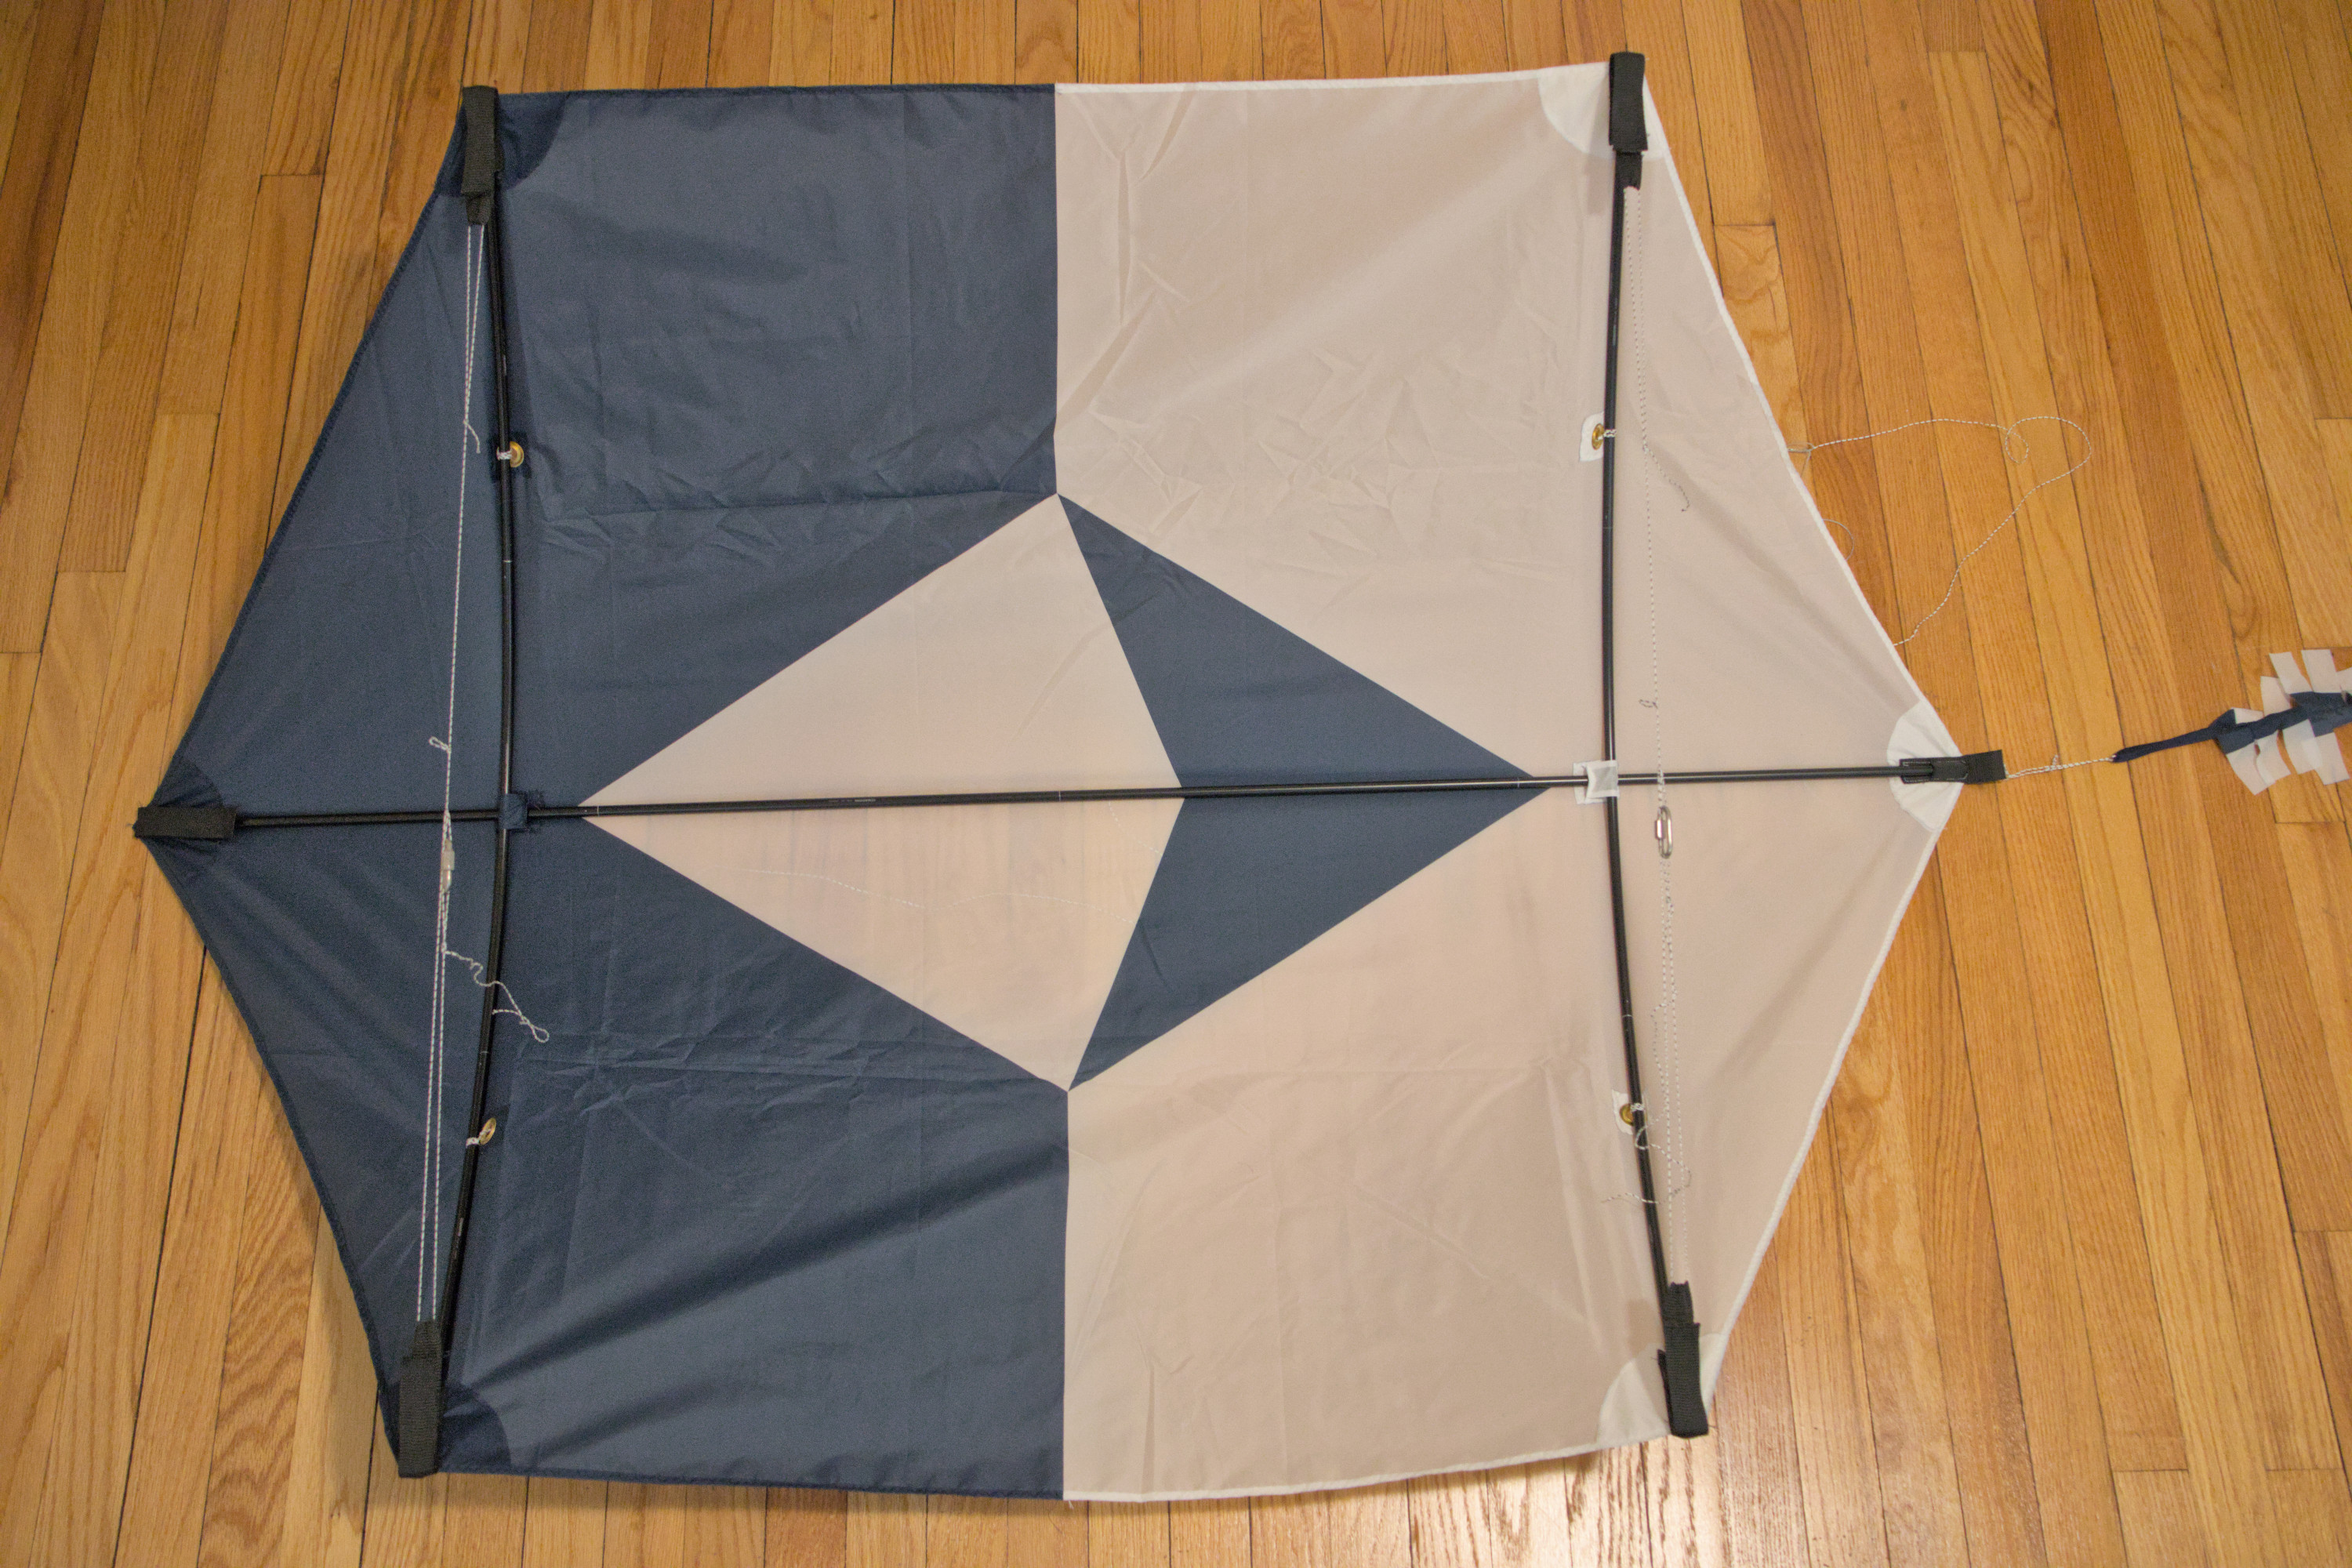
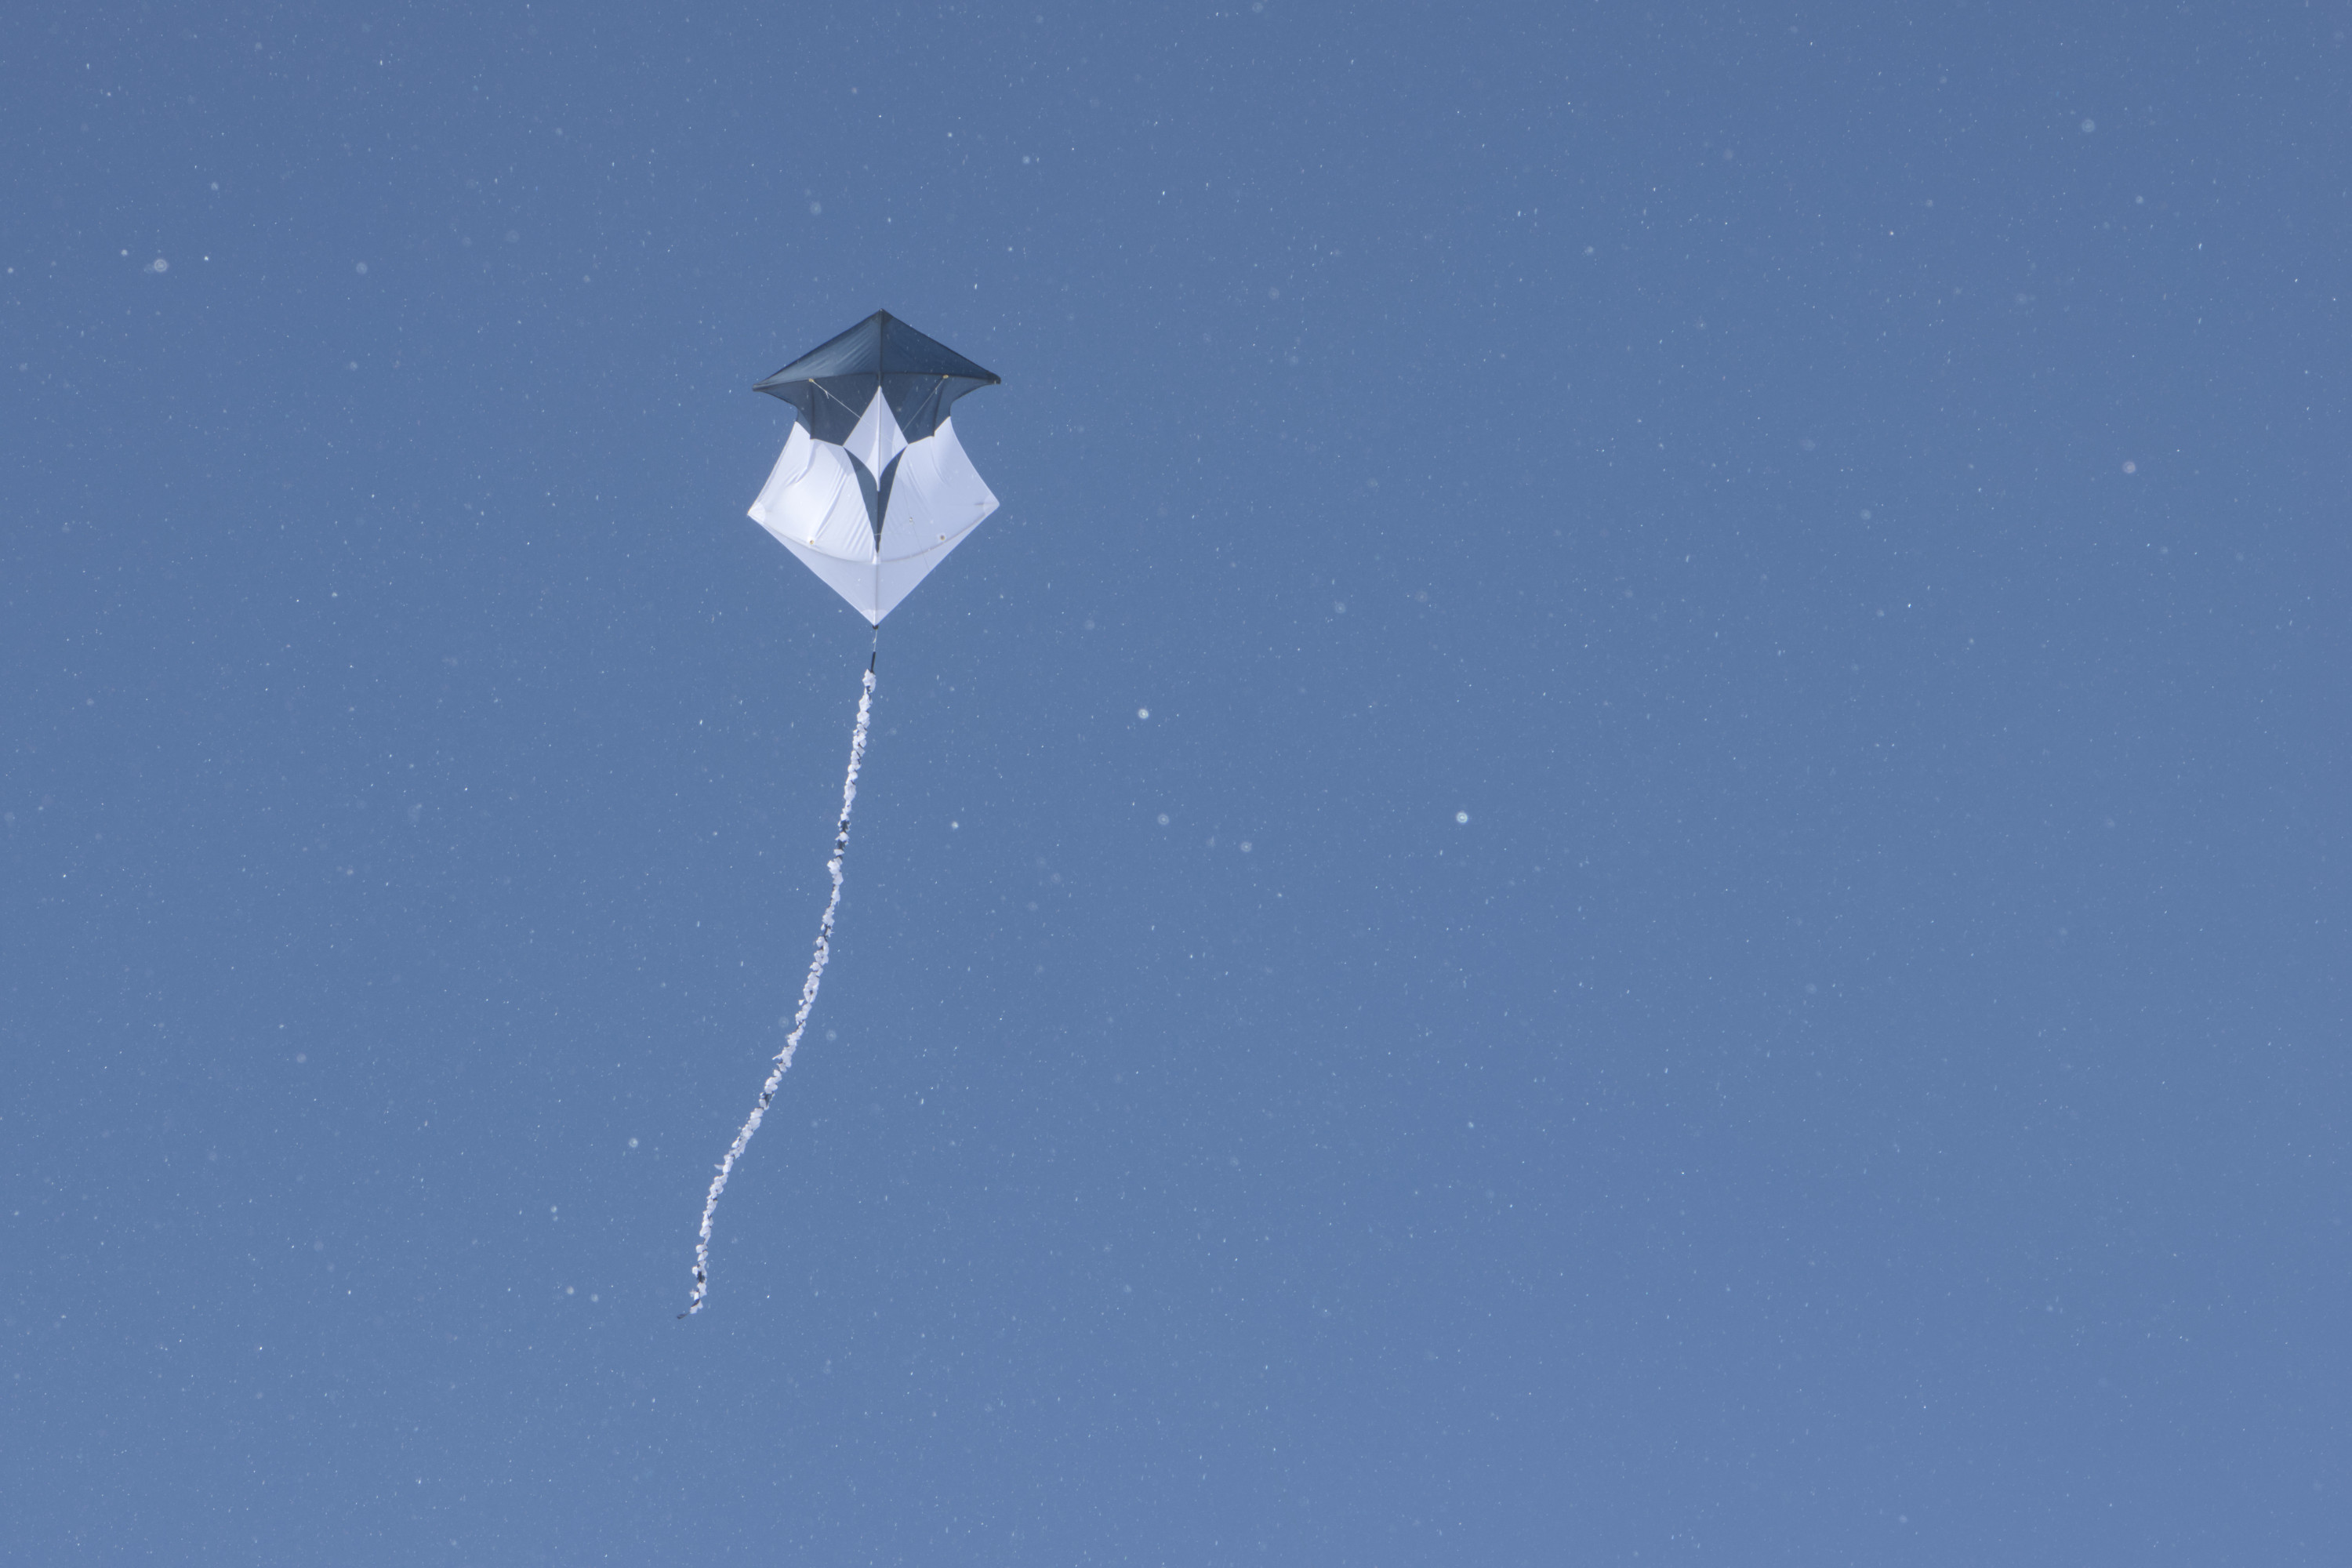
In December, the day before I left for Antarctica, I took the T out to Wonderland and tested the kite at Revere Beach with 4–5″ of bow in the spreaders. Unfortunately, it was almost dead calm, but I was able to get the kite aloft during a gust and keep it in the air by walking upwind, showing that the kite flew well in extremely-light wind, although the kite line was not taught enough in this wind to attach a camera. Once at the South Pole, it took me several more attempts to get the kite flying reasonably well.11 Unfortunately, the information found online about tuning this type of kite is contradictory.12 Some folks say that both spreaders should have the same amount of bow, while others say that the bottom spreader should be bowed more; some folks recommend stiffer spreader spars for higher winds, while others recommend more-flexible ones. I eventually settled on 11–12″ of bow in both spreaders, which was considerably more than the 5–6″ I started with, based on what I read online. This was just enough bend to push the aluminum tubes into the plastic deformation regime and permanently bend the tubes (this didn’t happen with 10″ of bow). I found that placing the hitch point on the bridle 18 cm above the center point worked well; moving it up made the kite more unstable, and I couldn’t launch the kite if I moved it down. Originally, I used an alpine butterfly knot for the hitch attachment, although I ended up switching to a simple overhand loop, as it was quicker to tie in the cold; both worked equally well.

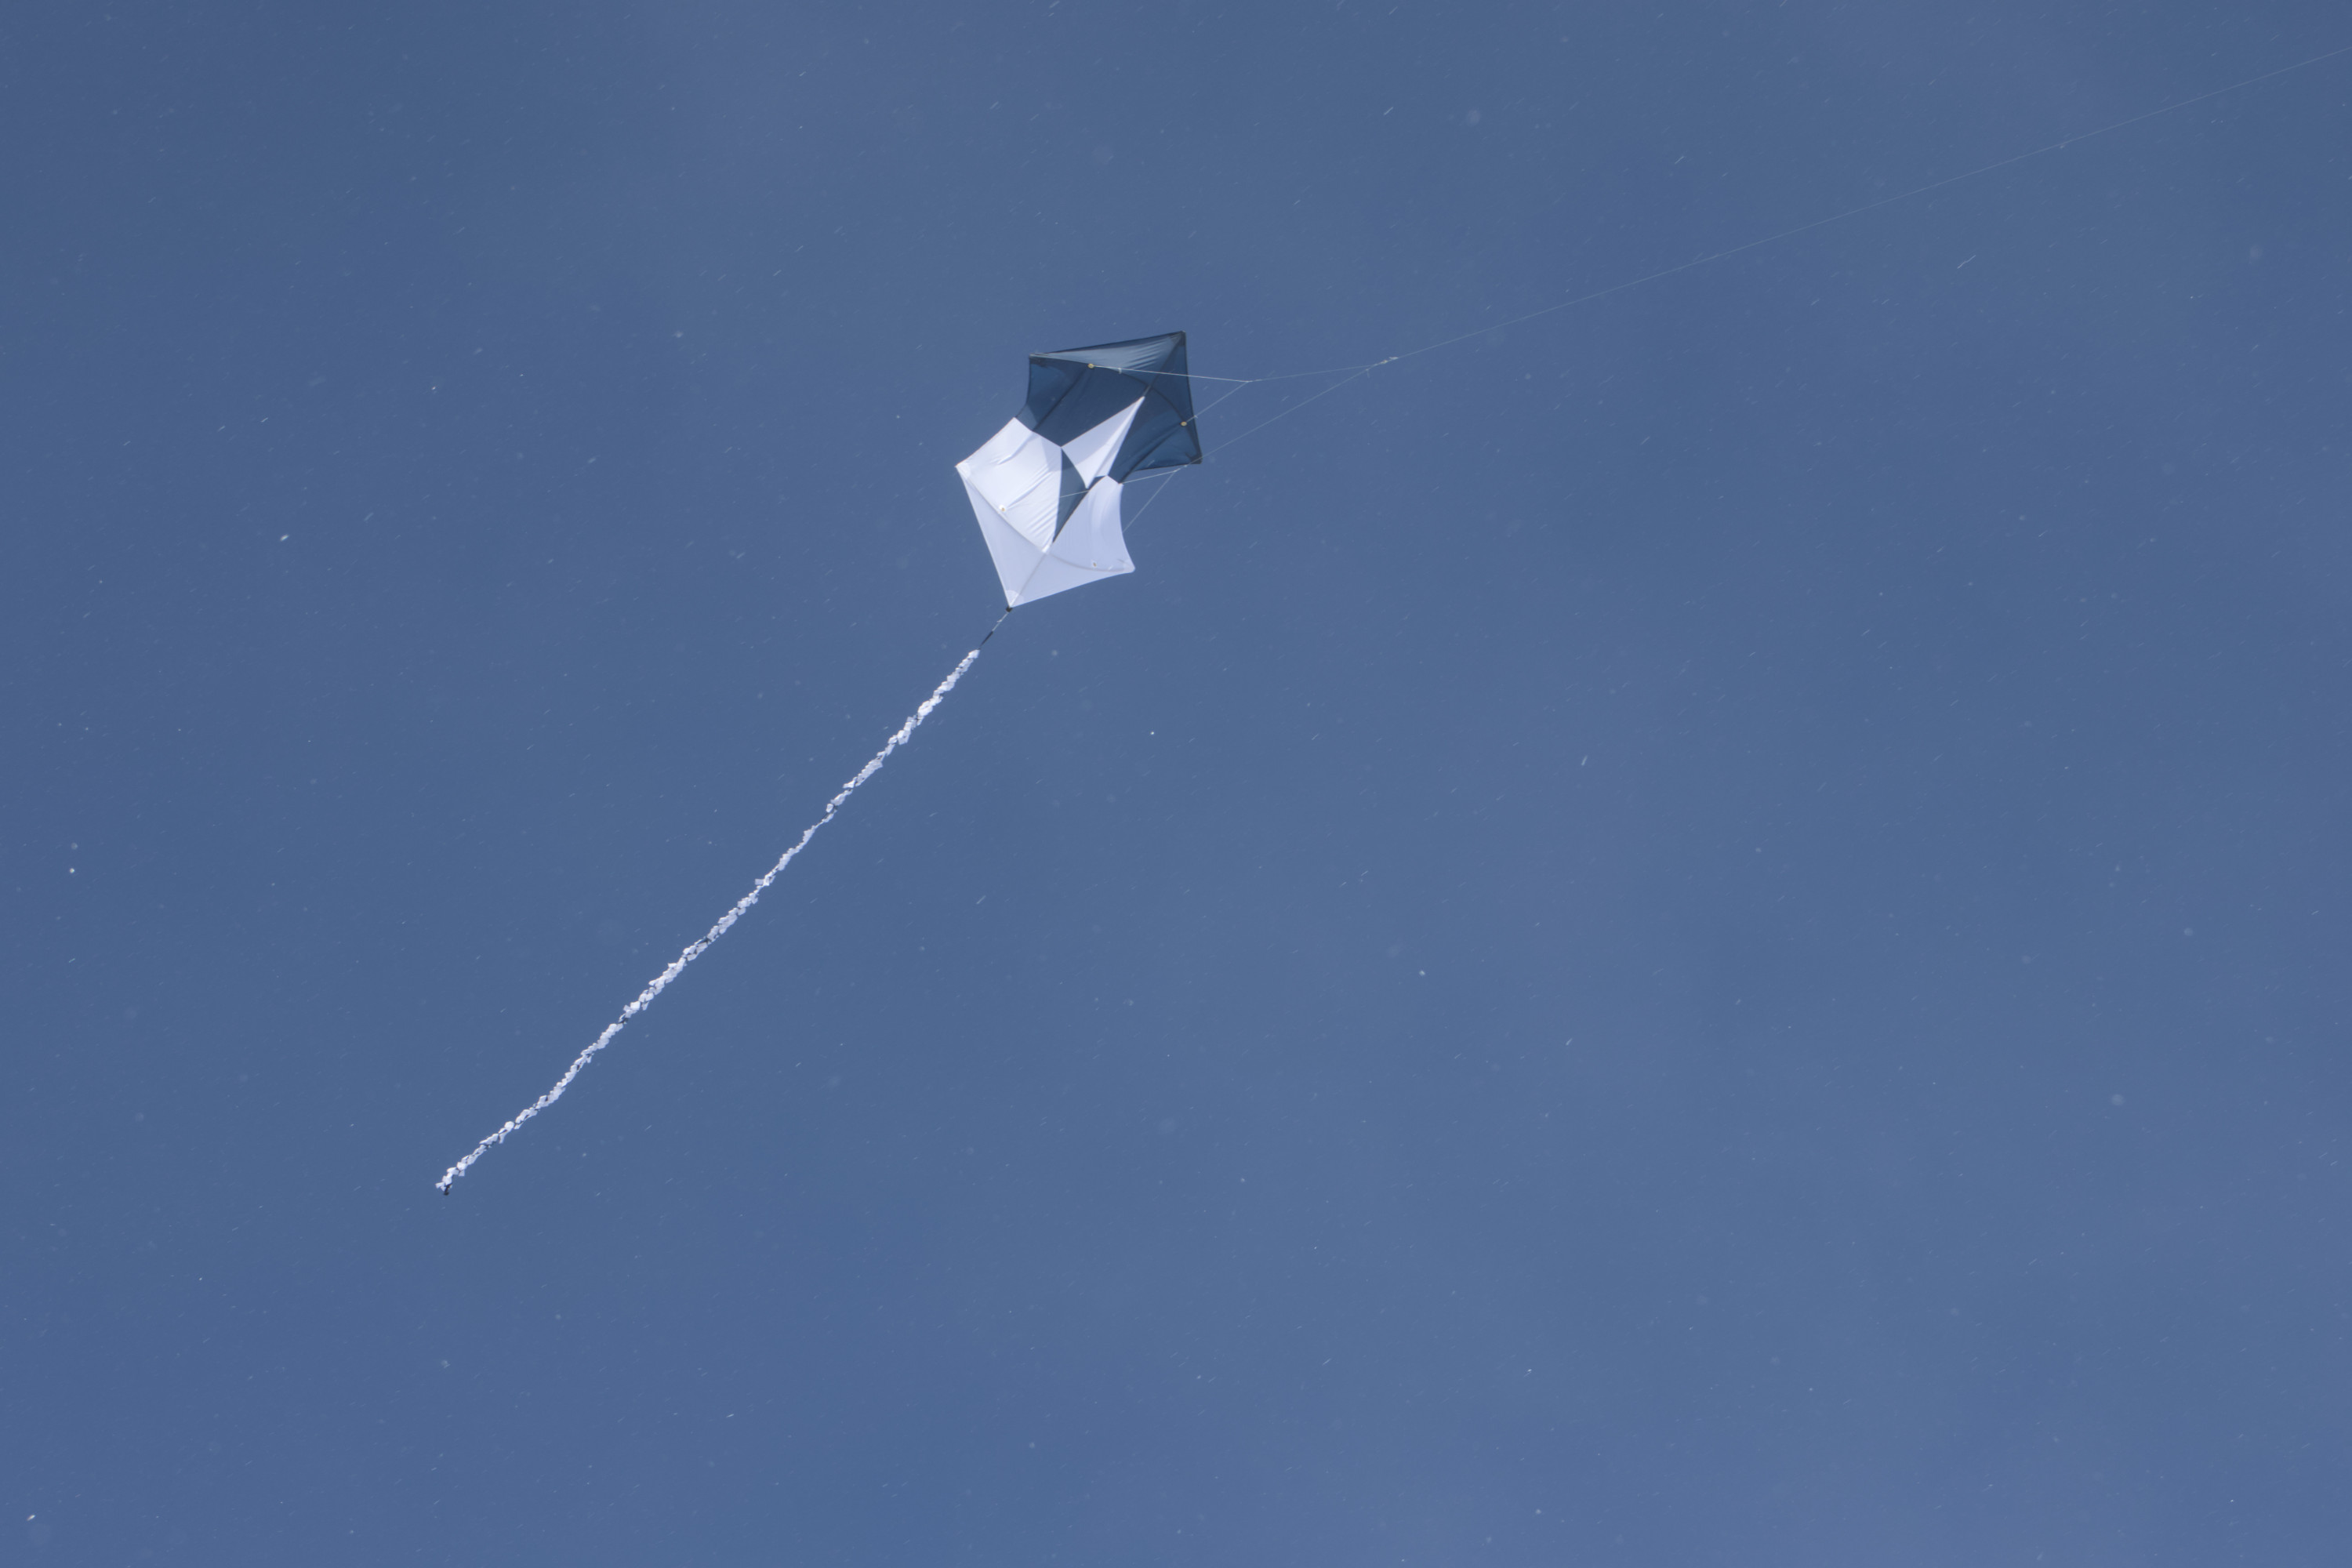
With this adjustment, the kite was at least reasonably stable in winds up to around 6 m/s, although it generally wasn’t stable enough for the camera if the wind was much above 5 m/s, particularly when walking the kite upwind; while the kite would fly in less wind, the kite line wasn’t taught enough to attach my camera below around 4 m/s, leaving only a small wind range where it worked well. There were only a couple of days with both appropriate wind and at least mostly-clear skies where I also had sufficient free time to fly the kite and camera.
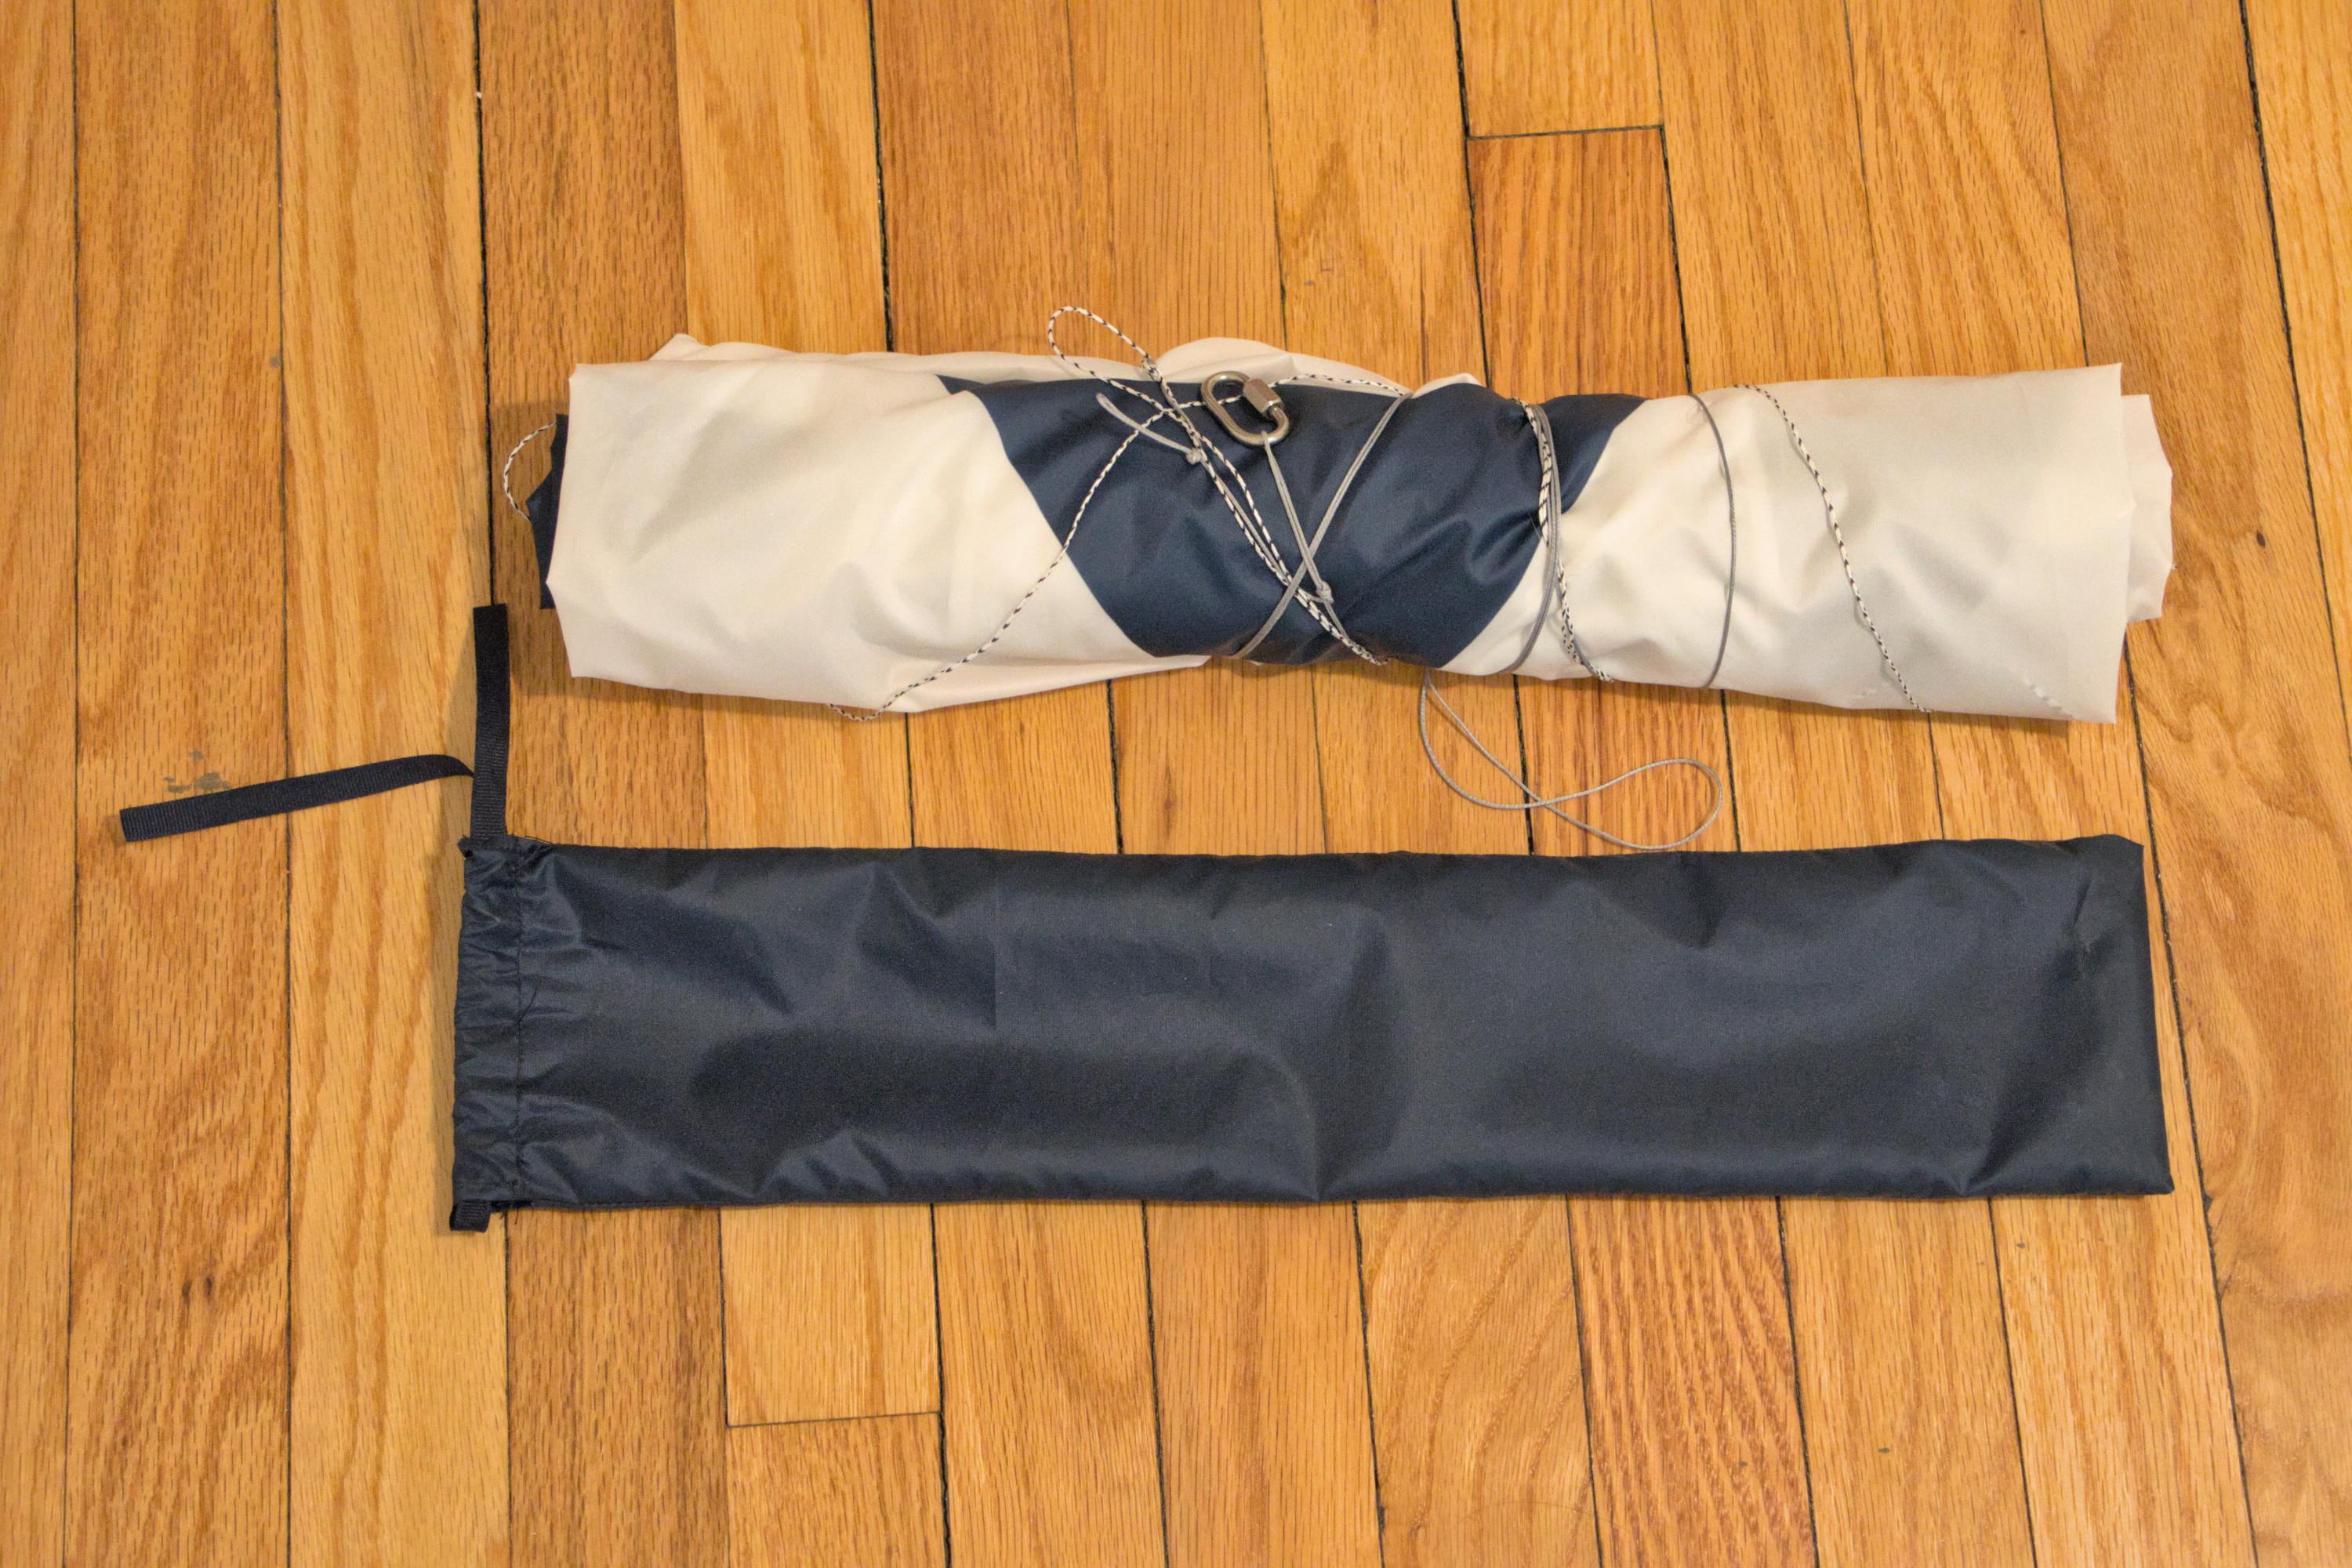
To pack up the kite, the bow line assemblies are untensioned and removed, the spine spar is removed, and the spreader spars are folded but left attached to the bridle and centered between the grommets. The kite is then folded over the folded spreader spars, the tail is tucked in, the kite is rolled with the folded spine spar (and spreader spars) inside, and the remainder of the bridle is wrapped around the rolled kite. The rolled kite is then placed in its bag, and the bow line assemblies are placed in a separate bag.
The kite had no problems with the cold—although I can’t say the same thing about my fingers when flying it, particularly when I needed to take off my gloves to deal with the camera—so it was a success in that regard. However, in retrospect, a parafoil would have probably been a better option, since there were significantly more days with clear skies and good visibility with wind speeds too fast for this kite than there were days where the wind speed was in this kite’s ideal range. During the two months I was at the Pole, the wind speed was in the 4–5 m/s ideal range only around 20% of the time13 and even less time when the skies were also clear. During the same period, the wind was in the 4–7 m/s range, which should work for a parafoil kite, around 50% of the time; while a parafoil kite could work at even higher wind speeds, there is frequently blowing snow obstructing visibility at that point. The spreader spars on this kite appear to be significantly stiffer than what I’ve seen in videos of similar kites, and I suspect that may have hurt its stability in higher winds, since the kite can’t flex to bleed off the extra force from the wind. Furthermore, this kite required a lot more tweaking and adjustment than I would have liked, as my interests lie in aerial photography, not kites; I suspect a commercially-available parafoil kite would require less adjustment.
Details of my camera setup and photos from the kite will follow in a subsequent blog post, as this post is already quite long. I’ve uploaded the design files for this kite, although I know very little about kites, and this kite only worked well in a very narrow wind speed range, so I’m not sure I’d recommend using them. I’ve also uploaded the design files for the kite reel.
It was recommended as a replacement for a similar parafoil kite that had also been discontinued, two decades ago. ↩
But only if adjusted correctly, which turned out to be an issue. ↩
There is even a design that was previously used in Antarctica. ↩
Since the joints are the weakest point, it is recommended to avoid having the spreaders cross the spine at a joint on either spar. ↩
The edges of these should have been folded over to prevent tearout, which I later had to fix. ↩
The cutoff lengths of aluminum tube came in handy as handles to pull on the loop on the end of the braided line without the quick link when bending the spreaders; the quick link served as the second handle. ↩
Also referred to as UHMWPE, Dyneema, or Spectra. ↩
When I first ordered the line, the seller provided a fraudulent USPS tracking number and instead shipped the item from China, despite what the listing said. During the refund process, the seller tried to get me to contact them outside eBay’s messaging system and then tried to get me to pay for return shipping with the promise of reimbursement, which I assume wouldn’t have happened. When I insisted that they send me a shipping label, they instead processed the refund without having me return the item. ↩
I did not verify the length, so I don’t know if the seller also lied about it. ↩
Including one where I cut my chin open on the laser-cut aluminum edge of the kite reel and needed stitches; I started wearing a neck gaiter while flying the kite after that. ↩
It’s also difficult to look up with the Pole’s extremely-slow and intermittent internet access. ↩
Per SPT’s weather station on DSL. ↩