Three years ago, I entered an Ashley Book of Knots Cake into the Johns Hopkins University Sheridan Libraries’ third annual Edible Book Festival. For this year’s contest, I figured I could apply my 3D-printed Hilbert curve microwave absorber research to craft a cake for Hans Sagan’s Space-Filling Curves book1 on the eponymous topic. Thus began an endeavor involving thermoplastic, silicone, and sugar.
I saw two ways to make a cake shaped as a Hilbert curve, using an appropriately shaped baking mold or painstakingly carving the appropriate shape out of a baked cake, with the former option being the logical path to pursue. This raised the question, how does one create such a mold? Baking molds are generally either metal or silicone, with silicone having the distinct advantage of being much easier to work with for such a shape, since it can be cast at room temperature. Thus, one needs to create a mold with which to cast the silicone baking mold. Fortunately, 3D-printing is well suited for this, and I already had experience 3D-printing Hilbert curve geometries.
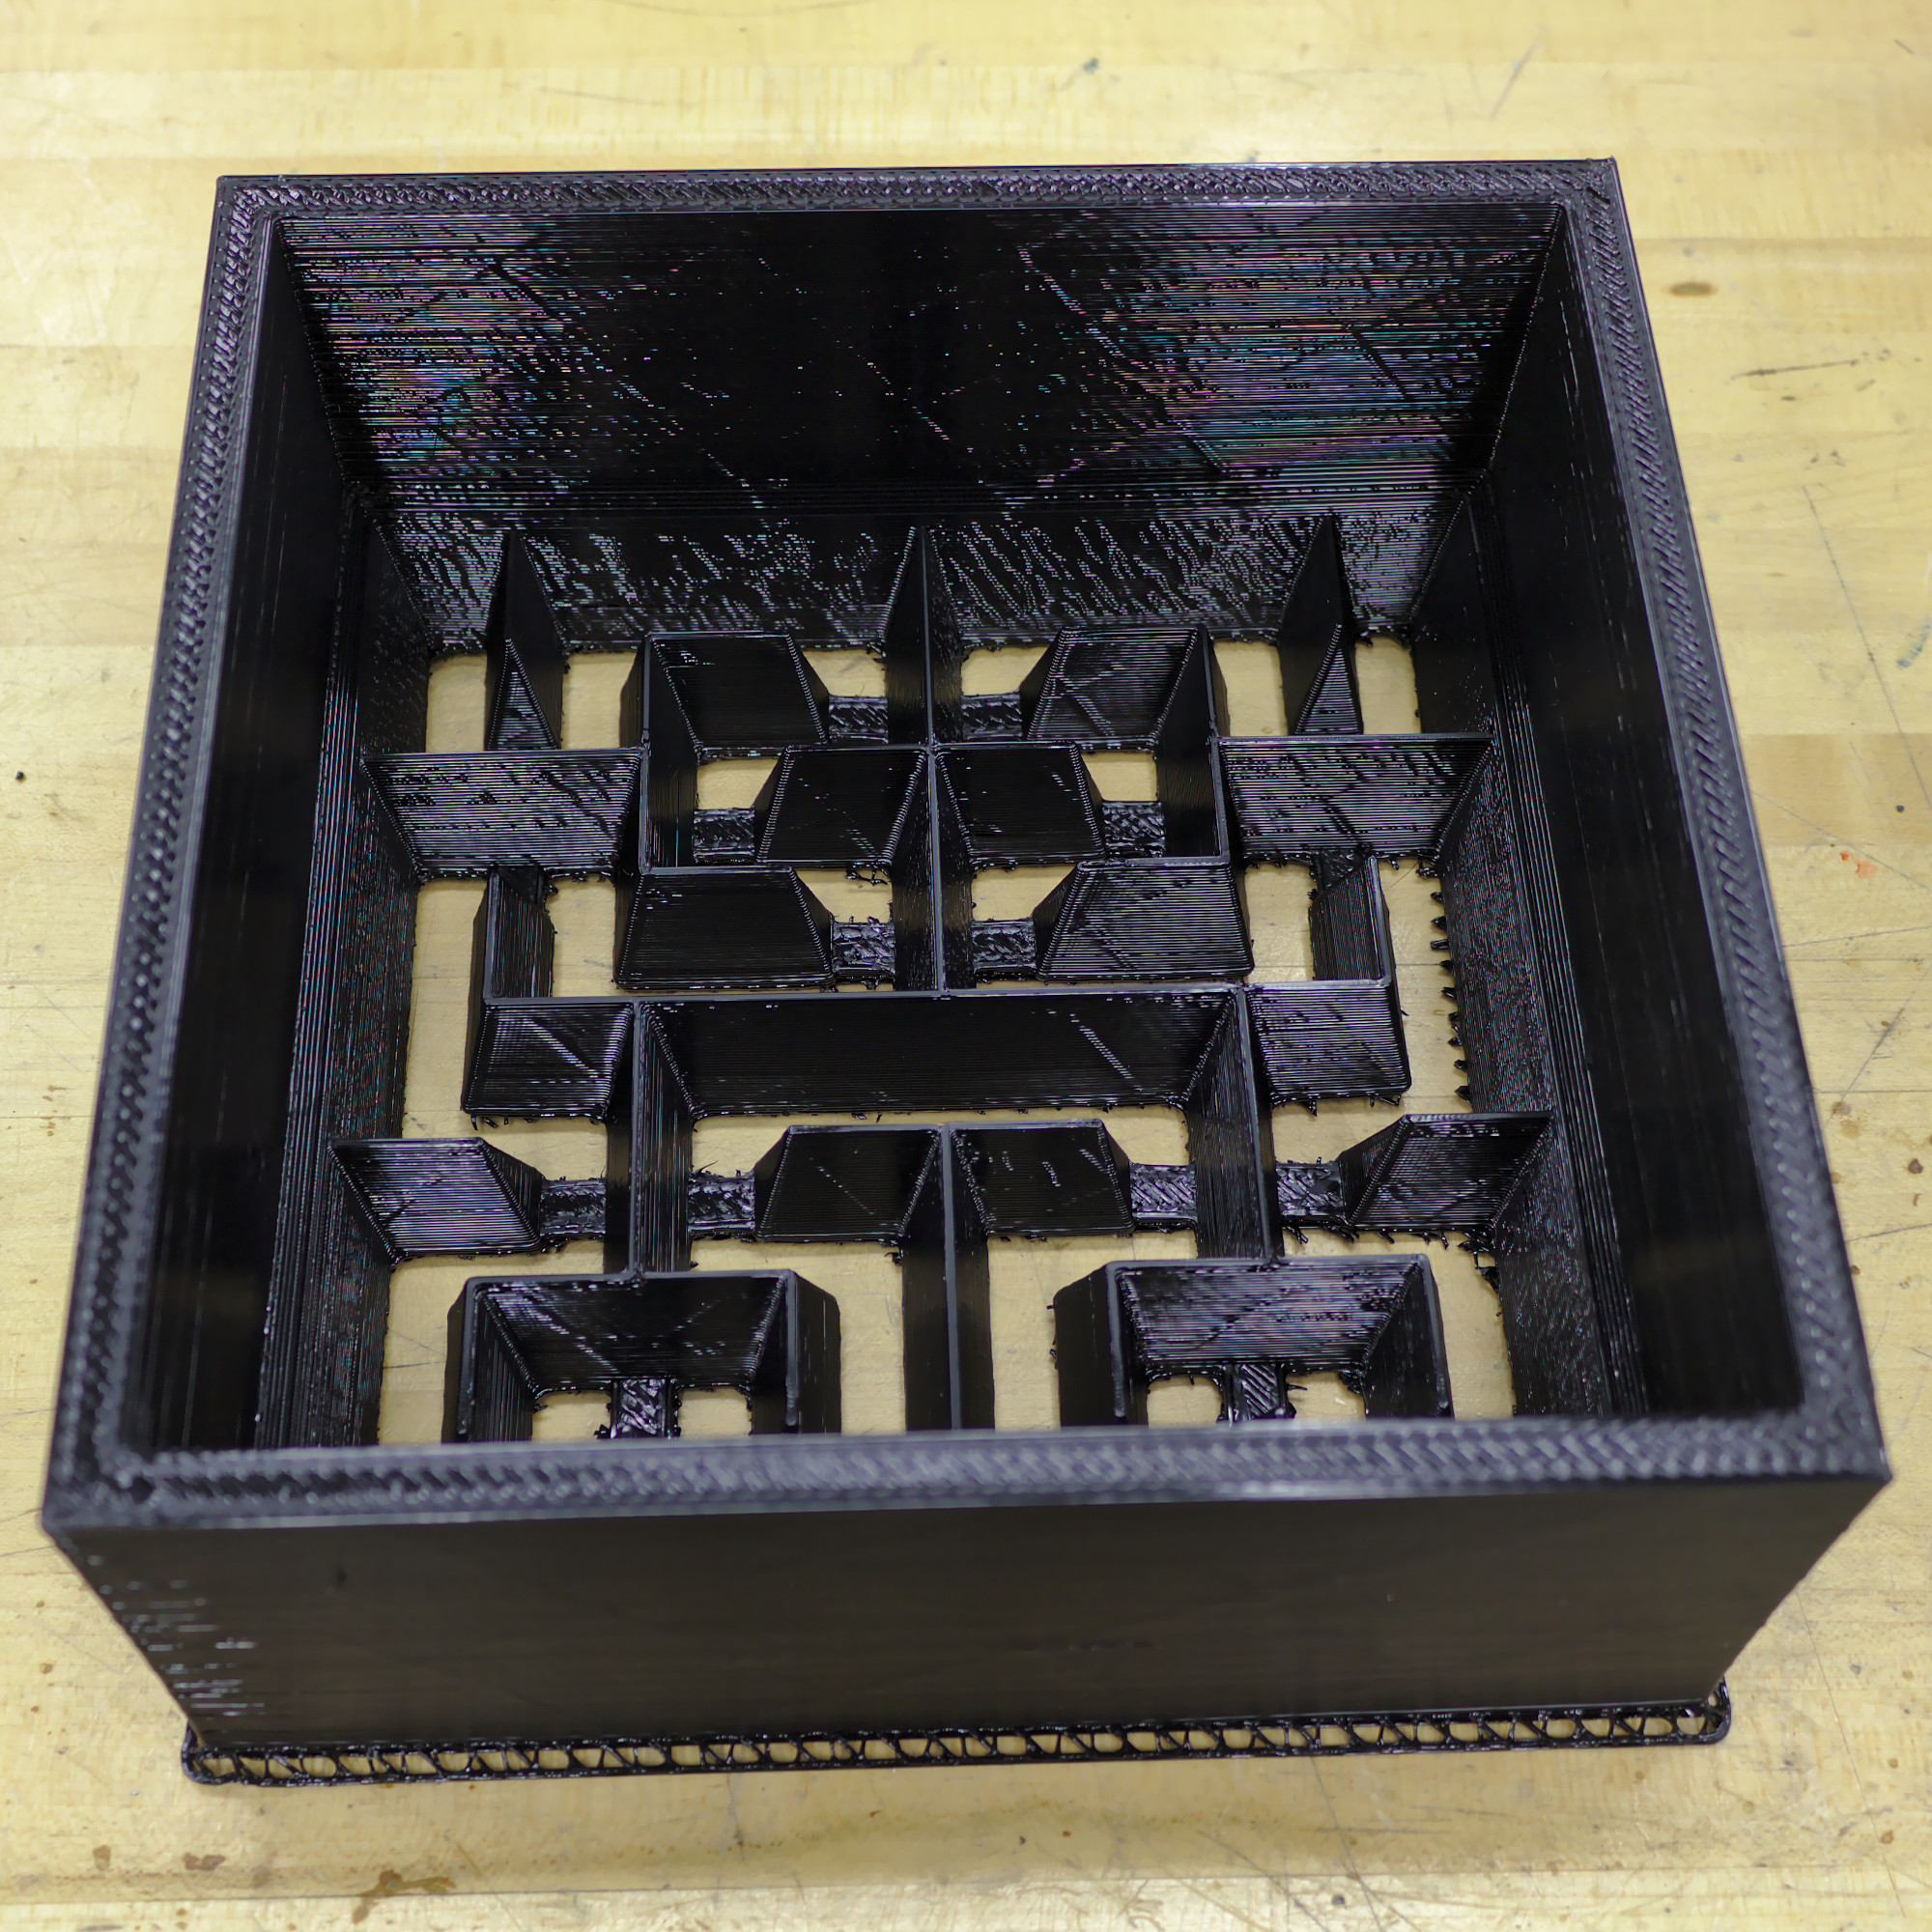
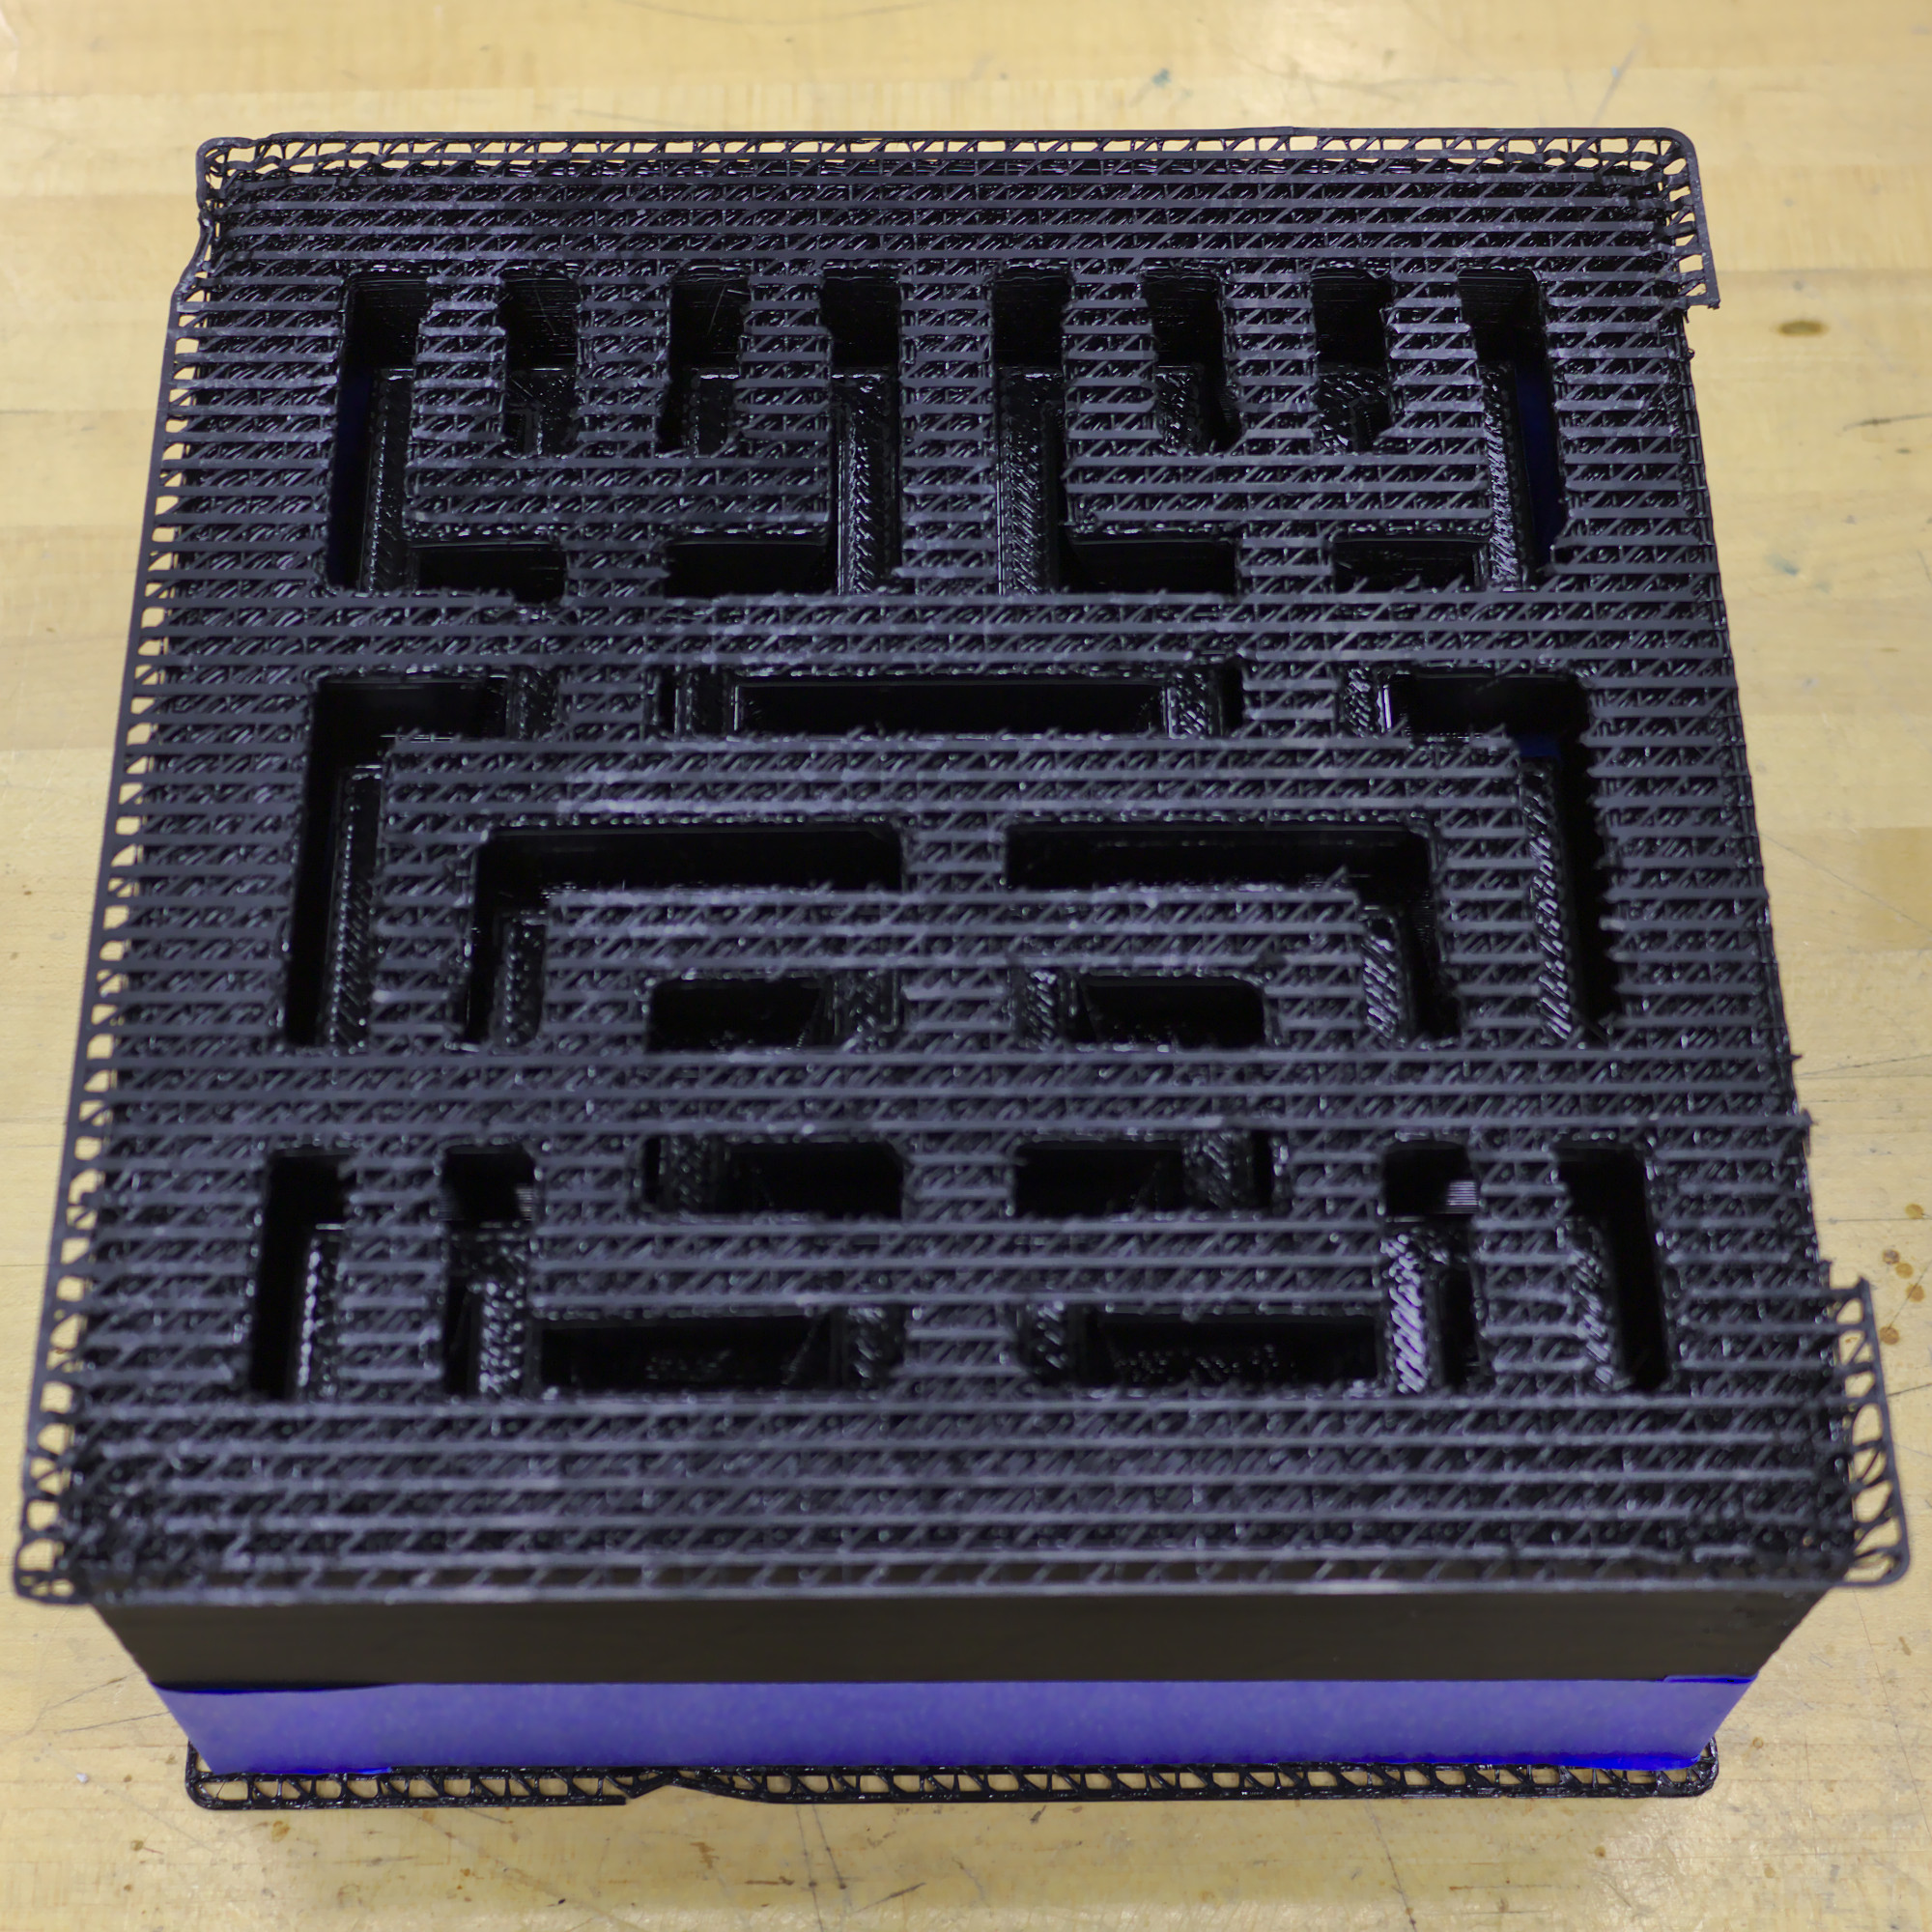
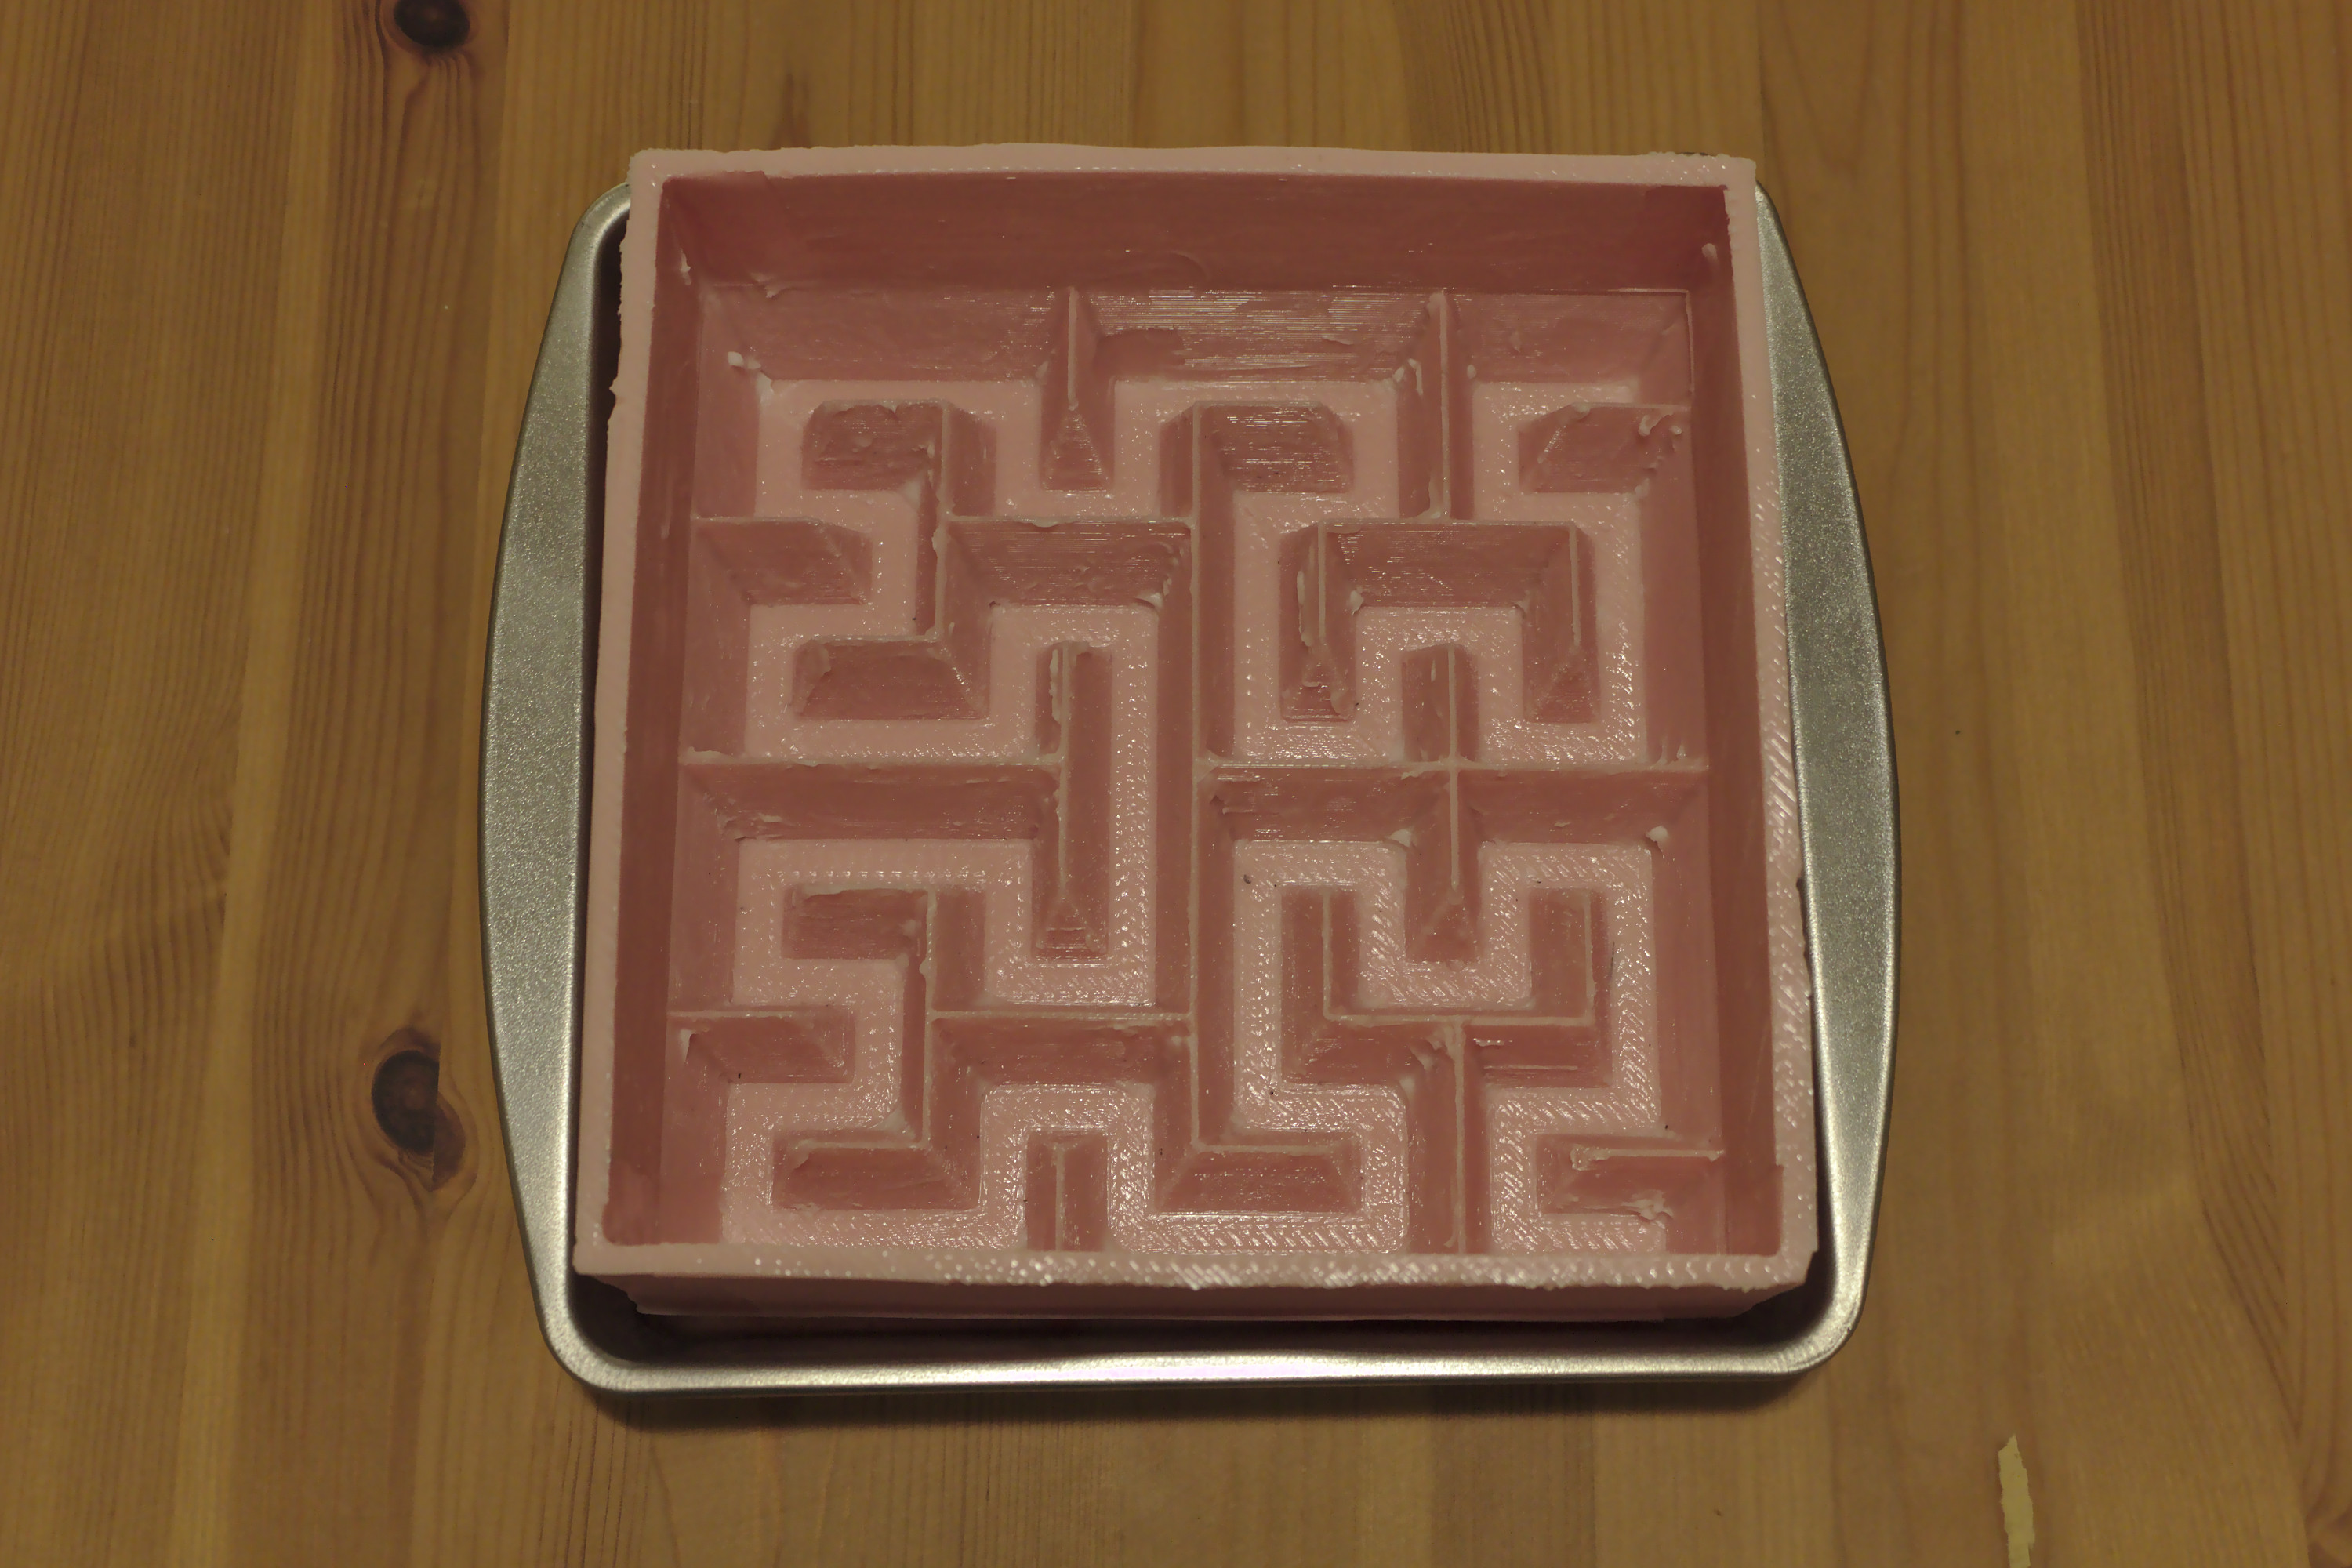
Starting from my existing Hilbert Curve solid models, I designed a two-part mold for a third-order geometric approximation of the Hilbert Curve. Compared to a single-part mold, a two-part mold allows for a thinner silicone wall thickness, which reduces silicone material usage and makes it easier to turn the mold inside-out, a necessary step in removing the eventual cake from the baking mold. This mold was printed from PETG—for no particular reason besides having it around—on a Lulzbot TAZ 6 printer; as the mold is rather large, a printer with a large build volume is necessary. A 1.2 mm nozzle was used to reduce the printing time, a single wall extrusion2 and 10% infill were used to reduce material usage, and a raft was printed below the part to aid with removal from the printer’s bed. When generating the G-code, a solid layer was added just below the Hilbert curve geometry to ensure that it would print correctly with the low infill percentage.
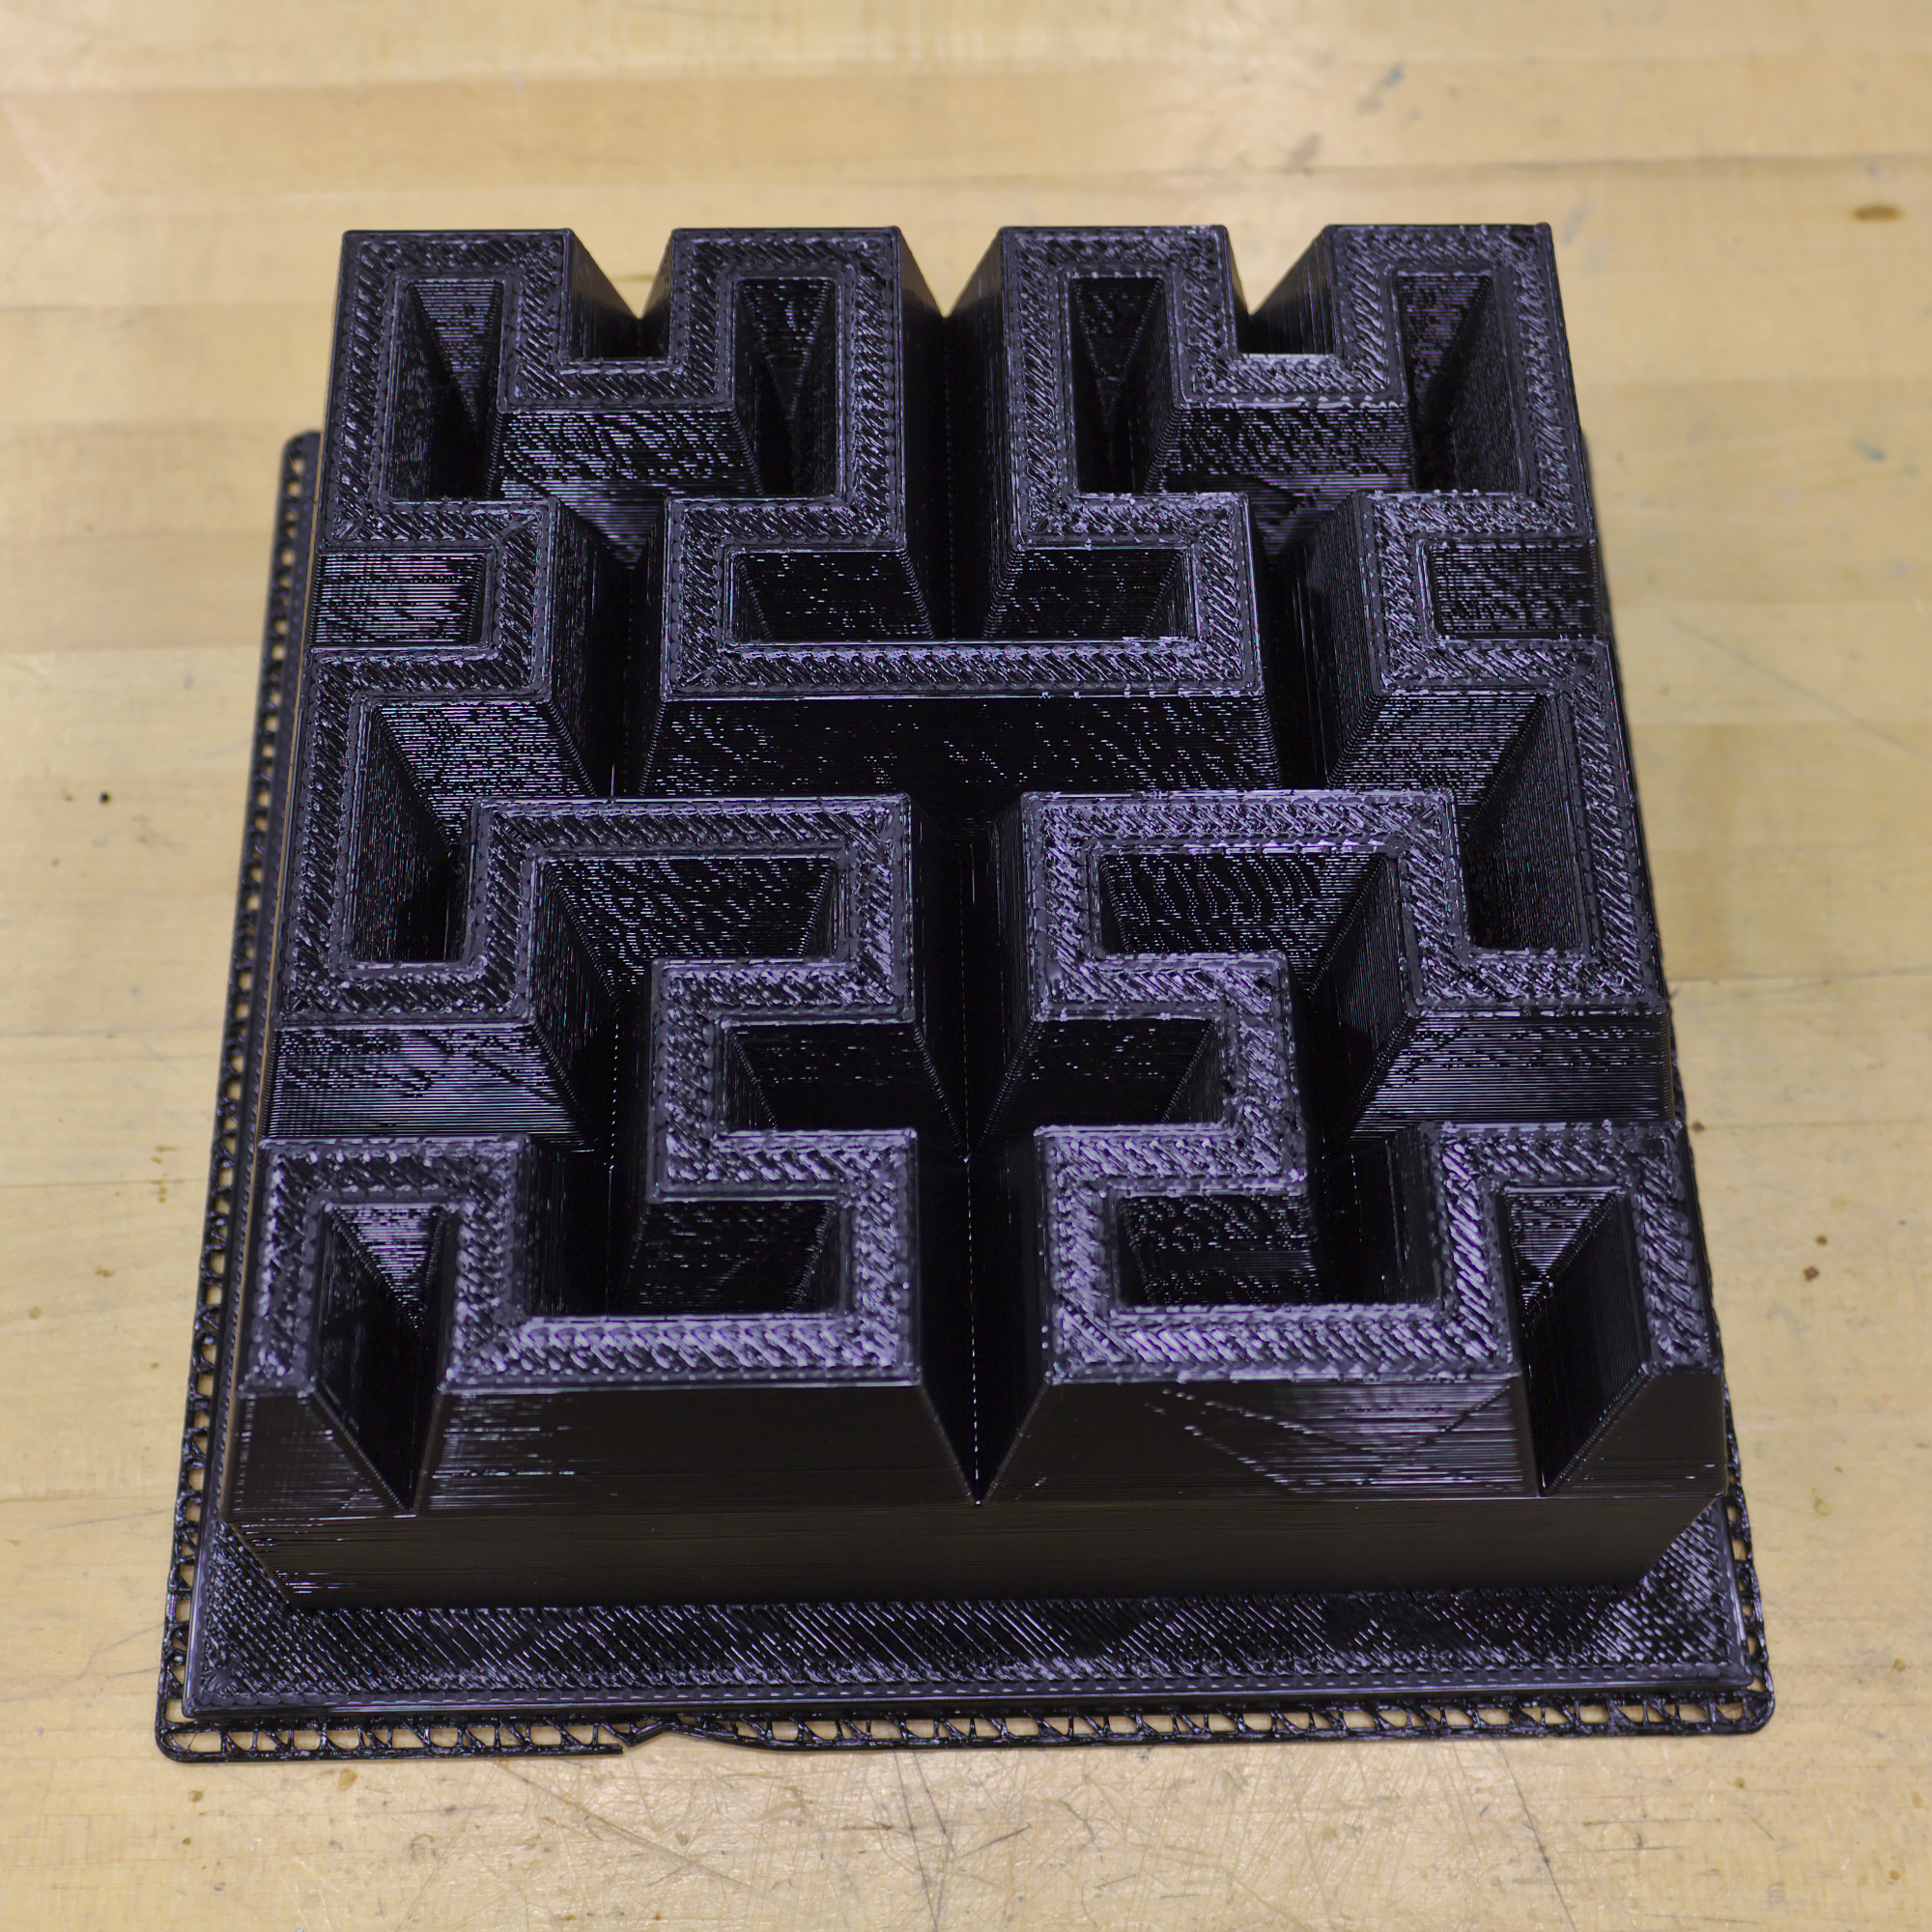
Once the mold was assembled, 1 kg of food-safe silicone3 was mixed, vacuum degassed, poured into the mold, and allowed to cure.

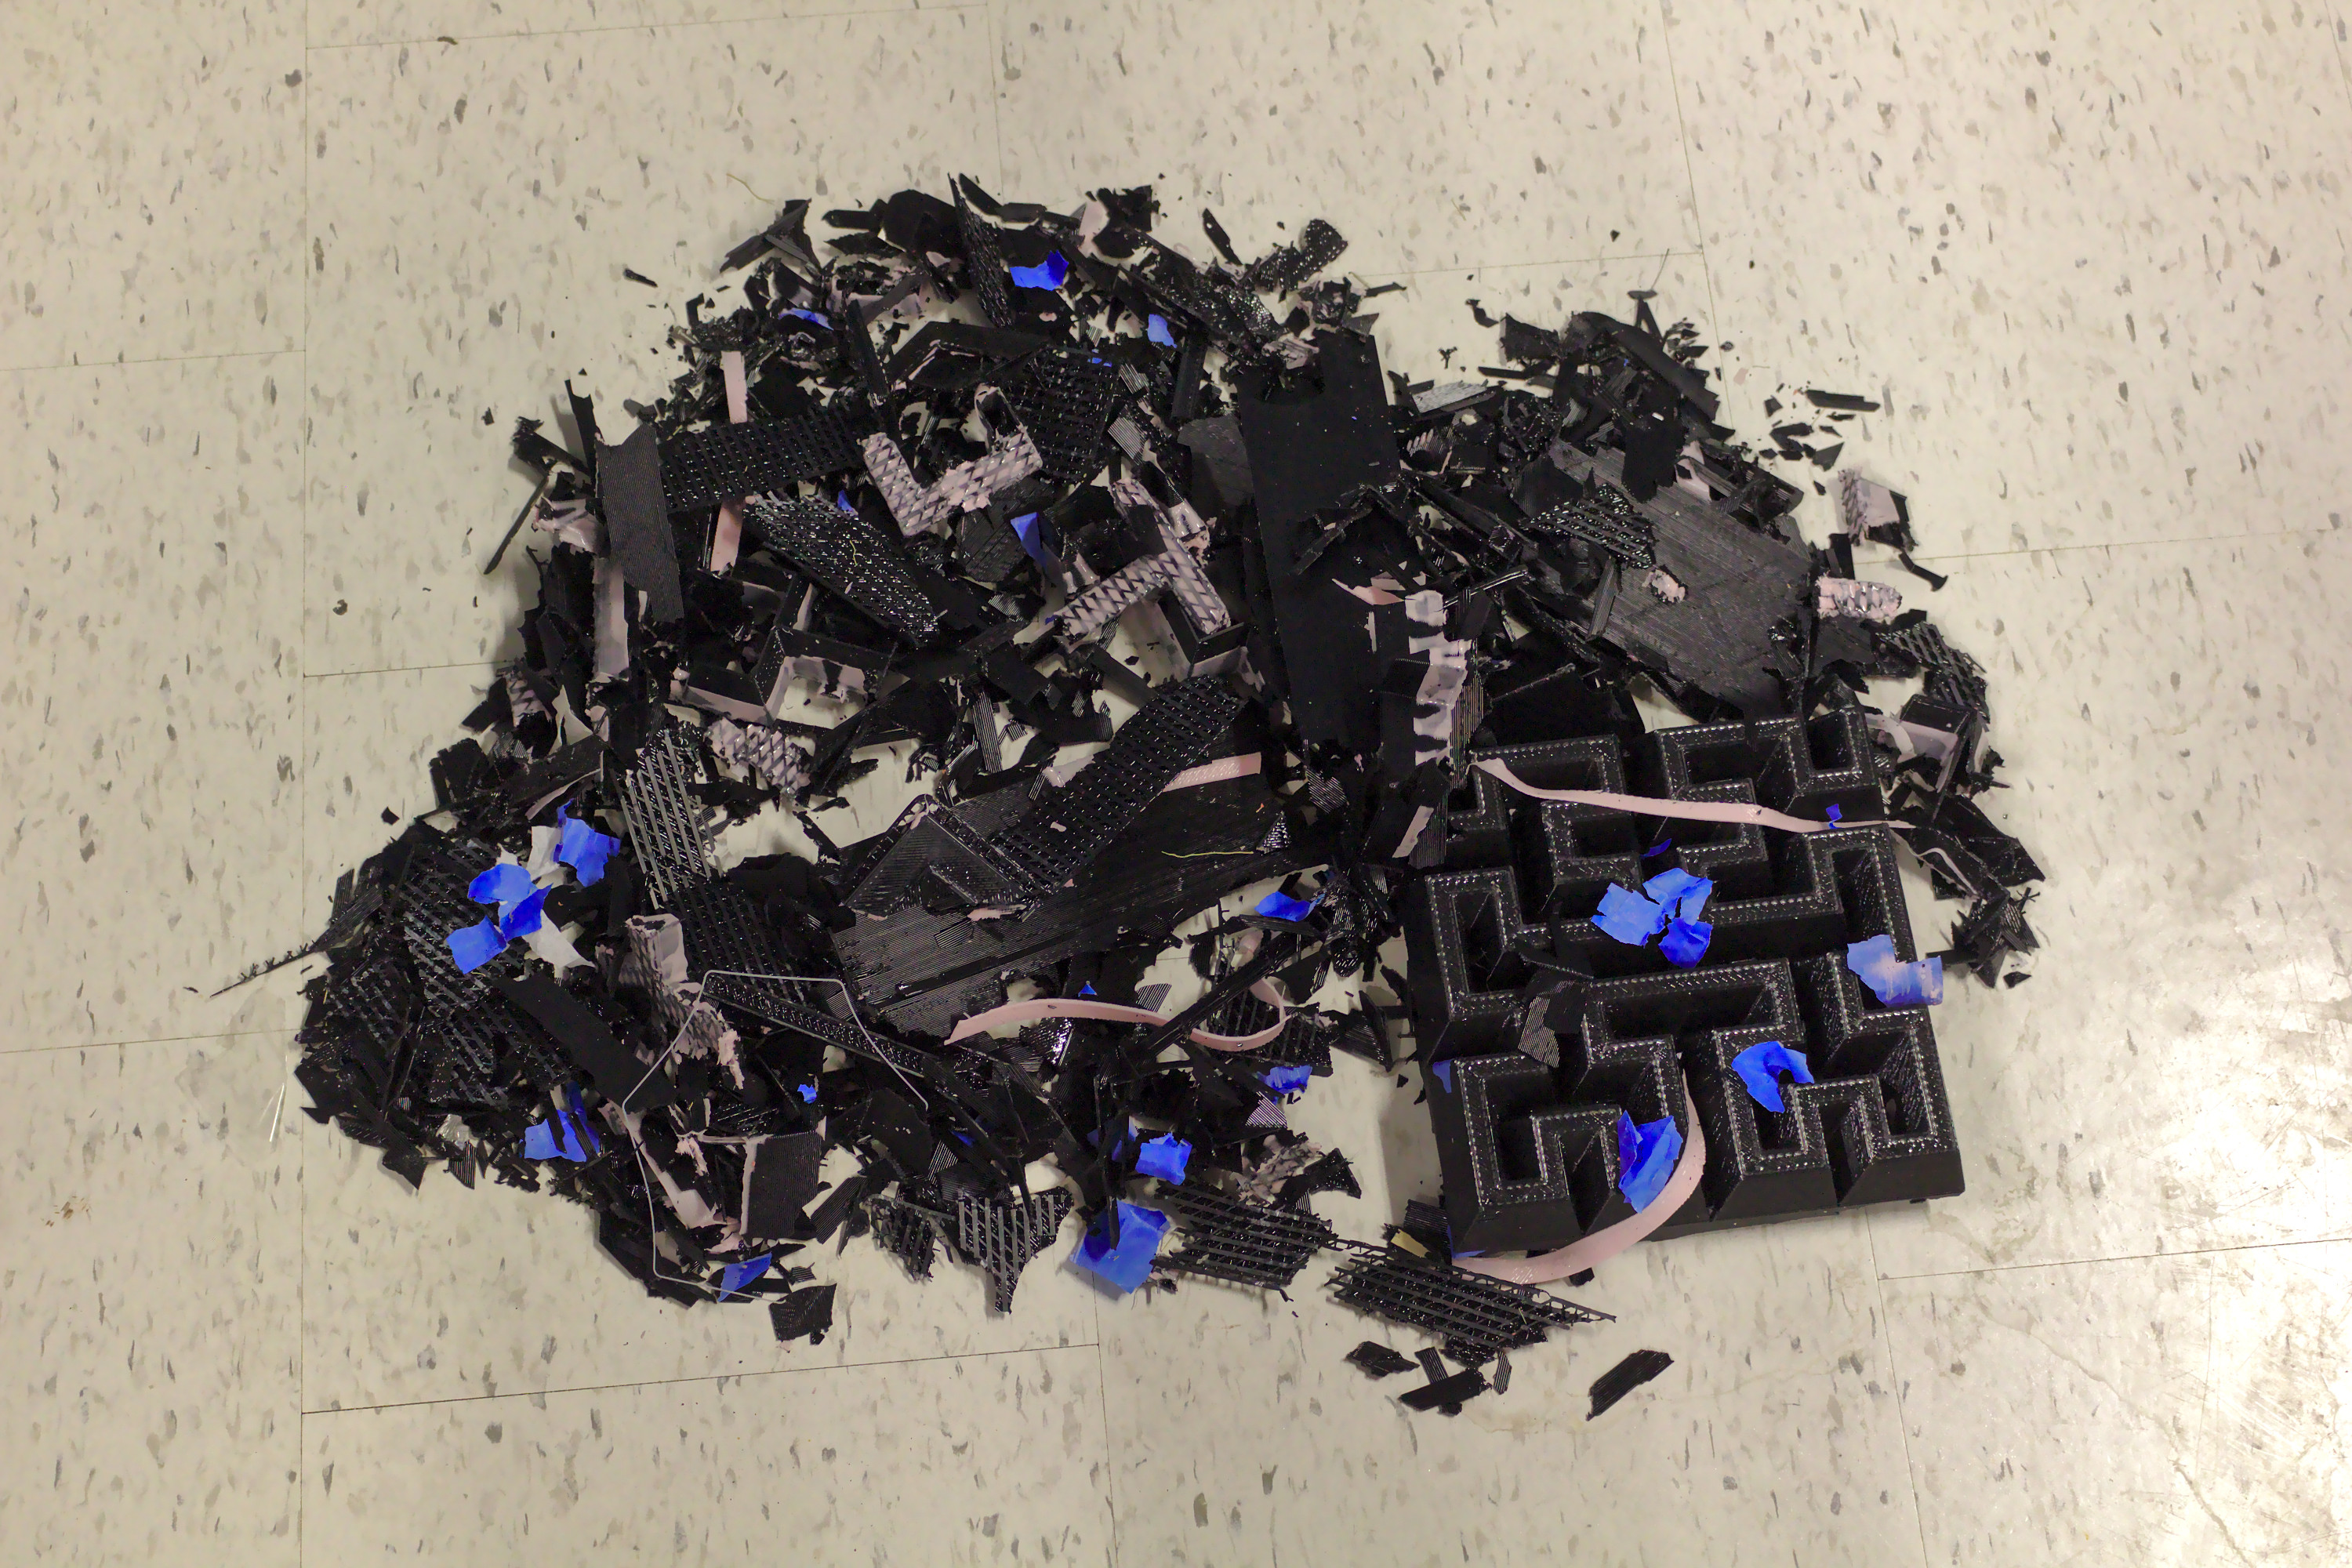
While I had hoped that the two-part plastic mold would allow the silicone mold to be easily removed once it had cured, this was an incredibly naive notion. After all attempts to carefully disassemble the plastic mold and remove the cured silicone failed, I ended up smashing the plastic mold to bits in order to free the silicone mold.4
I then thoroughly washed the silicone mold and was finally ready to begin baking. To increase my chances of success, I decided to use a recipe meant for a Bundt pan, a lemon pound cake.5 The recipe is below, courtesy of my mother.
2.5 cups sugar
1 cup butter
4 eggs
1 teaspoon vanilla extract
0.5 teaspoon lemon extract
1 cup milk
1 tablespoon lemon juice
3 cups flour
0.5 teaspoon baking sodaIn mixing bowl, cream together sugar and butter until light and fluffy. Add eggs one at a time, beating well after each. Stir in vanilla and lemon extracts. Mix lemon juice into milk. Thoroughly sift together the flour and baking soda. Add flour mixture to creamed mixture alternately with milk solution, beating well after each addition. Pour into greased mold.
The silicone baking mold was placed into an 8″ square cake pan for support6 and thoroughly greased with shortening; while silicone baking molds don’t need to be greased, in theory, I decided it was best to do so if I were to have any chance of removing the complicated cake geometry from the mold in one piece.
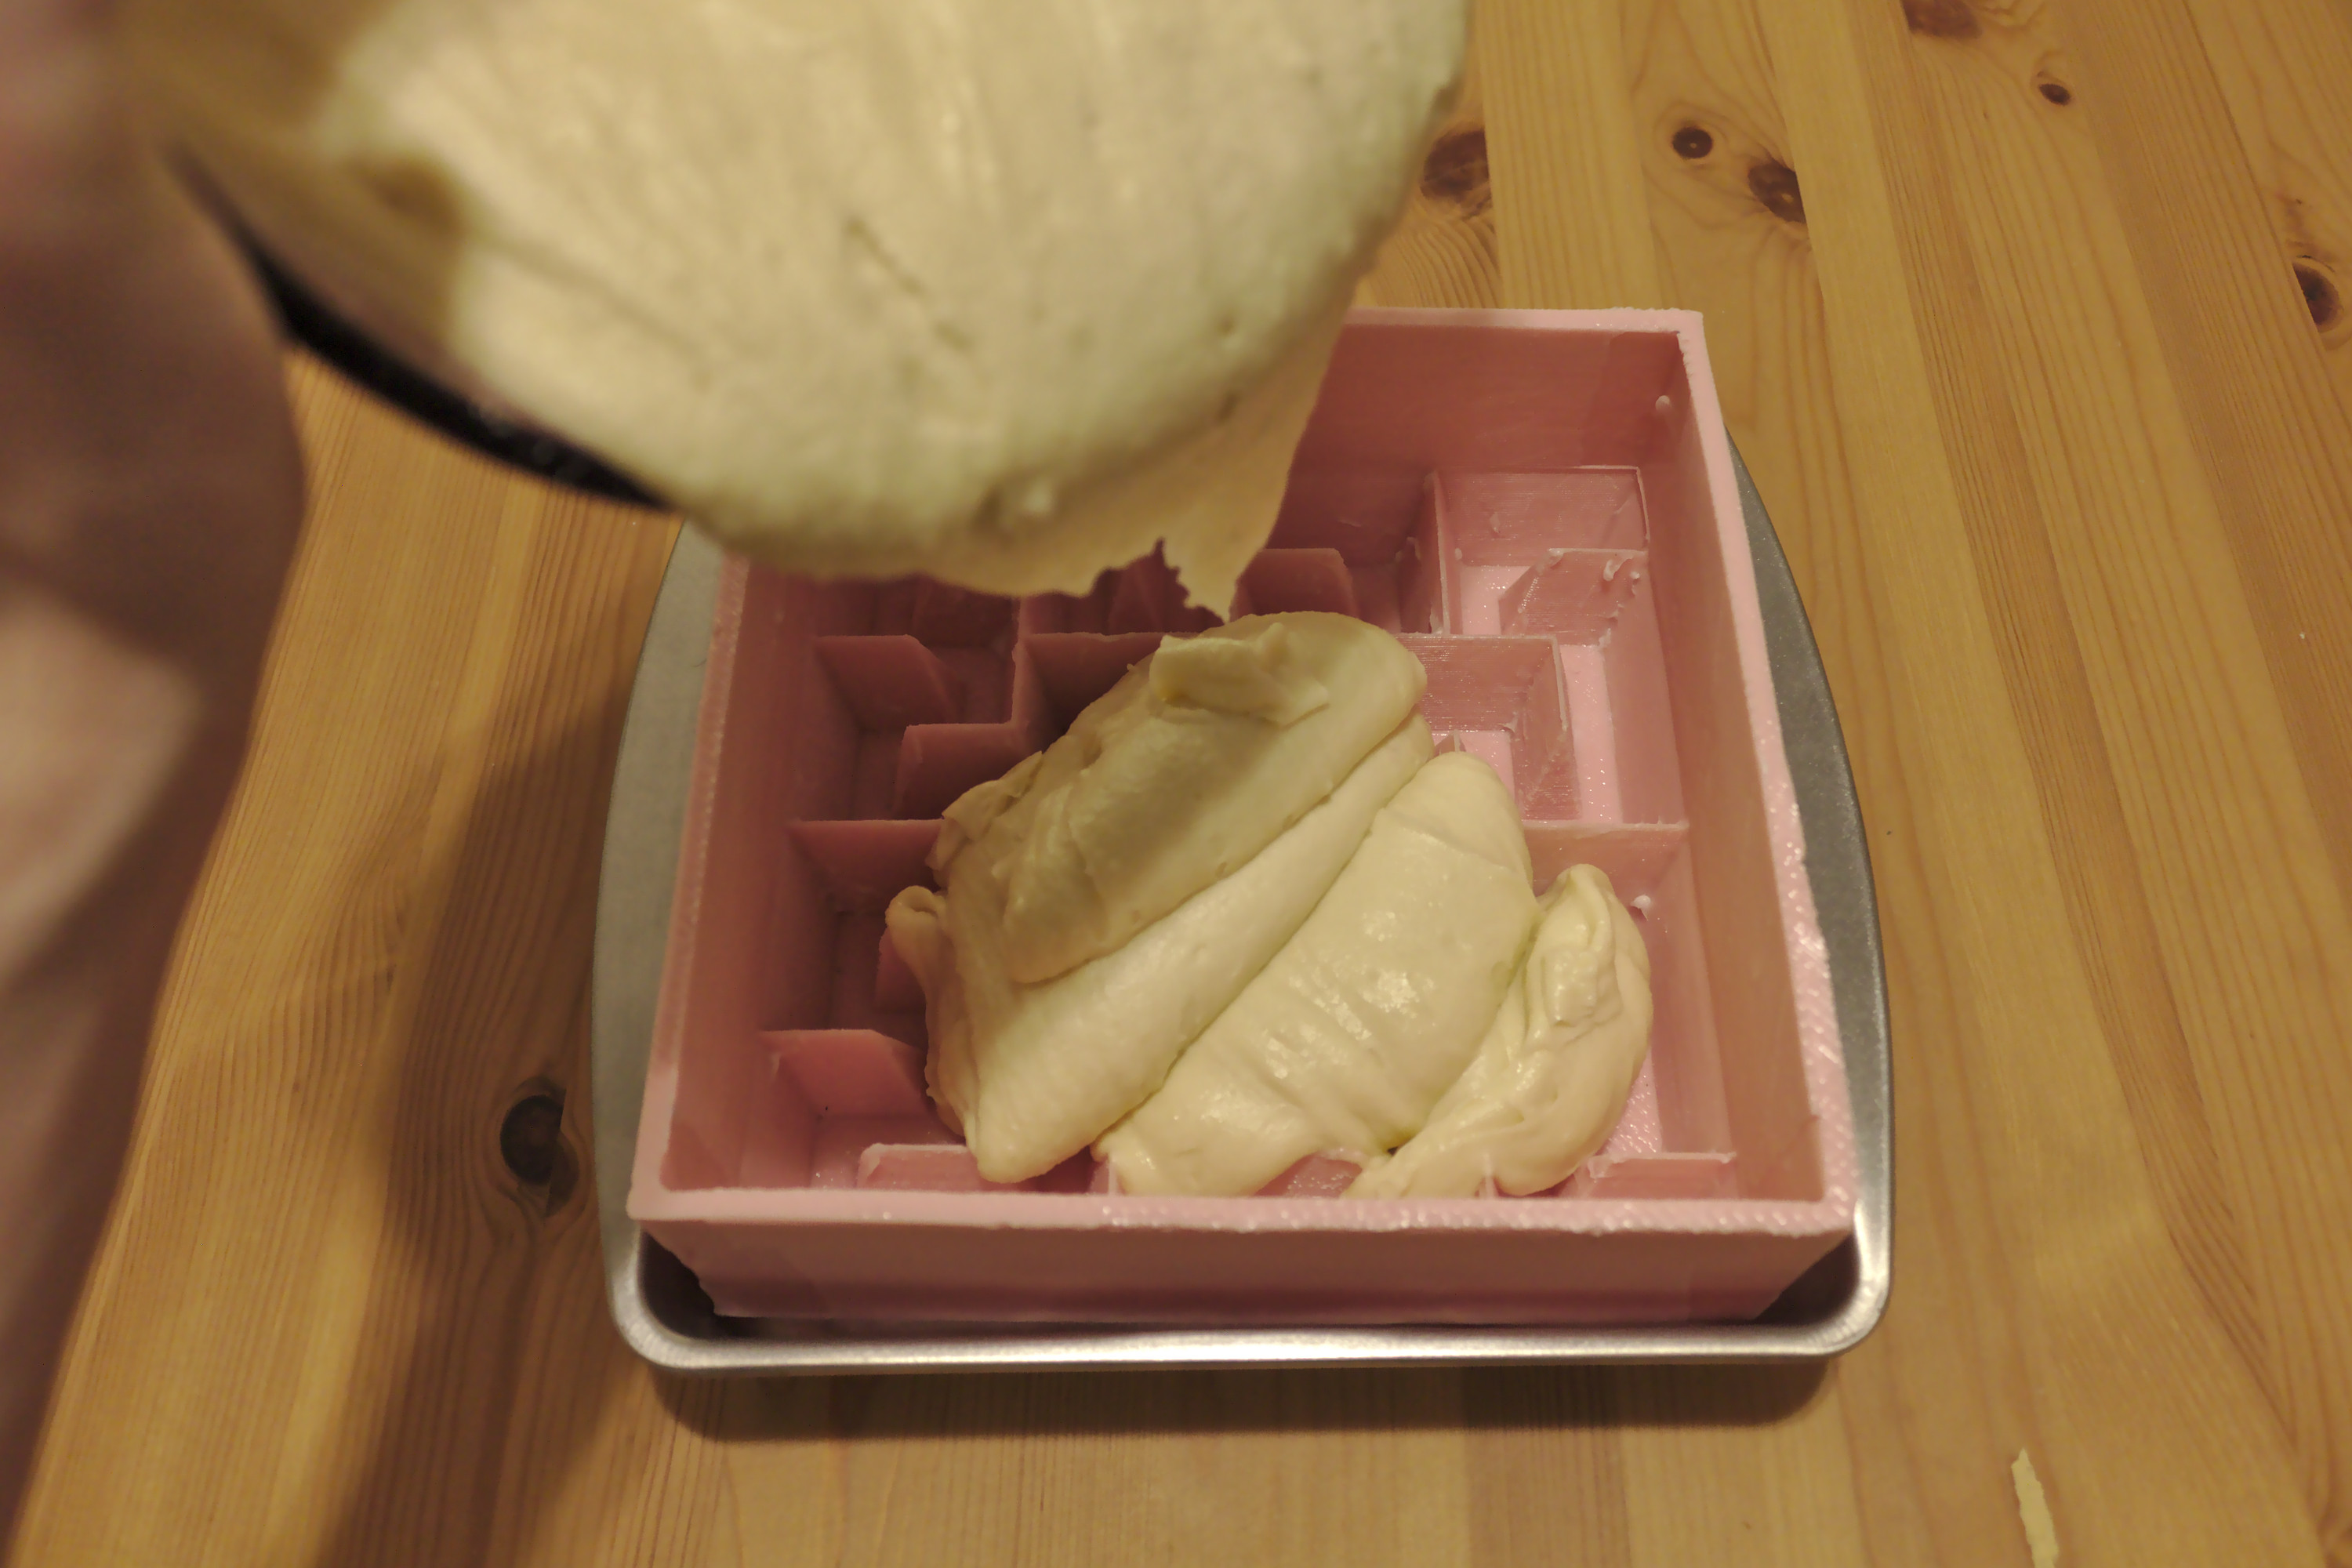

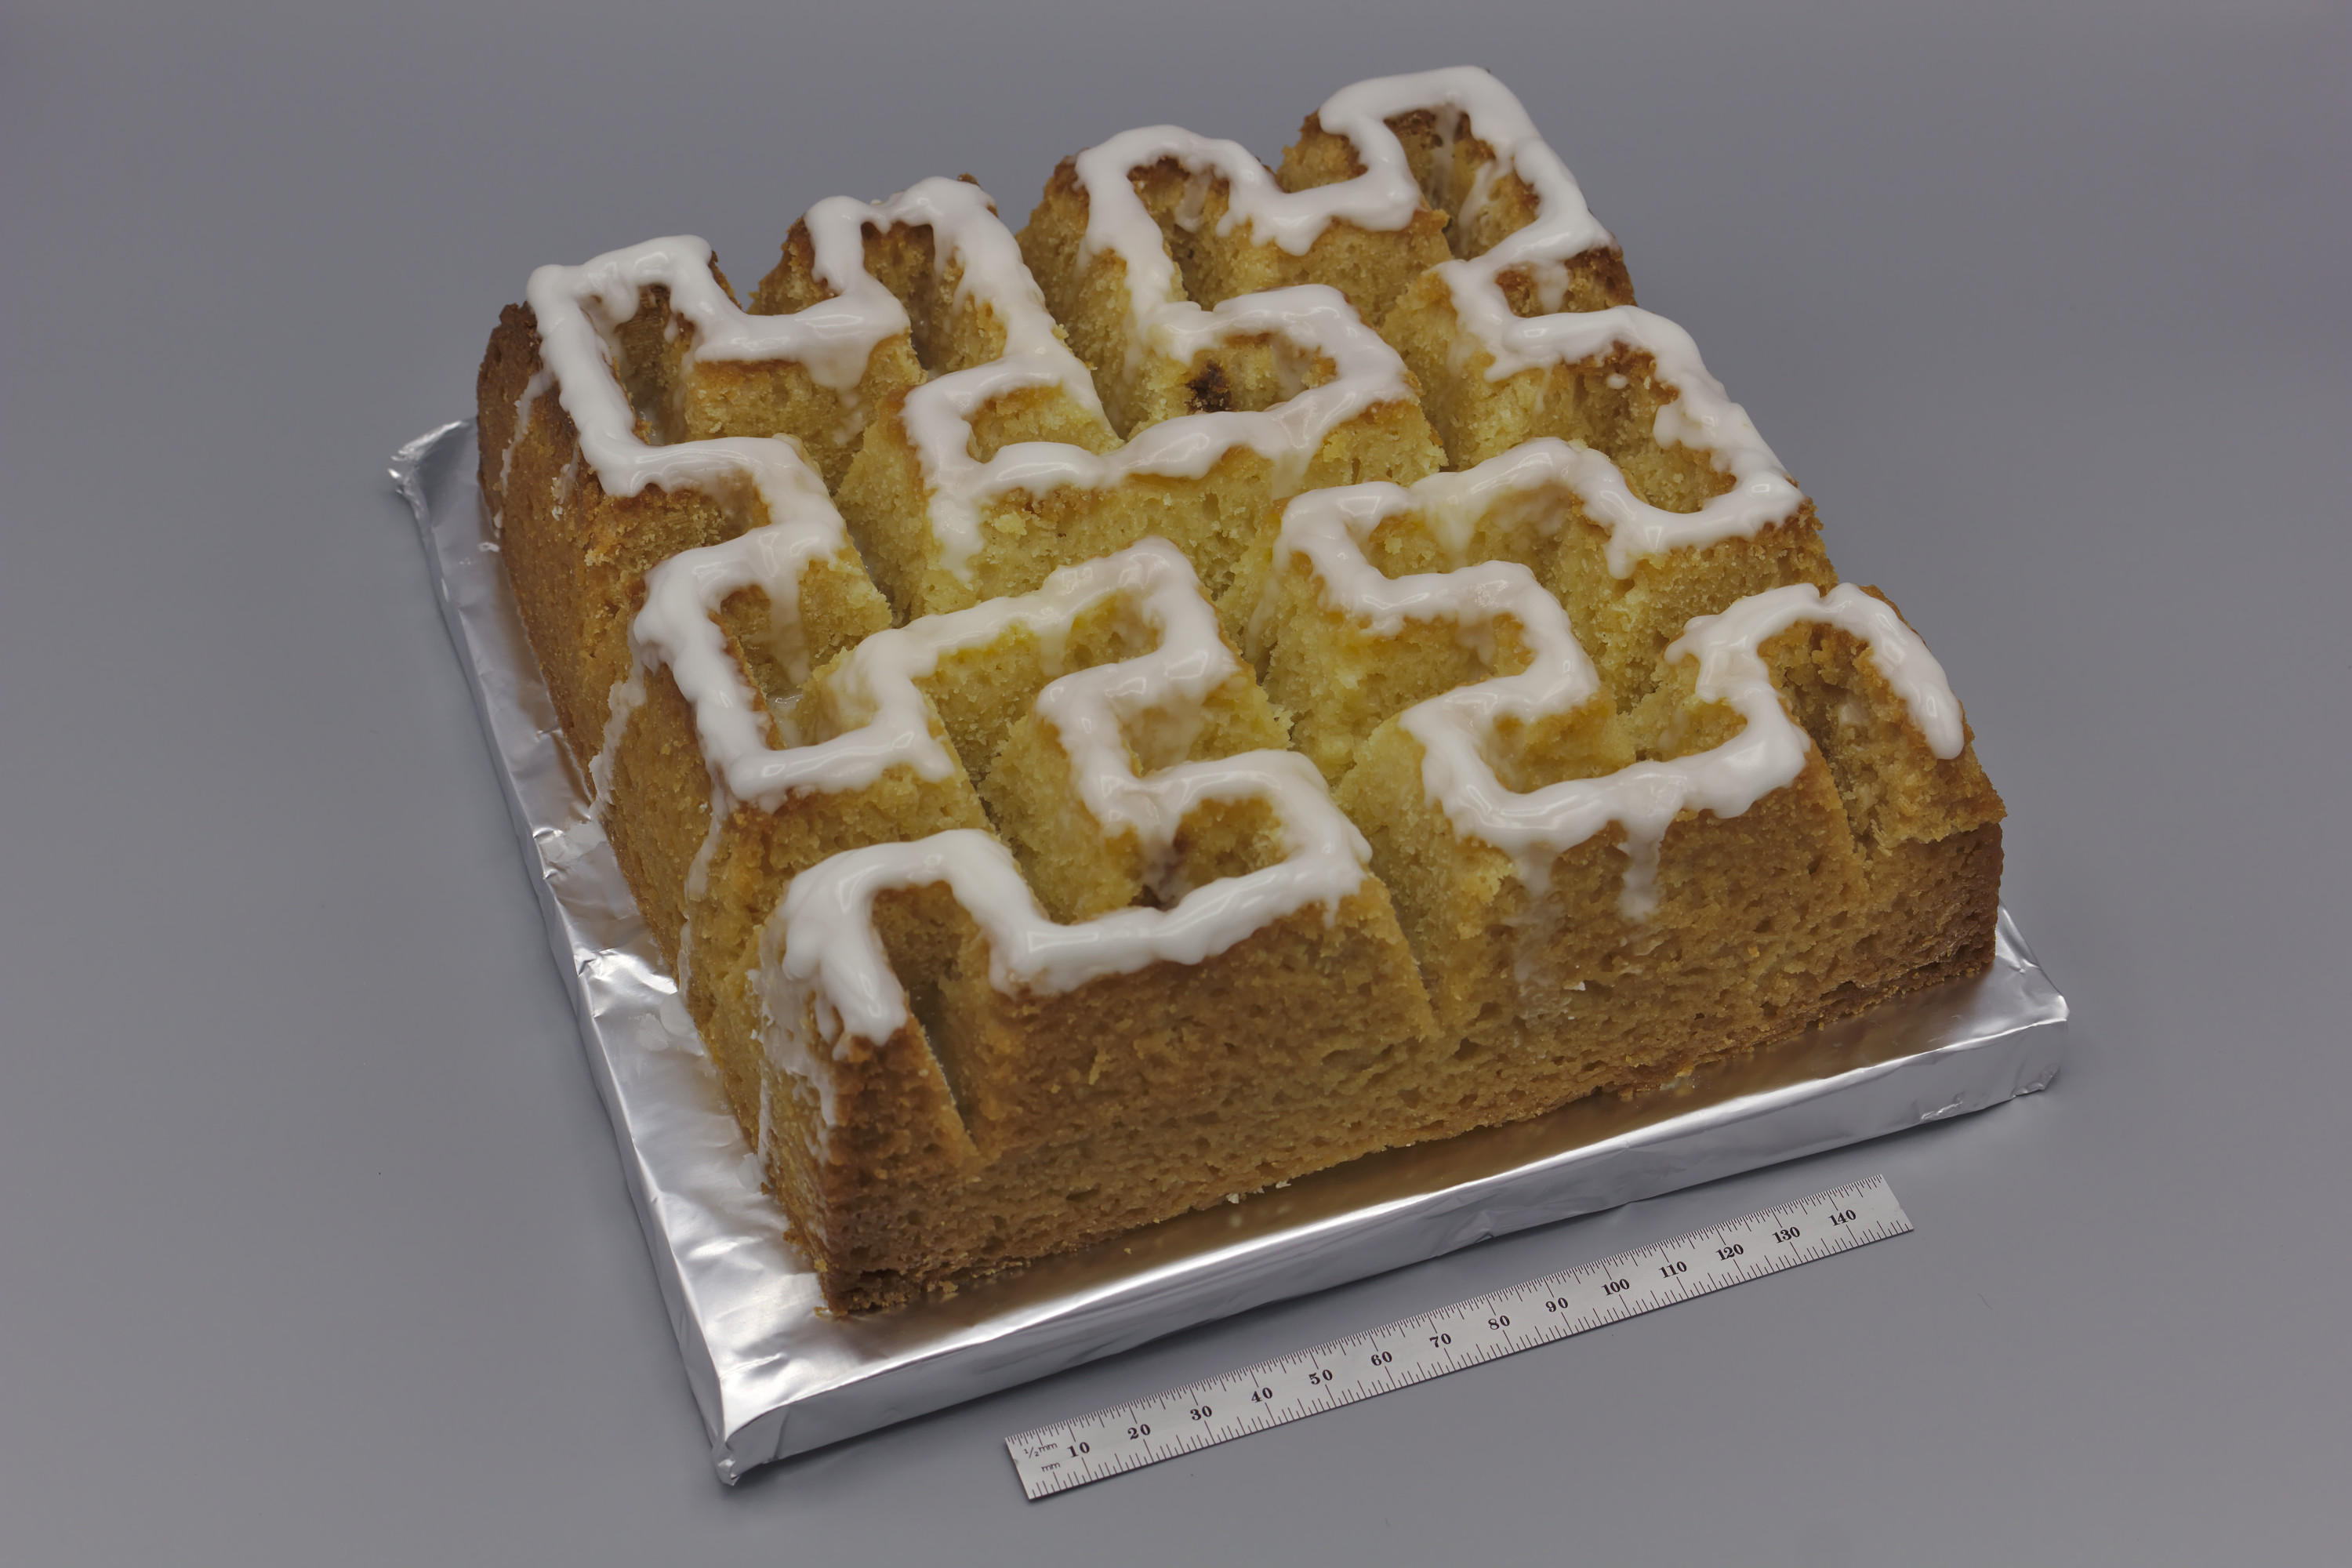
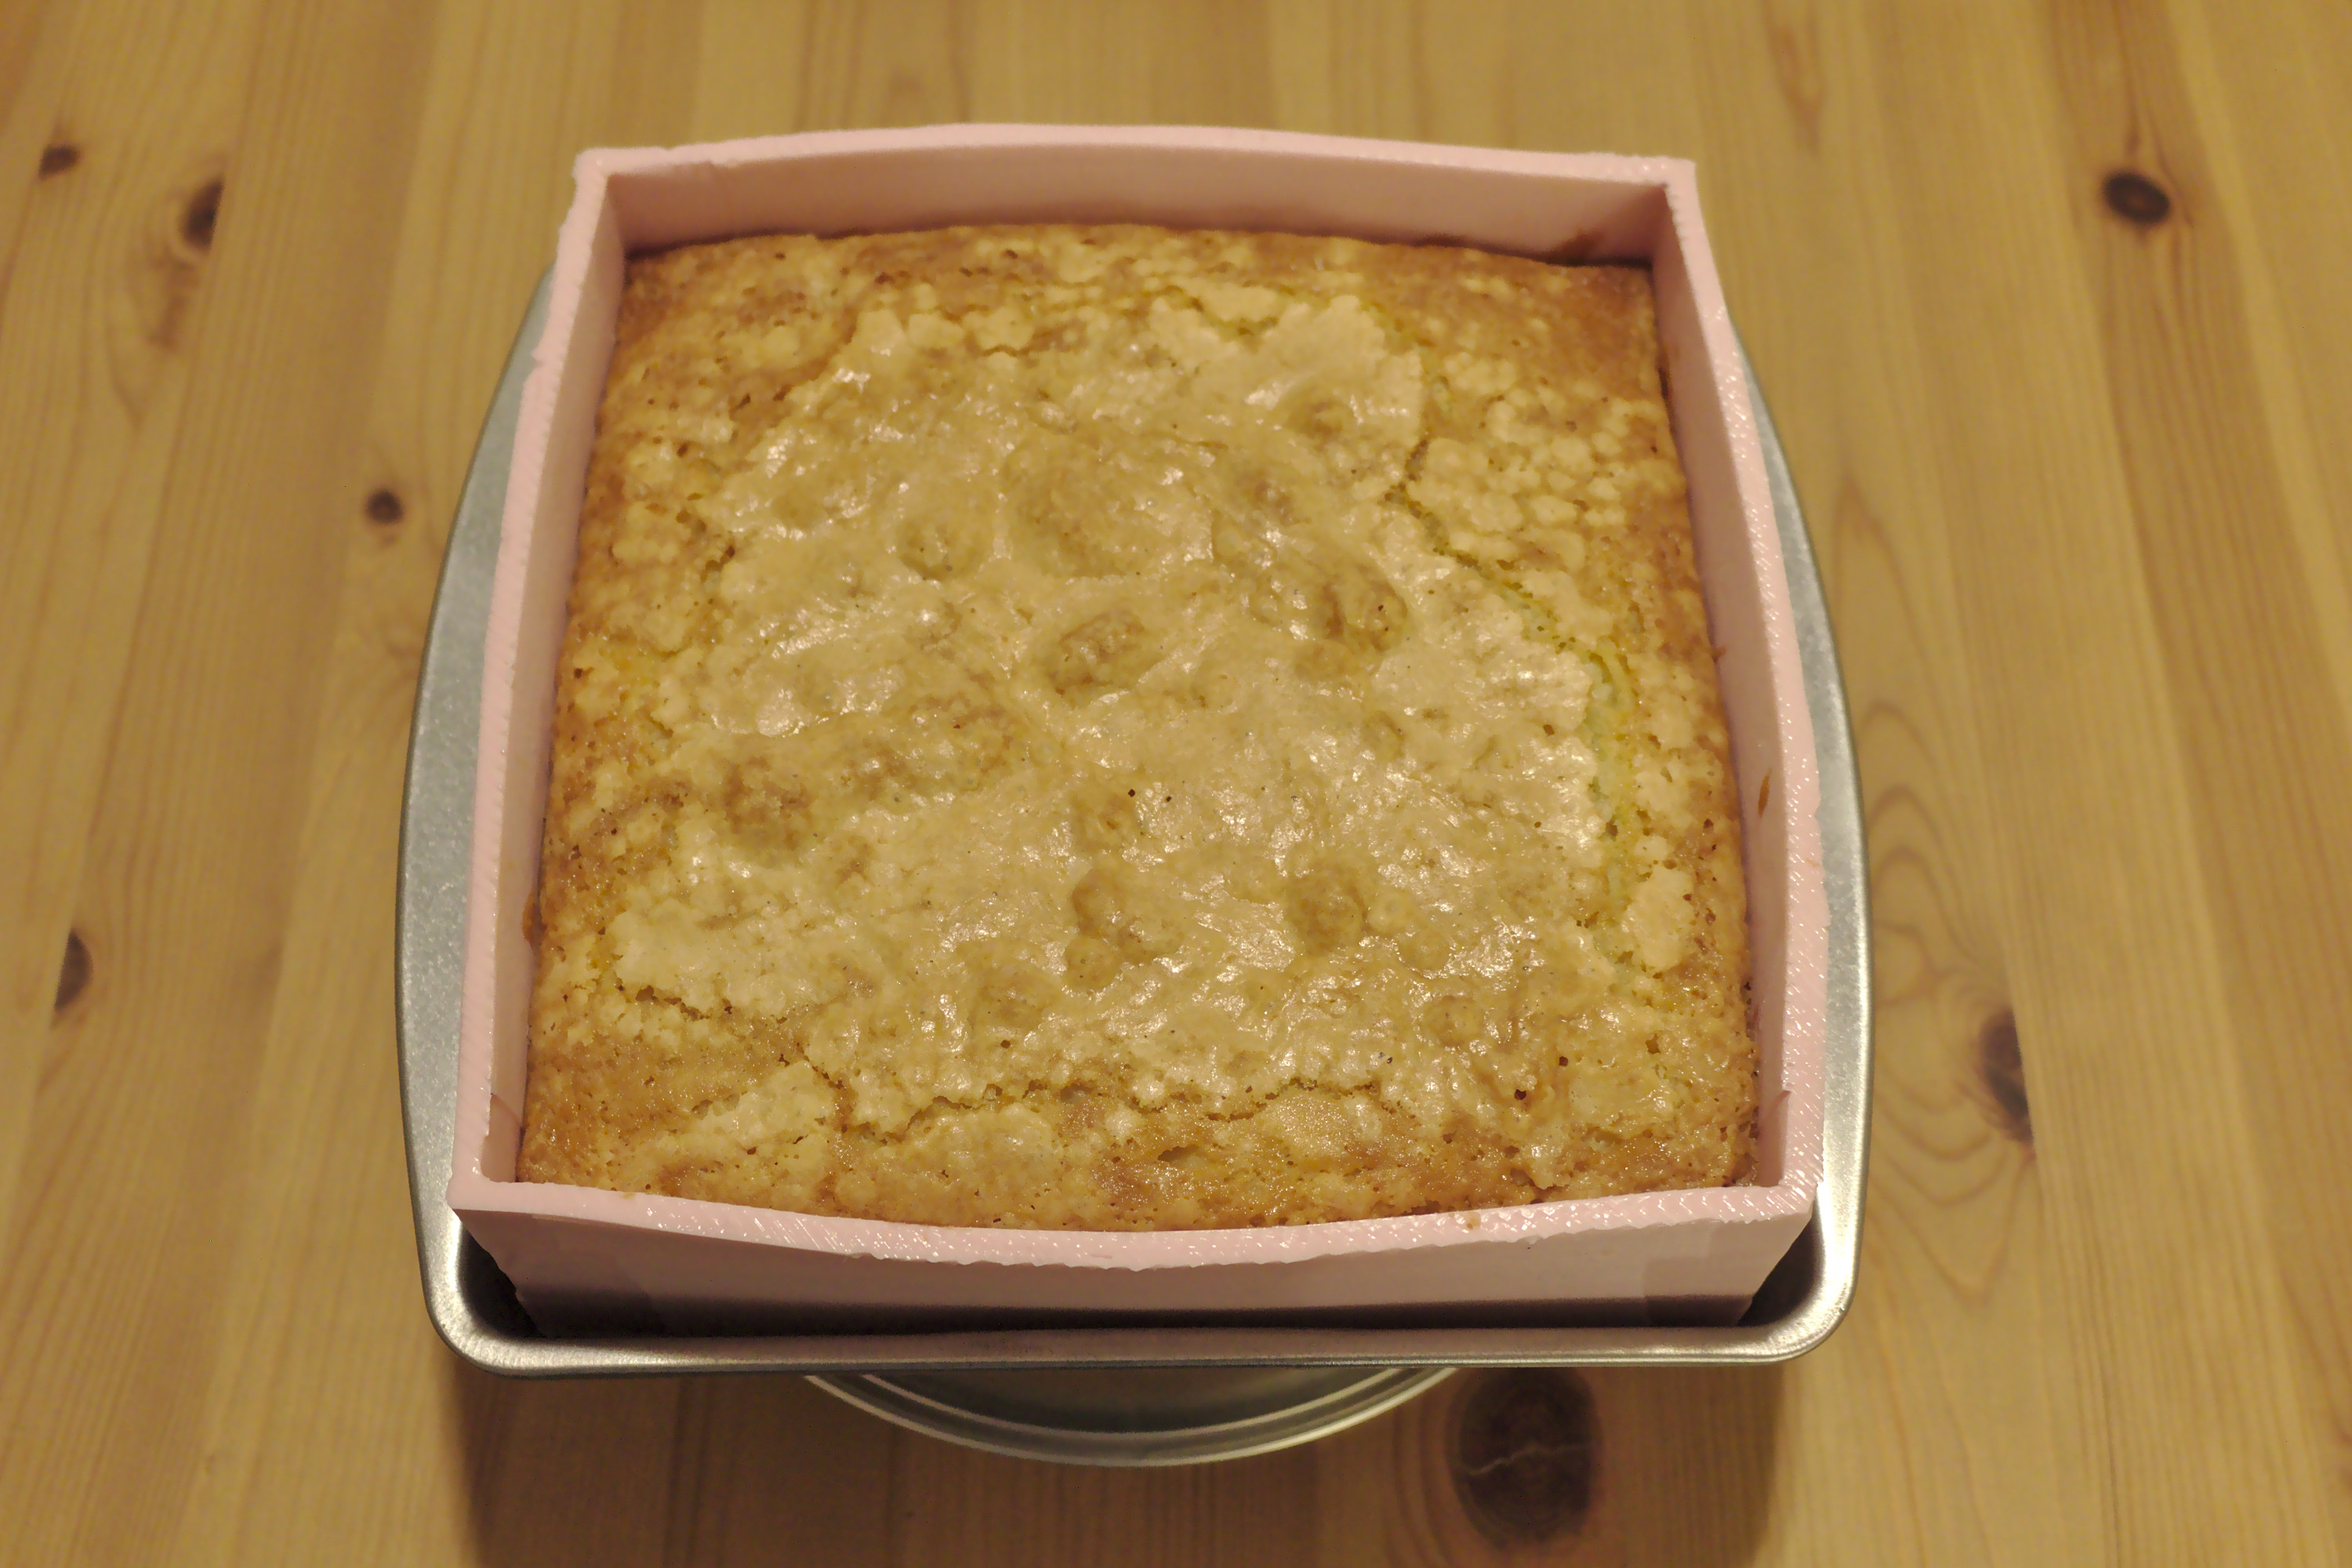
The cake was then baked at 350°F for 135 minutes, with a pan of water also in the oven to try to prevent the top crust from hardening too much. As the mold does not have a hole in the center like a Bundt pan does, this baking time is considerably longer than what was specified by the original recipe. I learned this the hard way, since my first attempt came out under-baked, ruining the curve geometry. Once removed from the oven, I allowed the cake to cool for half an hour, before placing it in the freezer for seven hours; I reasoned that a frozen cake would be the least likely to break apart while attempting to remove it from the mold. Once I removed the frozen cake from the freezer, I was able to flip it over and slowly and carefully turn the silicone mold inside-out to remove the cake in one piece, starting from the corners where the curve does not end.7
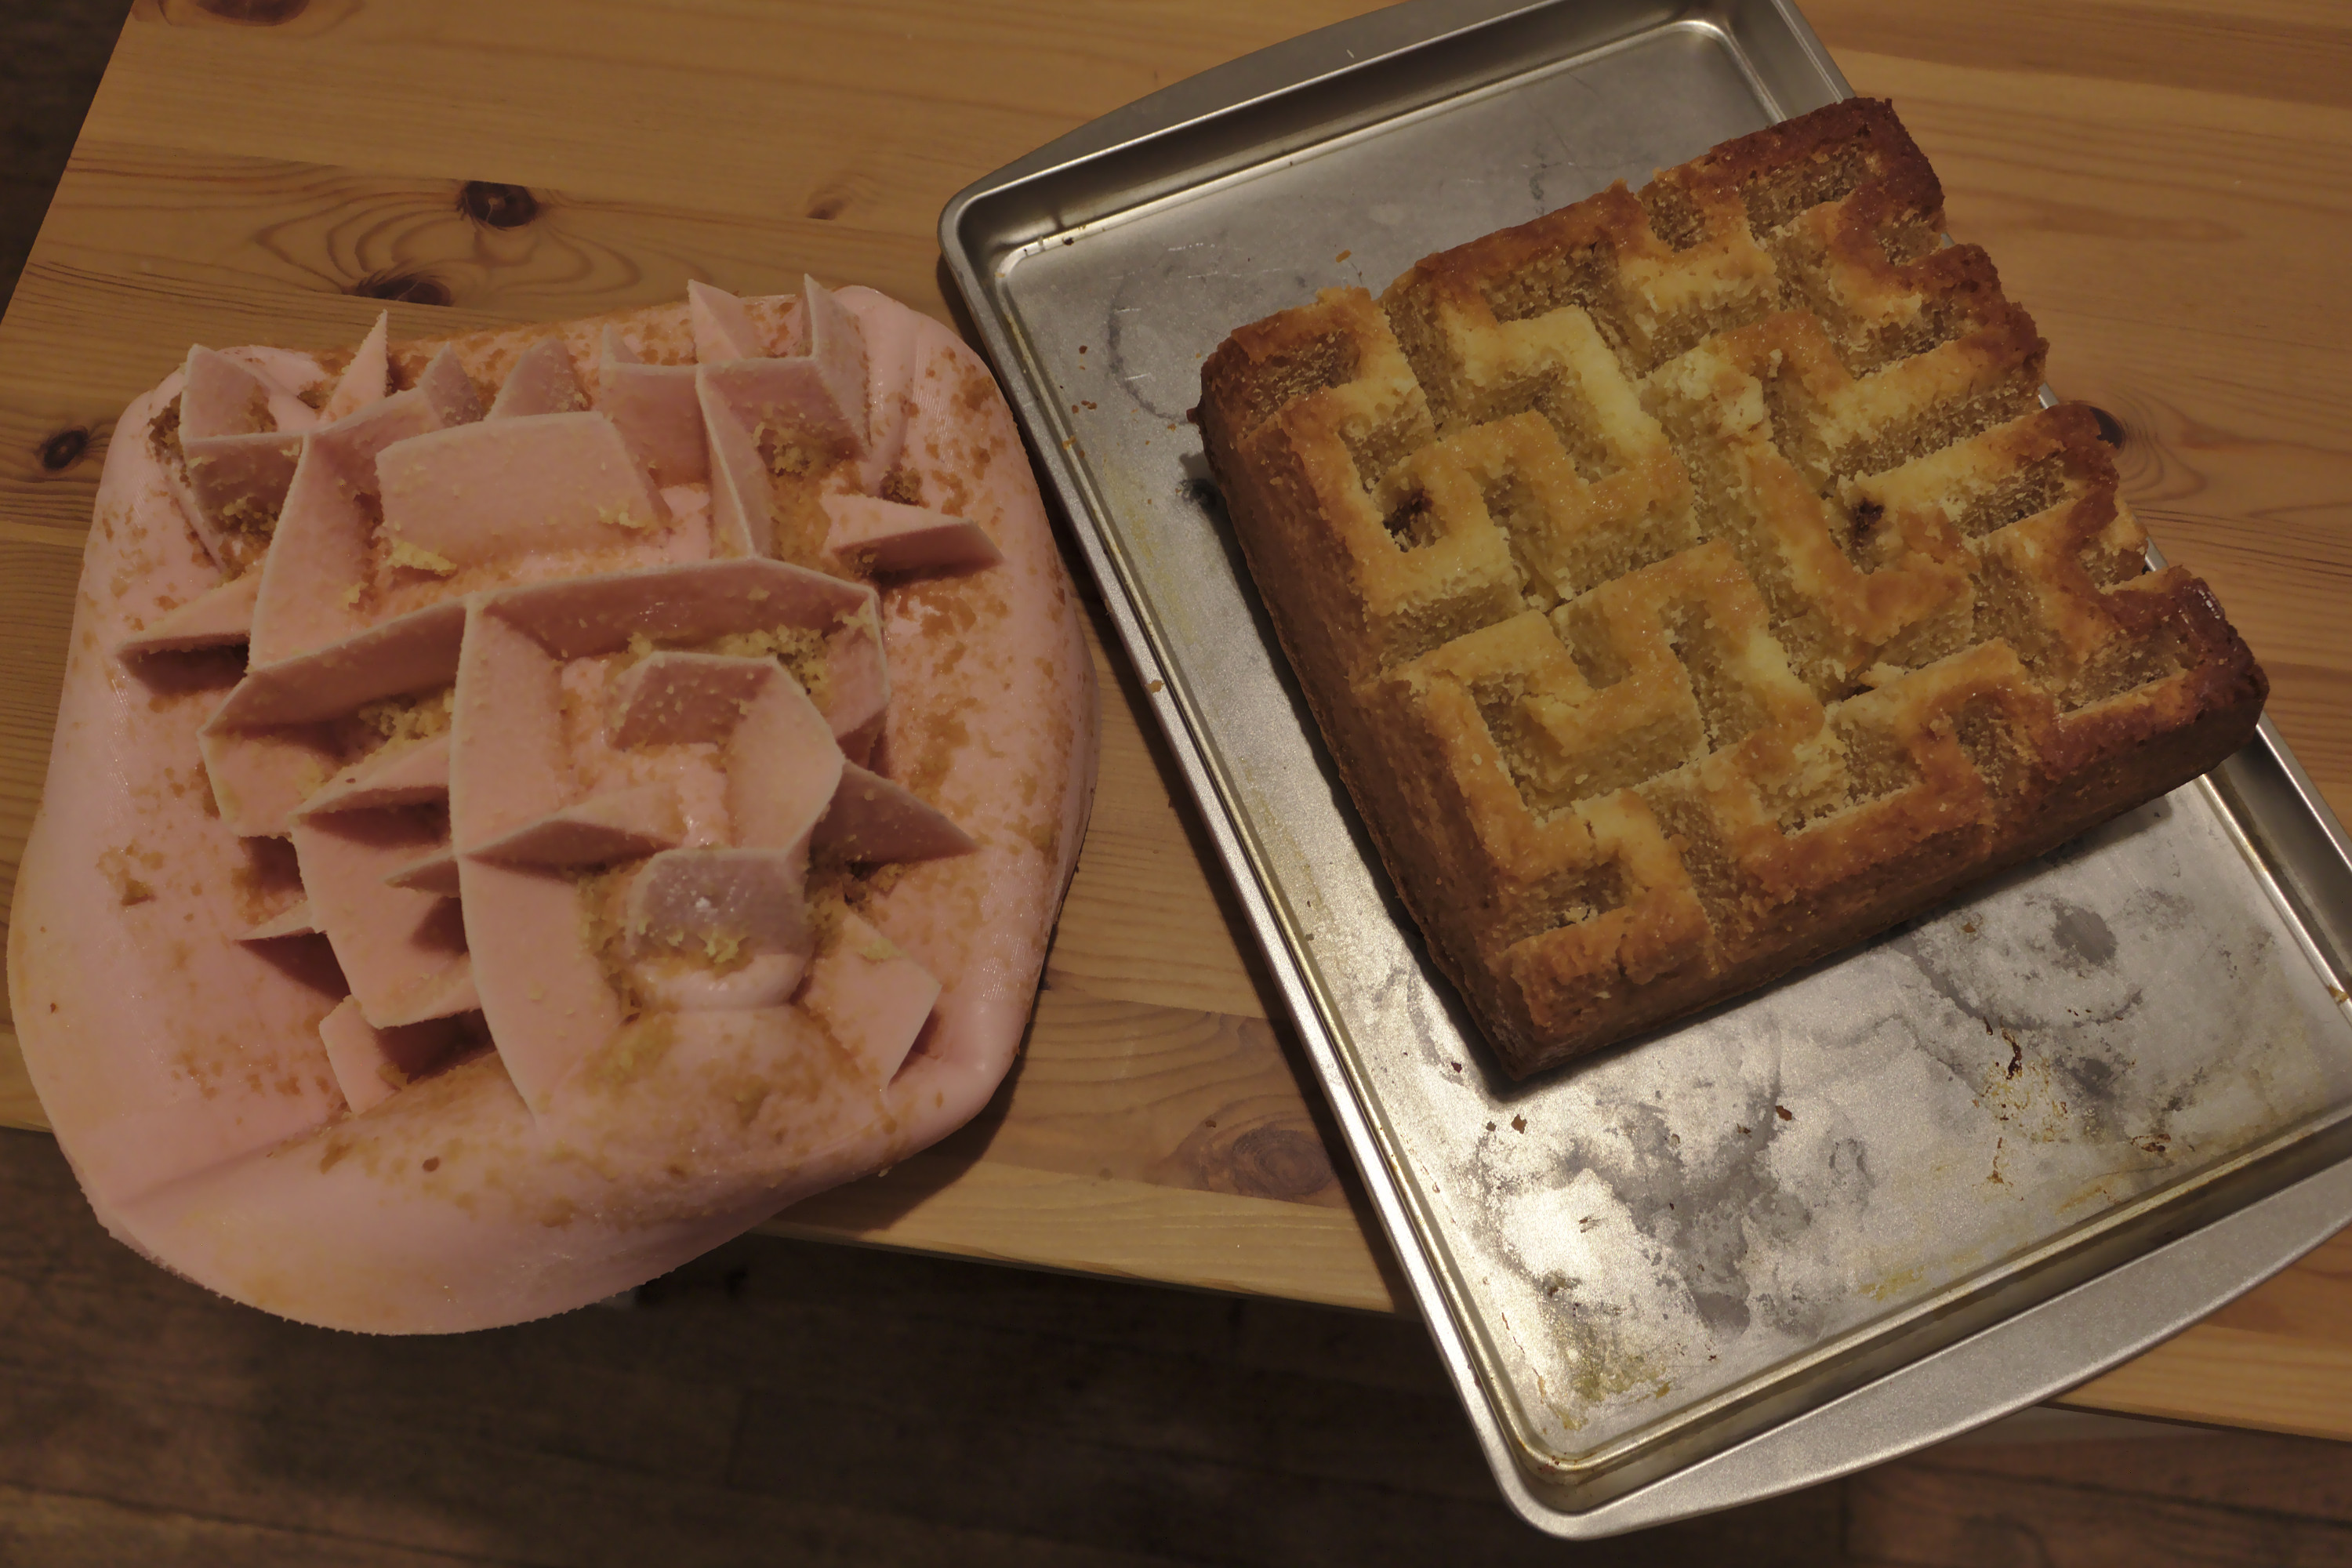
I then flipped the cake back over and sliced the bottom flat.


Finally, the cake was ready for its finishing touch, a lemon glaze, mixed from a ratio of one cup confectioner’s sugar to two tablespoons lemon juice. I carefully and methodically brushed on four coats of glaze using a silicone basting brush, completing the cake.
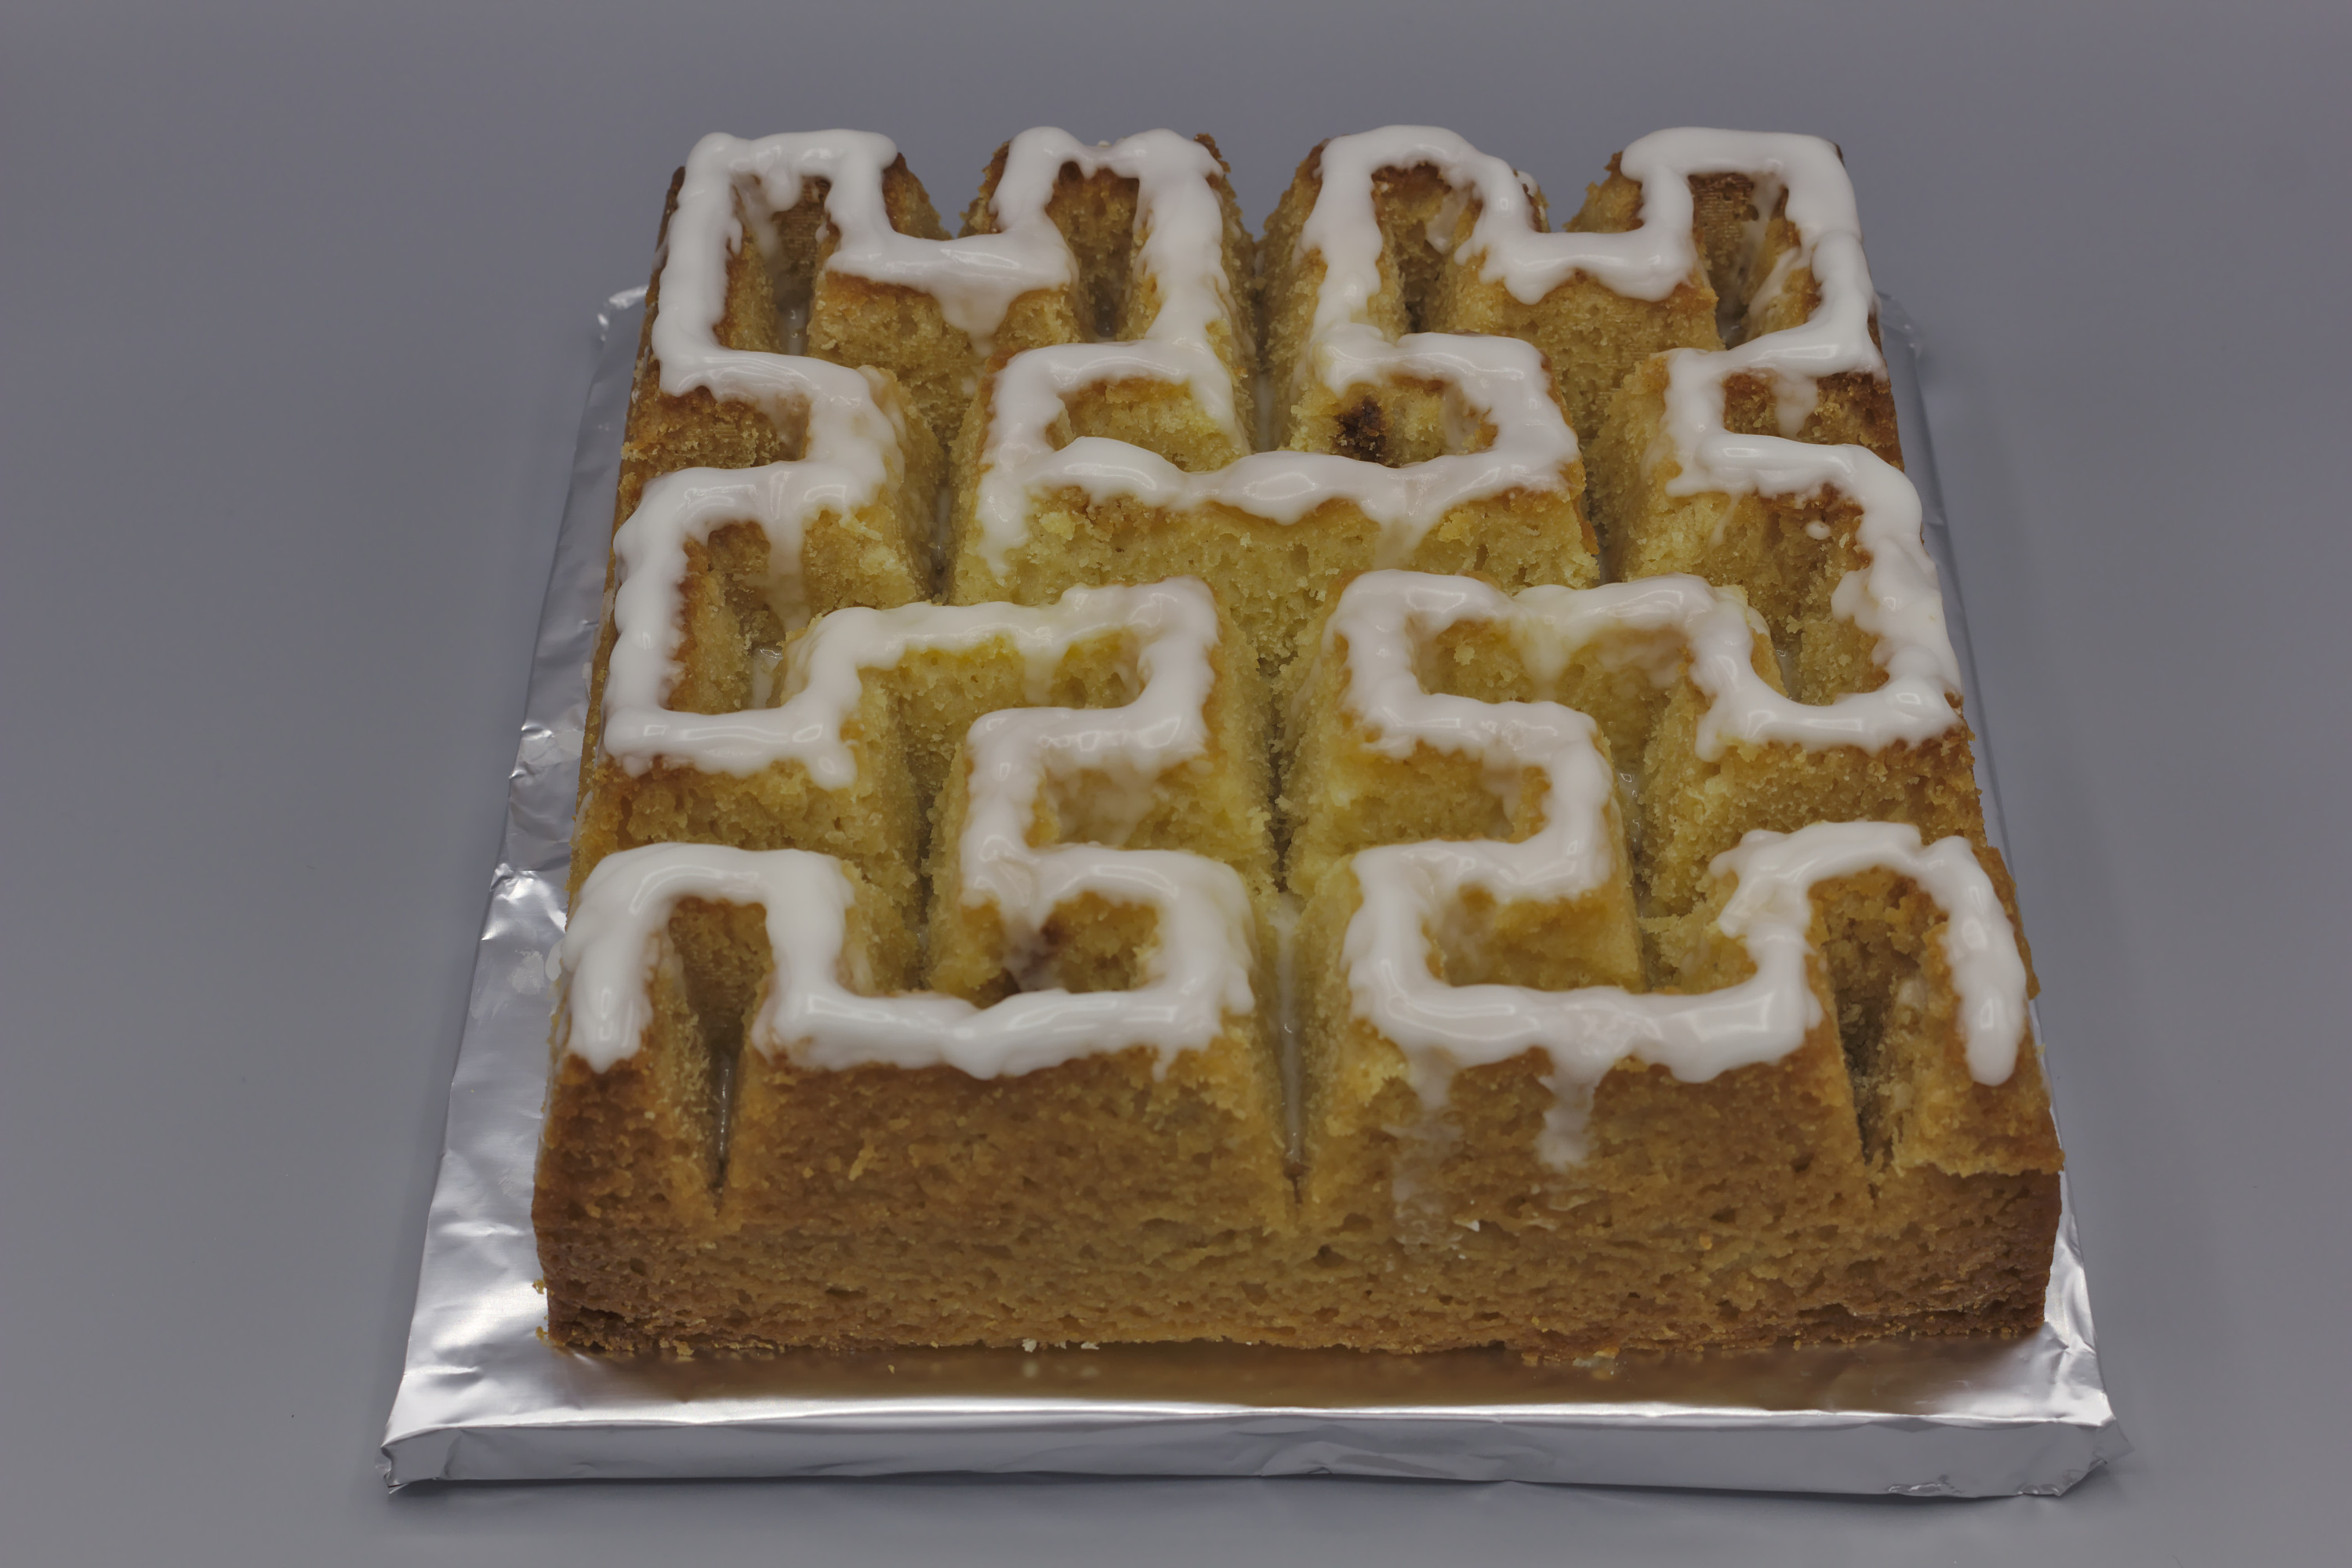
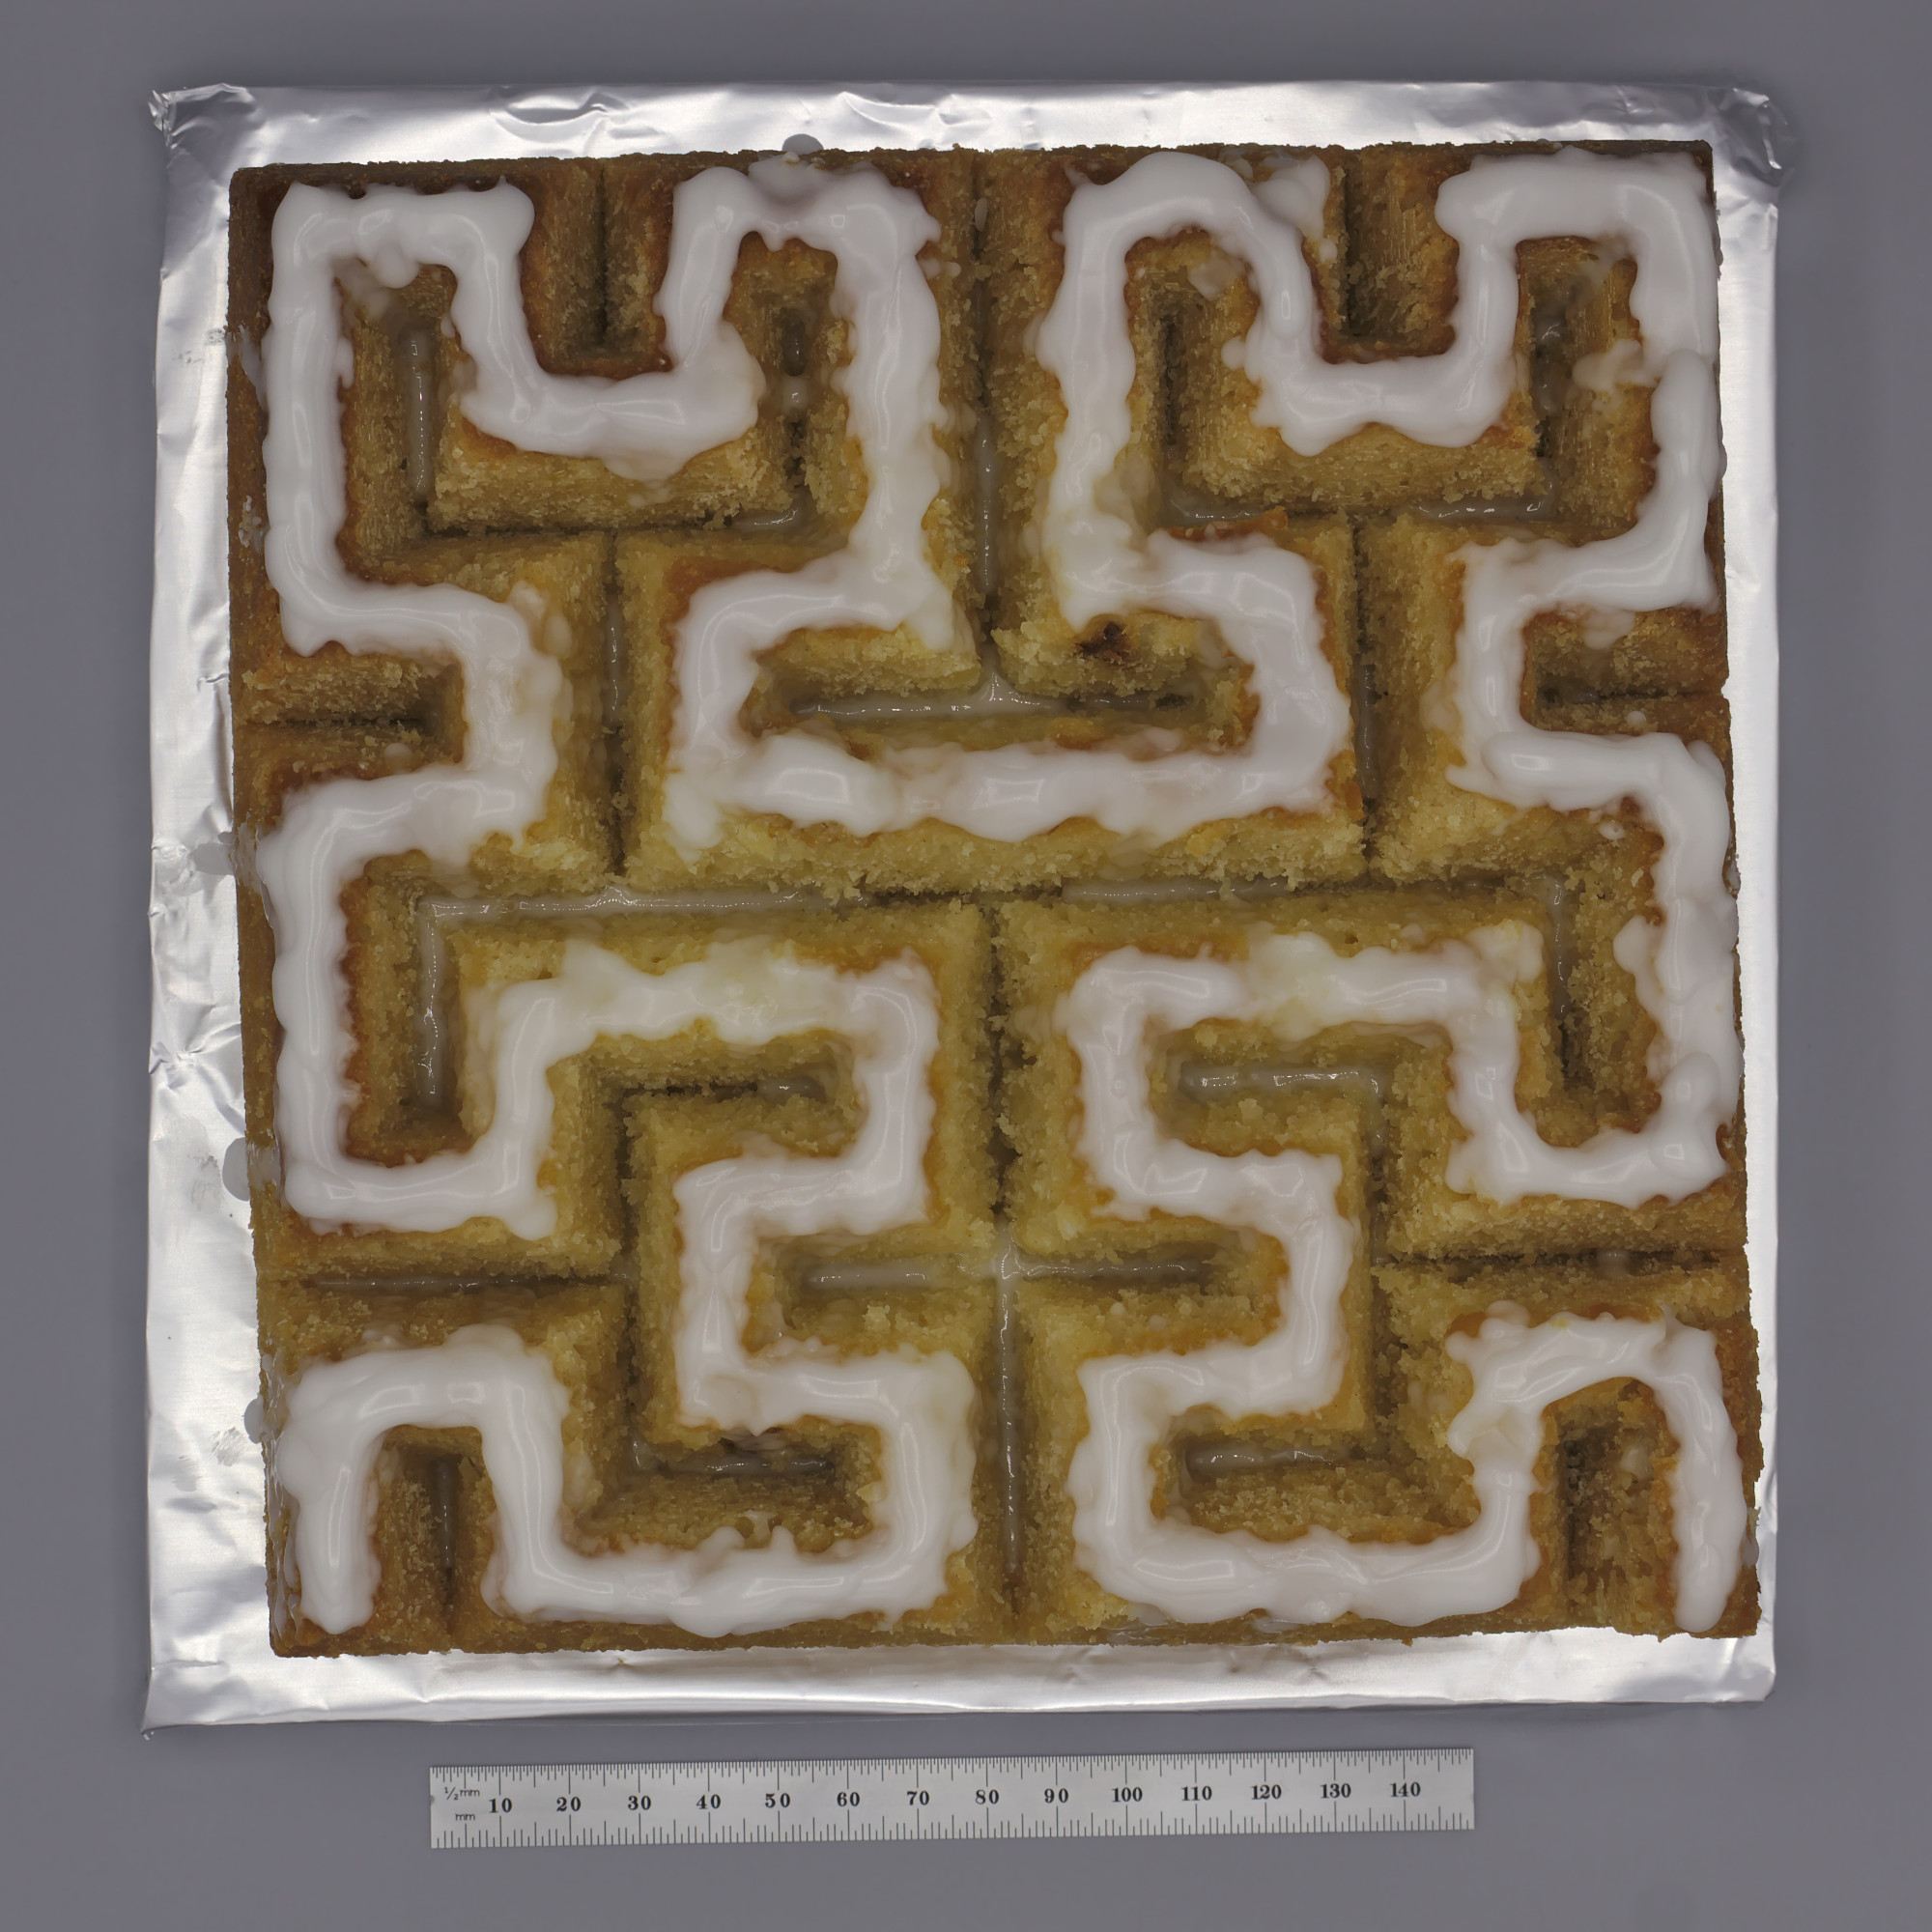

Sadly, I didn’t win anything, just like last time, but there was stiff competition from many excellent cakes. The model files from the mold are available.
H. Sagan, Space-Filling Curves (Springer-Verlag, 1994). ISBN: 9780387942650. DOI: 10.1007/978-1-4612-0871-6. ↩
This led to some gaps in the part’s wall, which allowed some silicone to leak into the interior of the mold, making removal more difficult. ↩
The single wall extrusion helped here, as did the single bottom layer. ↩
I also like the taste. ↩
By happenstance, it fit almost perfectly; I had sized the mold based on silicone and available print volumes. ↩
One of the ends of the curve did break off partially, but it was easy to reattach. ↩
Pingback: Baking a Sierpiński Carpet Linzer Cookie | Matthew Petroff